Making a cherry pie means wrestling with sticky, cool dough that clings to your fingers and flours your workspace. Each fold and crimp feels a bit off but somehow satisfying when it all comes together.
Chopping fresh cherries dumps a burst of juice that drips down your hands, while the bubbling filling steams and splatters in the oven, reminding you this is as messy as it is real.
The tactile mess of folding the crust, the way the dough sticks to fingers, and the flour puffing up with each press—it’s a hands-on, imperfect process that feels real.
What goes into this dish
- Fresh cherries: I love pitting ripe, juicy cherries—watch out for that bright, tart scent. If you don’t have fresh, frozen works, but avoid the overly sweet, syrupy ones; they can make the filling gloopy.
- Sugar: I use regular granulated sugar, but brown sugar adds a richer, caramel note. Skip it if you prefer a sharper tartness—just watch the sweetness level.
- Lemon juice: Brightens everything up with a zingy, citrus smell—and helps balance the sweetness. Skip if you want a more subdued, dessert-only flavor.
- Cornstarch: Thickens the filling perfectly, giving that satisfying, velvety texture. Tapioca starch can be a good substitute if you’re out, but skip the thickener and the filling will be runny.
- Pie crust: Classic butter crust is my go-to—flaky, buttery, with that irresistible aroma. If you’re short on time, a store-bought crust saves a lot of fuss, but it won’t have the same satisfying crunch.
- Butter: I add a small knob on top before baking for a glossy, melt-in mouth finish. No butter? Use a neutral oil, but the crust won’t have that tender, flaky bite.
- Egg wash: Just a beaten egg brushed over the crust makes it golden and shiny. Skipping it leaves a dull crust, but if you’re vegan, a splash of almond milk can do the trick.
Homemade Cherry Pie
Ingredients
Equipment
Method
- Preheat your oven to 375°F (190°C). Roll out the pie crust on a lightly floured surface into a circle about 12 inches in diameter, then fit it into a pie dish. Chill in the fridge while you prepare the filling.
- In a large mixing bowl, combine the pitted cherries with sugar, lemon juice, and cornstarch. Gently stir until the cherries are evenly coated and the mixture starts to release juice.
- Pour the cherry filling into the chilled pie crust, spreading it out evenly with a spoon or spatula. Dot small pieces of butter over the filling for extra richness.
- Cut a second circle from the remaining pie crust or use strips to create a lattice top. Cover the filling completely or arrange the strips in a crisscross pattern. Trim and crimp the edges to seal.
- Brush the top of the crust with the beaten egg using a pastry brush to give it a shiny, golden finish. Cut small vent slits in the top crust to let steam escape.
- Place the pie on a baking sheet to catch any drips and bake in the preheated oven for about 45 minutes, or until the crust is deep golden brown and the filling is bubbling through the vents.
- Once baked, remove the pie from the oven and let it cool on a wire rack for at least 2 hours. This allows the filling to set and thickens further, making it easier to slice and serve.
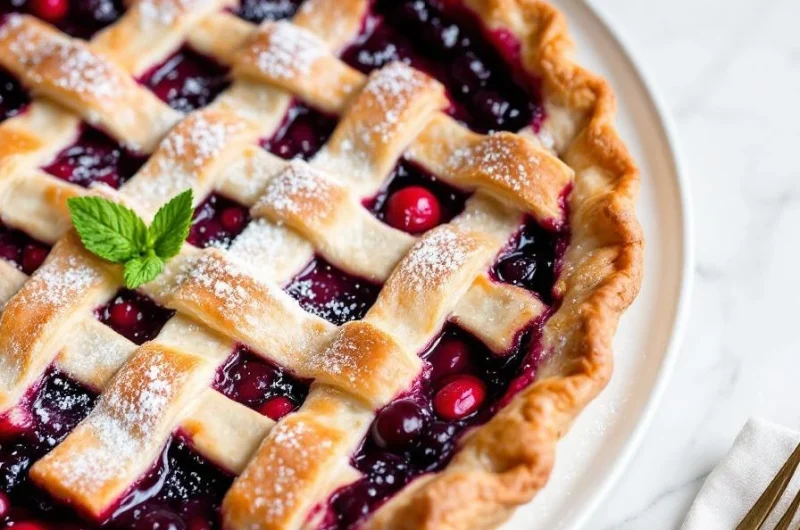
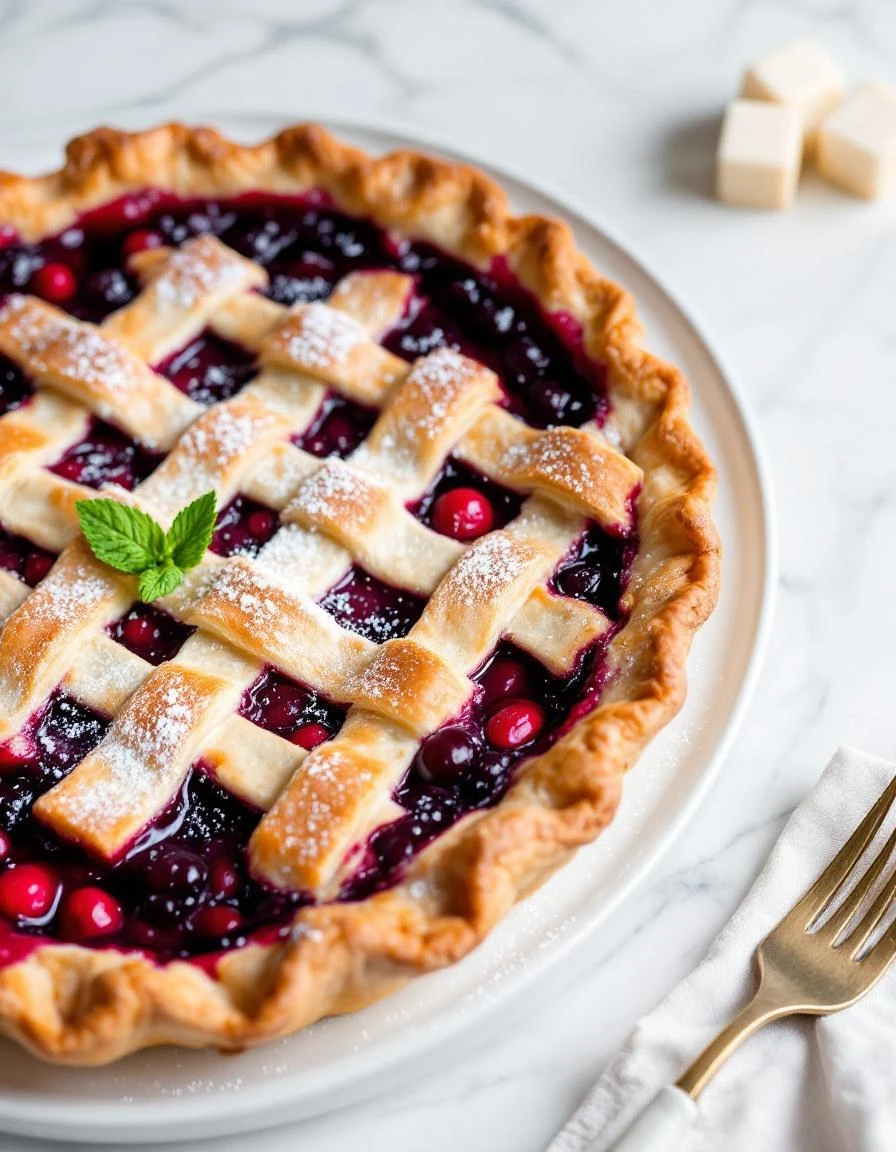
- Slice the pie with a sharp knife, revealing the vibrant, ruby-red filling surrounded by flaky, golden crust. Serve warm or at room temperature for best flavor and texture.
Notes
Common mistakes and how to fix them
- FORGOT to chill the pie crust? Cold fat keeps it tender—refrigerate for at least 30 minutes before rolling.
- DUMPED in too much sugar? Balance sweetness with a splash of lemon juice or a pinch of salt to cut through.
- OVER-TORCHED crust? Cover edges with foil halfway through baking to prevent burning while keeping it golden.
- MISSED the vent holes? Cut small slits in the top crust to vent steam and avoid bubbling over.
Make-Ahead and Storage Tips
- Cherry filling can be made a day in advance; refrigerate for up to 24 hours to let flavors meld and juices settle, but avoid over-steeping to prevent breakdown.
- Pie crust can be assembled and chilled for 1-2 days or frozen for up to a month; wrapped tightly to prevent freezer burn and preserve flakiness.
- Baked pie is best eaten within 2 days; reheat in a 350°F oven until warm and crust is crispy again, about 10-15 minutes, checking for bubbling filling.
- Filling flavor may intensify overnight, becoming more concentrated, so taste and adjust sugar or lemon before baking if needed.
- To freeze unbaked pie, wrap tightly in plastic wrap and foil; bake directly from frozen, adding extra baking time, until crust is golden and filling is bubbly.
FAQs
1. How do I know when the pie is done?
A cherry pie should smell sweet and tangy, with a hint of buttery crust. When you cut into it, expect a juicy, ruby-red filling that drips and a flaky, golden crust that crunches slightly under your fork.
2. What’s the perfect texture for the filling?
The crust should be deeply golden and slightly crisp, especially at the edges. The filling will be bubbling up through the vents and the juices will thicken, giving off a fragrant, sugary aroma.
3. Can I use frozen cherries?
Use ripe cherries that are plump and firm, with a glossy, deep red skin. When pitted, they should feel juicy and give off a bright, tart scent that wakes up your senses.
4. How do I prevent the filling from being runny?
Yes, just thaw and drain excess moisture so the filling doesn’t become too watery. Keep in mind frozen cherries might be softer and slightly less flavorful, but they work in a pinch.
5. How should I reheat leftovers?
Reheat in a 350°F oven until the crust is crisp and the filling is bubbling, about 10-15 minutes. The aroma of warm berries and buttery crust will fill your kitchen, making it feel cozy and inviting.
Hi there! I’m Himani and welcome to Val’s Recipe Box. This little corner of the internet didn’t begin with me. It began with Val my neighbourhood aunt whose kitchen held more warmth than any fireplace ever could.


 This little corner of the internet didn’t begin with me.
It began with Val my neighbourhood aunt whose kitchen held more warmth than any fireplace ever could.
She was more of a friend and I’ve come to know her in the most unexpected way.
This little corner of the internet didn’t begin with me.
It began with Val my neighbourhood aunt whose kitchen held more warmth than any fireplace ever could.
She was more of a friend and I’ve come to know her in the most unexpected way.