Ingredients
Equipment
Method
- Preheat your oven to 375°F (190°C). Roll out the pie crust on a lightly floured surface into a circle about 12 inches in diameter, then fit it into a pie dish. Chill in the fridge while you prepare the filling.
- In a large mixing bowl, combine the pitted cherries with sugar, lemon juice, and cornstarch. Gently stir until the cherries are evenly coated and the mixture starts to release juice.
- Pour the cherry filling into the chilled pie crust, spreading it out evenly with a spoon or spatula. Dot small pieces of butter over the filling for extra richness.
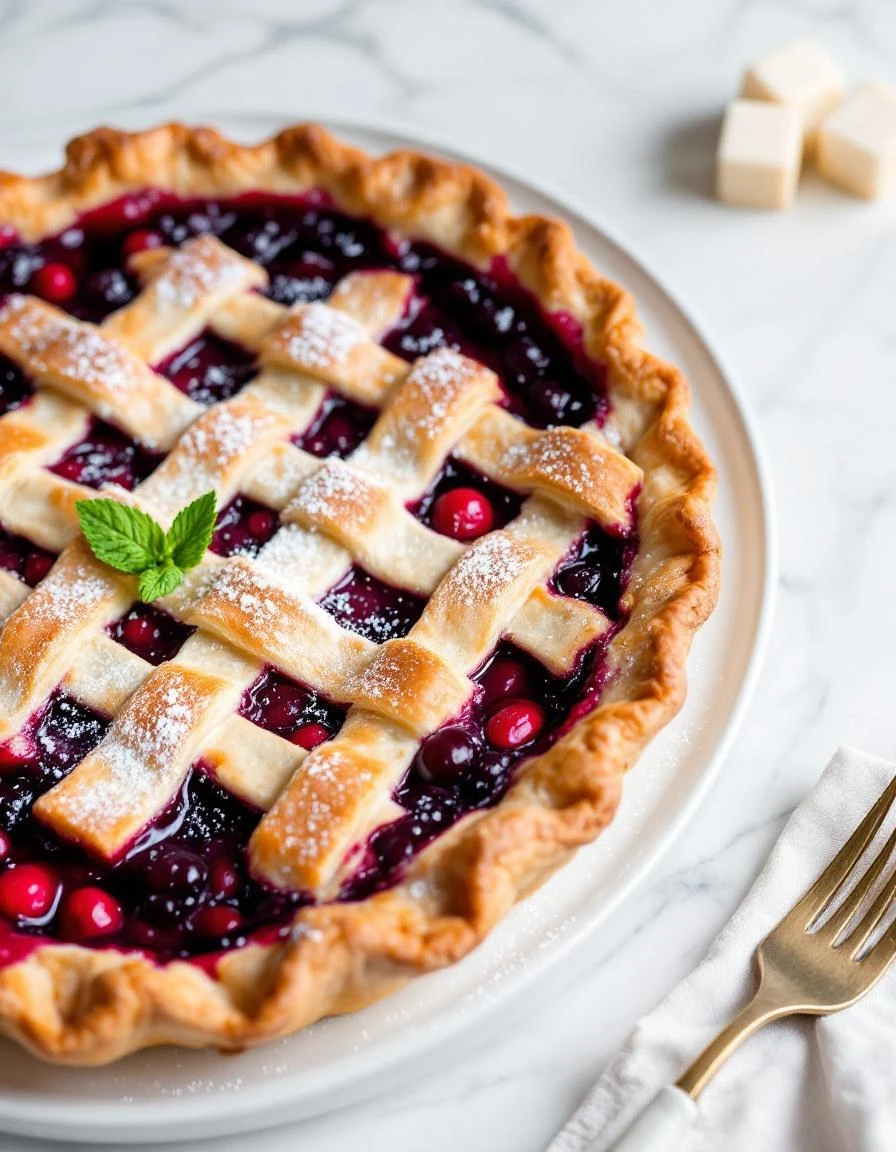
- Cut a second circle from the remaining pie crust or use strips to create a lattice top. Cover the filling completely or arrange the strips in a crisscross pattern. Trim and crimp the edges to seal.
- Brush the top of the crust with the beaten egg using a pastry brush to give it a shiny, golden finish. Cut small vent slits in the top crust to let steam escape.
- Place the pie on a baking sheet to catch any drips and bake in the preheated oven for about 45 minutes, or until the crust is deep golden brown and the filling is bubbling through the vents.
- Once baked, remove the pie from the oven and let it cool on a wire rack for at least 2 hours. This allows the filling to set and thickens further, making it easier to slice and serve.
- Slice the pie with a sharp knife, revealing the vibrant, ruby-red filling surrounded by flaky, golden crust. Serve warm or at room temperature for best flavor and texture.
Notes
For an extra touch, sprinkle a little sugar on the crust before baking for added sweetness and crunch.