
Vegetable stuffed shells might sound like a fancy twist on a humble dish, but really, it’s just about throwing together whatever greens and bits of veg I have lingering in the fridge. It’s a way to make something comforting feel a little healthier, a little brighter. Plus, the act of stuffing those shells feels oddly satisfying, like giving pasta a purpose beyond just boiling and slathering with sauce.
What I love most is how flexible this dish is. I can swap in spinach, zucchini, or mushrooms—whatever’s fresh or on its way out. It’s a reminder that a little creativity in the kitchen can turn simple ingredients into something that feels special, even if I’m just making dinner after a long day.
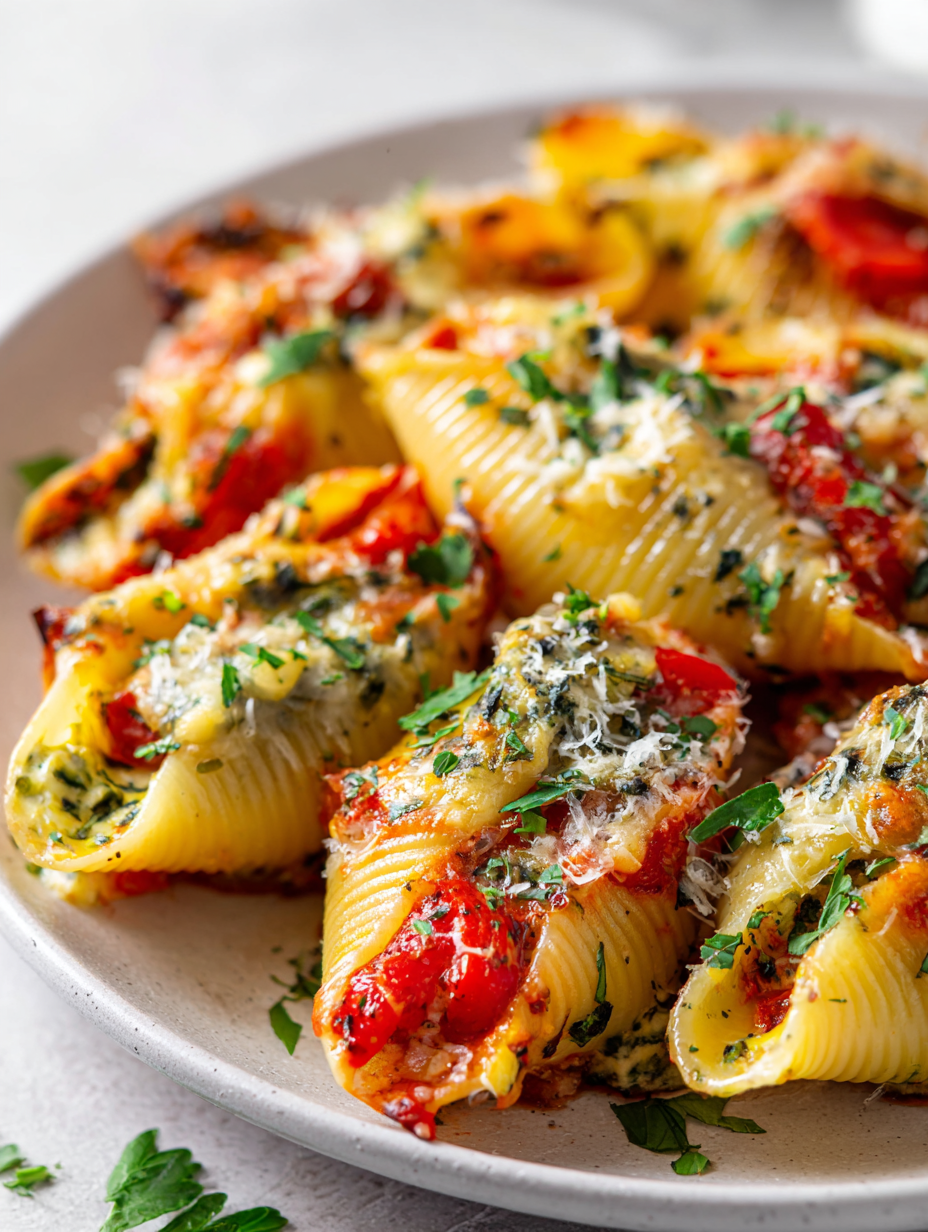
This recipe is inspired by the idea of transforming a classic comfort food into a vibrant, veggie-packed dish that feels like a celebration of greens and textures, rather than just pasta and cheese.
Turning a Classic into a Veggie Celebration
- This dish is my secret weapon for sneaking more greens into my kids’ plates, and it never fails to surprise them.
- Cooking these shells always takes me back to my grandmother’s kitchen, where the air was thick with garlic and laughter.
- There’s something so satisfying about stuffing pasta—like giving it a little purpose beyond just a vessel for sauce.
- I feel a quiet pride when I serve this—watching the colors and textures come alive on the plate.
The inspiration behind this dish
This dish came about one hectic week when I needed something nourishing but quick and flexible. I realized I had a bunch of mixed vegetables that needed using up, and pasta shells that weren’t quite destined for just a simple bake. Stuffing those shells felt like giving them a little extra purpose, turning everyday ingredients into something more special. It’s become my go-to when I want comfort food with a bit of a veggie twist, and honestly, it’s a reminder that improvising in the kitchen often leads to the best surprises.
History and Fun Facts
- Vegetable stuffed shells originated in Italy, where pasta shapes inspired by shells became a canvas for seasonal fillings.
- The idea of stuffing pasta dates back to medieval times, with variations across different regions highlighting local produce.
- Modern takes, like this veggie-packed version, emerged from the 20th-century diet shifts toward more plant-based, colorful dishes.
- Shell pasta’s natural shape makes it perfect for holding hearty, chunky fillings, which is why it’s a favorite for stuffed dishes.
Ingredient breakdown: key components
- Zucchini: I love how zucchini becomes tender and slightly sweet when baked, adding moisture without overpowering the dish. If your zucchini is watery, salt it beforehand to draw out excess moisture.
- Spinach: Fresh spinach wilts down quickly, releasing a bright green color and a mild earthy aroma. Use frozen spinach if fresh isn’t available—just squeeze out excess water first.
- Ricotta: I prefer a creamy, mild ricotta that melts smoothly into the filling. For a richer twist, mix in a bit of grated Parmesan or a splash of lemon juice for brightness.
- Tomato Sauce: I love a vibrant, smoky tomato sauce that clings to the shells and bubbles at 180°C (350°F). If it’s too thick, add a splash of pasta water to loosen it up before baking.
- Pasta Shells: Choose large, sturdy shells that hold stuffing well. Cook them just until al dente—overcooked shells become mushy, and undercooked ones will be hard to stuff.
- Cheese: I use a mix of mozzarella and Parmesan for that perfect gooey, salty topping. For a sharper flavor, sprinkle some aged cheddar on top just before baking.
- Herbs & Seasonings: Fresh basil and garlic brighten the filling with aromatic, punchy notes. If you’re out of fresh, dried herbs work but add them early in the cooking for maximum flavor.
Spotlight on key ingredients
Zucchini:
- I love how zucchini becomes tender and slightly sweet when baked, adding moisture without overpowering the dish. If your zucchini is watery, salt it beforehand to draw out excess moisture.
- Spinach: Fresh spinach wilts down quickly, releasing a bright green color and a mild earthy aroma. Use frozen spinach if fresh isn’t available—just squeeze out excess water first.
Ricotta and Tomato Sauce:
- Ricotta: I prefer a creamy, mild ricotta that melts smoothly into the filling. For a richer twist, mix in a bit of grated Parmesan or a splash of lemon juice for brightness.
- Tomato Sauce: I love a vibrant, smoky tomato sauce that clings to the shells and bubbles at 180°C (350°F). If it’s too thick, add a splash of pasta water to loosen it up before baking.
Notes for ingredient swaps
- Dairy-Free: Substitute ricotta with blended silken tofu or cashew cheese for a creamy, neutral flavor that melts well.
- Vegetarian: Swap out meat-based sauces for a hearty mushroom or lentil sauce to add umami and texture.
- Low-Carb: Use zucchini noodles or thinly sliced eggplant instead of pasta shells, but expect a different bite and texture.
- Vegan: Replace cheese with nutritional yeast or vegan cheese options, which add a cheesy flavor without dairy.
- Gluten-Free: Ensure pasta shells are gluten-free, as some brands contain wheat; rice or corn-based shells work well.
- Extra Greens: Mix in kale or arugula with spinach for more peppery or bitter notes, which balance the richness.
- Sweet note: Add a splash of lemon juice or zest to the filling for brightness, especially if the dish feels too heavy.
Equipment & Tools
- Large pot: Boil pasta shells
- Skillet: Cook vegetables and garlic
- Mixing bowl: Combine filling ingredients
- Baking dish: Bake assembled stuffed shells
- Spoon or piping bag: Fill pasta shells neatly
Step-by-step guide to vegetable stuffed shells
- Gather your equipment: a large pot for boiling shells, a skillet for veggie filling, a baking dish, and a mixing bowl. Preheat your oven to 180°C (350°F).
- Cook the pasta shells: bring a large pot of salted water to a boil. Add shells and cook until just al dente, about 8-10 minutes. Drain and set aside to cool slightly, making sure they don’t stick together.
- Prepare the vegetable filling: while shells cook, sauté diced zucchini and chopped spinach in a skillet with a splash of olive oil over medium heat (about 5 minutes). Add minced garlic in the last minute until fragrant. Remove from heat and let cool slightly.
- Mix the filling: in a bowl, combine the sautéed vegetables with ricotta cheese, grated Parmesan, chopped herbs, salt, and pepper. The mixture should be creamy and well-combined. Taste and adjust seasoning as needed.
- Stuff the shells: carefully fill each shell with a generous spoonful of the veggie ricotta mixture, making sure not to tear the pasta. Place stuffed shells in your baking dish, seam side down, in a single layer.
- Add sauce and cheese: pour your prepared tomato sauce evenly over the stuffed shells. Sprinkle shredded mozzarella and a little extra Parmesan on top for a bubbly, golden finish.
- Bake: cover the dish with foil and bake for 25-30 minutes, until the sauce is bubbling and the cheese is melted and slightly golden. Remove foil for the last 5 minutes if you want a crisp top.
- Rest and serve: let the shells rest for about 5 minutes after baking. Serve warm, garnished with fresh basil if desired. The shells should be tender, the cheese gooey, and the sauce rich and vibrant.
Let the dish rest for 5 minutes before serving to allow the cheese to set slightly. Garnish with fresh basil or herbs for a burst of aroma. Serve warm, with extra sauce if desired.
How to Know It’s Done
- Shells are tender but hold their shape (not mushy).
- Cheese is melted and bubbly, with a golden top.
- Vegetable filling is cooked through, not raw or watery.
Vegetable Stuffed Shells
Ingredients
Equipment
Method
- Bring a large pot of salted water to a rolling boil and cook the pasta shells until just al dente, about 8-10 minutes. Drain and set aside to cool slightly.
- While the pasta cooks, heat olive oil in a skillet over medium heat. Add minced garlic and sauté until fragrant, about 30 seconds.
- Add diced zucchini to the skillet and cook until tender, about 5 minutes, stirring occasionally. Then, toss in chopped spinach and cook until wilted, about 2 minutes. Remove from heat and let cool slightly.
- In a mixing bowl, combine the sautéed vegetables with ricotta cheese, grated Parmesan, chopped basil, salt, and pepper. Mix until smooth and well incorporated.
- Carefully spoon or pipe the vegetable mixture into each cooked shell, filling them generously without tearing the pasta.
- Spread a layer of tomato sauce in the bottom of a baking dish. Arrange the stuffed shells seam side down in a single layer on top of the sauce.
- Pour the remaining tomato sauce evenly over the shells. Sprinkle shredded mozzarella and a little extra Parmesan on top.
- Cover the baking dish with foil and bake at 180°C (350°F) for 25-30 minutes, until bubbling and cheese is melted. Remove the foil for the last 5 minutes to allow the cheese to brown slightly.
- Let the shells rest for about 5 minutes after baking, then garnish with fresh basil leaves for a fragrant, colorful touch.
- Serve warm with extra sauce on the side and enjoy this veggie-packed comfort dish!
Notes
Tips & Tricks for Perfect Shells
- Bolded mini-head: Use fresh herbs for a bright, aromatic burst. Add at the end to preserve flavor.
- Bolded mini-head: When boiling shells, keep water at a steady boil—avoid overcrowding to prevent sticking.
- Bolded mini-head: Sauté veggies until just tender—overcooking turns them mushy and dulls their color.
- Bolded mini-head: For stuffing, pipe filling into shells for neatness and even distribution, especially if it’s thick.
- Bolded mini-head: Cover the baking dish with foil during most of baking—uncover last 5 minutes for bubbly top.
- Bolded mini-head: Add a splash of pasta water to loosen sauce if it’s too thick or clings too tightly to shells.
- Bolded mini-head: Rest the baked shells for 5 minutes before serving—this helps cheese and filling set, avoiding spills.
Common mistakes and how to fix them
- FORGOT to dry vegetables → Squeeze out excess moisture for better filling consistency.
- DUMPED the filling → Use gentle spooning or piping to stuff shells neatly.
- OVER-TORCHED cheese → Cover with foil if cheese browns too quickly in the oven.
- MISSED the salt in water → Salt pasta water well for flavorful shells that don’t stick.
Quick fixes and pantry swaps
- If shells stick together, splash in more boiling water and stir gently.
- When filling feels too thick, open a splash of pasta water for easier piping.
- DUMPED cheese browns too fast? Cover with foil for 5 minutes to shield it.
- Overcooked shells become mushy—test one early and adjust cooking time.
- When in doubt, swap canned diced tomatoes for fresh—they shimmer with brighter flavor.
Prep, store, and reheat tips
- Prep the stuffed shells: assemble and refrigerate up to 24 hours ahead for a quick bake later, noticing the shells may absorb moisture and need a light spray of water before baking.
- Store leftovers in an airtight container for 3-4 days in the fridge, with the sauce and filling retaining their vibrant flavors but softening slightly.
- For longer storage, freeze baked shells for up to 2 months; wrap tightly to prevent freezer burn and allow to thaw in the fridge overnight before reheating.
- Reheat in the oven at 180°C (350°F) covered with foil until heated through, about 20-25 minutes, checking for bubbling and steam, with cheese topping slightly crisped.
Top questions about vegetable stuffed shells
1. How do I choose the right pasta shells?
Use large pasta shells that can hold a good amount of filling without tearing. Cook until just al dente, around 8-10 minutes, so they’re tender but firm enough to stuff.
2. How do I prevent the filling from being too watery?
Make sure to squeeze out excess water from spinach or zucchini to prevent soggy shells. Sauté vegetables until just tender and slightly caramelized for best flavor.
3. Can I substitute the cheese in this recipe?
You can swap ricotta with crumbled feta or cottage cheese for a tangy twist. For a vegan version, try blended silken tofu or cashew cheese, but expect a slightly different texture.
4. How do I know when the stuffed shells are done?
Bake the shells covered with foil for 25-30 minutes until bubbly. Remove the foil in the last 5 minutes to get a golden, crisp cheese topping. Check that cheese is melted and sauce is hot.
5. What herbs work best for this dish?
Use fresh basil or parsley for a bright aroma. To save time, you can chop herbs ahead and add them just before baking to keep their flavor fresh.
6. How do I stuff the shells without tearing them?
Stuff the shells carefully with a spoon or piping bag to avoid tearing. Place them seam side down in the baking dish to keep the filling in place during baking.
7. Can I make this dish in advance?
Prepare the dish up to a day ahead. Cover tightly and refrigerate. Add a splash of water or extra sauce before baking to keep the shells moist and prevent drying out.
8. How do I reheat leftovers properly?
Reheat covered at 180°C (350°F) for 20-25 minutes until hot and bubbling. Let sit for 5 minutes before serving to allow the cheese to set slightly.
9. What quick fixes can I use during baking?
If shells stick, splash in hot water and gently stir. If cheese browns too quickly, cover with foil to prevent burning while finishing baking.
10. What equipment do I need for this recipe?
Use a large pot for boiling shells, a skillet for sautéing vegetables, and a baking dish for assembling and baking. Always preheat your oven to ensure even cooking.
This dish feels like a quiet rebellion against the usual pasta routine—more color, more texture, more life on the plate. It’s a reminder that even simple ingredients can surprise you when handled with a little care and patience.
Sharing this with someone who appreciates a little veggie boost makes all the effort worth it. It’s not just about the flavors, but about creating something that feels nourishing and real, even on a busy weeknight.
Hi there! I’m Himani and welcome to Val’s Recipe Box. This little corner of the internet didn’t begin with me. It began with Val my neighbourhood aunt whose kitchen held more warmth than any fireplace ever could.


 This little corner of the internet didn’t begin with me.
It began with Val my neighbourhood aunt whose kitchen held more warmth than any fireplace ever could.
She was more of a friend and I’ve come to know her in the most unexpected way.
This little corner of the internet didn’t begin with me.
It began with Val my neighbourhood aunt whose kitchen held more warmth than any fireplace ever could.
She was more of a friend and I’ve come to know her in the most unexpected way.