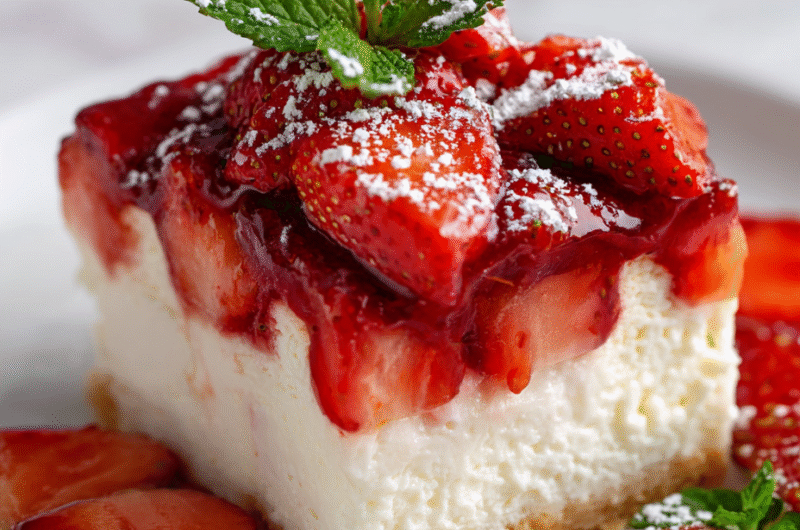
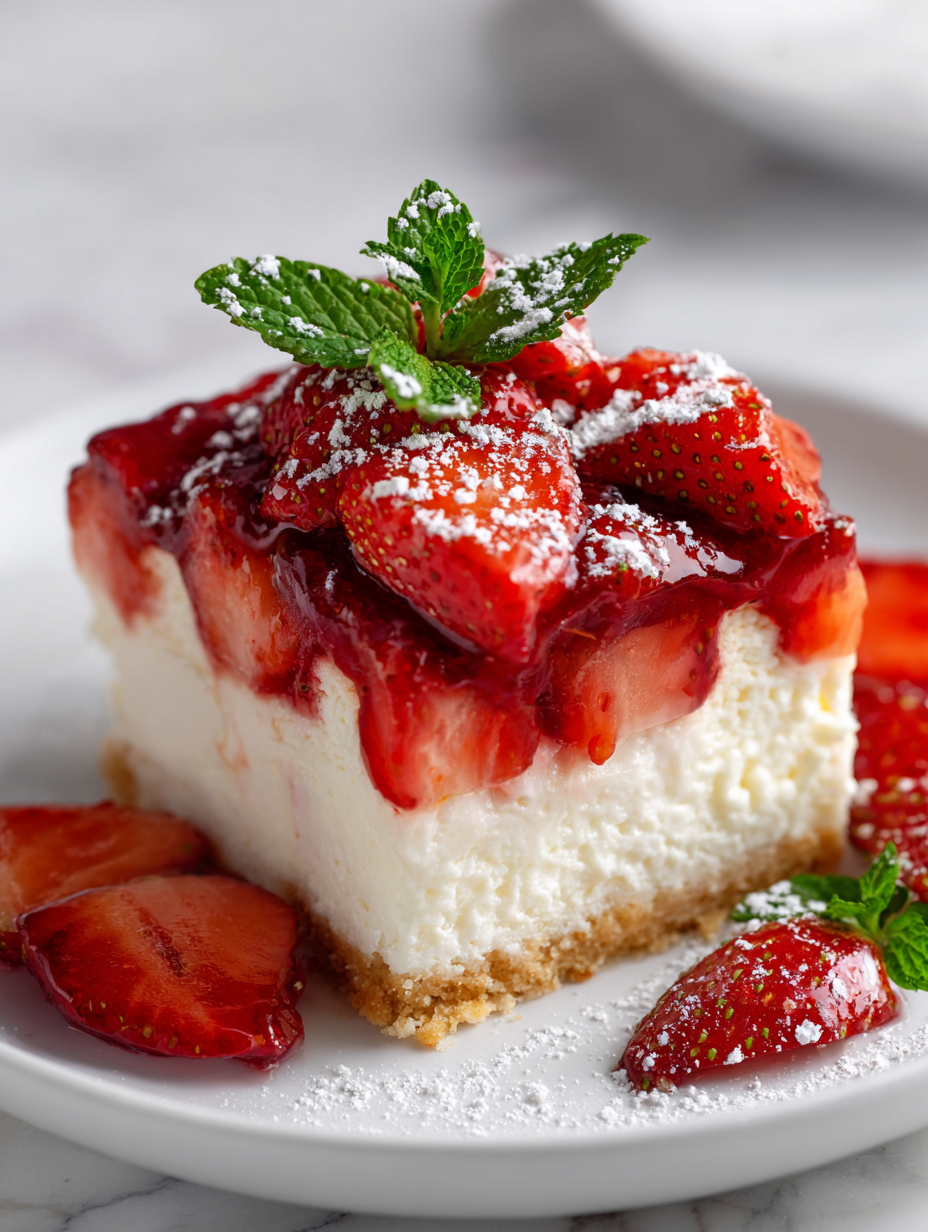
This strawberry cheesecake cake is my way of merging two childhood favorites into one show-stopping dessert. I love how the creamy, tangy cheesecake layers contrast with the bright, juicy strawberries, all nestled in a tender, buttery cake. It’s not just pretty—it’s a slice of summer in every bite, even if it’s served in the heart of winter.
What makes this cake special isn’t just its flavor but the way it brings people together. I remember making it for a family gathering, watching the kids dive in first, while the adults linger over the layered beauty, reminiscing about simpler times. It’s a dessert that invites conversation, laughter, and a little bit of nostalgia, all wrapped up in one sweet package.
Baking this cake is a bit of a labor of love, but the payoff is worth it. The process of layering, chilling, and finally slicing through that glossy strawberry topping feels like unwrapping a gift. Every time I make it, I get a rush of pride, knowing I’ve created something that feels both special and homey, perfect for celebrating any occasion or just a quiet weekend treat.
This recipe is my twist on combining two desserts I grew up loving—layered in a way that makes slicing through it feel like unwrapping a gift, revealing creamy cheesecake with bursts of fresh strawberry in every bite.
Inspiration Behind the Cake
This cake came together one lazy summer afternoon when I had a surplus of ripe strawberries and a craving for something indulgent yet nostalgic. I wanted to create a dessert that captured the fresh sweetness of strawberries but also offered the creamy richness of cheesecake in every layer. The idea of combining them into a cake that feels both playful and elegant struck me suddenly, like a little culinary spark. Since then, it’s become a family favorite, especially for summer gatherings or when I need a dessert that feels special but isn’t overly complicated.
Key Ingredients Breakdown
- Fresh strawberries: I like to use ripe, fragrant berries that smell like summer. If yours are a bit tart, a sprinkle of sugar helps bring out their natural sweetness.
- Cream cheese: I prefer blocks that are full-fat and softened, which melts into the batter smoothly. Cold cream cheese can cause lumps—so soften it first or beat it until smooth.
- Granulated sugar: It’s the backbone of sweetness, but don’t overdo it. Taste the batter before baking; a slightly tangy note from the cheese should still shine through.
- Butter: I use unsalted, melted butter for the cake layers—think about that rich, toasty aroma as it bakes. For a lighter cake, swap half for a neutral oil, but keep the butter in the cheese layer for flavor.
- Eggs: Large eggs are best—they help set the structure. When beating the batter, look for it to slightly increase in volume and look glossy, like a silky ribbon.
- Graham cracker crumbs: I toast them lightly for a nuttier flavor, but if you’re short on time, skip it. The texture should be crumbly yet cohesive, like crunchy cookie dirt.
- Strawberry glaze: Bright and glossy, it’s a quick simmer of berries, sugar, and lemon juice. It gives that shiny, fresh burst on top—don’t skip the zest for a zingy brightness.
Spotlight on key ingredients
Strawberries:
- Fresh strawberries: I love how ripe berries smell like sunshine. As they cook, they ooze a vibrant, sweet-tart juice that makes the whole kitchen smell like summer.
- Cream cheese: I prefer softened, full-fat blocks. It melts into the batter seamlessly, giving that silky, tangy richness I crave in cheesecake.
Cream cheese:
- I prefer softened, full-fat blocks. It melts into the batter seamlessly, giving that silky, tangy richness I crave in cheesecake.
- Graham cracker crumbs: I toast them lightly to boost their nutty aroma. They crumble easily but hold together when pressed, adding a satisfying crunch.
Notes for ingredient swaps
- Dairy-Free: Swap cream cheese for coconut cream or cashew-based cream cheese. Expect a slightly sweeter, nuttier flavor with a creamier texture.
- Gluten-Free: Use almond flour or gluten-free graham crackers for the crust. The texture will be a bit more crumbly and less crunchy.
- Sugar Alternatives: Replace granulated sugar with honey, maple syrup, or coconut sugar. Keep in mind these may alter moisture and sweetness levels.
- Vegetarian/Vegan: Use plant-based cream cheese and egg replacers like silken tofu or flax eggs. The flavor stays tangy but gets an extra nutty note.
- Fresh Berries: If strawberries aren’t in season, frozen berries work well—just thaw and drain excess water for a more concentrated flavor.
- Lemon Zest: Swap lemon for lime or orange zest for a different citrus twist that brightens the flavor profile.
- Sweetener in Glaze: Use agave syrup or fruit preserves instead of sugar for a more intense berry flavor and glossy finish.
Equipment & Tools
- Springform pan: To shape and bake the cake evenly, easy to remove the sides.
- Mixing bowls: For preparing crust, filling, and topping components.
- Electric mixer: To beat cream cheese and eggs smoothly, avoiding lumps.
- Rubber spatula: For folding ingredients and smoothing layers.
- Saucepan: To simmer strawberries and make glaze.
- Offset spatula: To spread topping evenly and cleanly.
- Sharp knife: To slice the cake neatly without crushing.
Step-by-step guide to strawberry cheesecake cake
- Preheat your oven to 175°C (350°F). Grease and flour a 9-inch springform pan, or line it with parchment for easy release.
- Make the crust: Combine 1 1/2 cups graham cracker crumbs, 1/4 cup sugar, and 1/2 cup melted butter. Mix until crumbly and press evenly into the bottom of the pan. Bake for 10 minutes until golden; cool slightly.
- Prepare the cheesecake filling: In a large bowl, beat 16 oz softened cream cheese until smooth. Add 1 cup sugar, and beat until fluffy. Mix in 3 eggs, one at a time, beating well after each. Stir in 1 teaspoon vanilla extract. The batter should be silky and slightly increased in volume.
- Pour the batter over the cooled crust. Smooth the top with a spatula. Bake for 50-55 minutes, until the edges are set but the center still jiggles slightly when shaken. The surface might crack; that’s okay—will be covered with strawberries later.
- While the cheesecake bakes, prepare the strawberry topping: In a saucepan, combine 2 cups chopped strawberries, 1/4 cup sugar, and a squeeze of lemon juice. Simmer over medium heat for 10 minutes, stirring occasionally, until berries break down and sauce thickens. Add zest for brightness. Cool completely.
- Remove the baked cheesecake from the oven and let it cool in the pan for about 1 hour. Then, refrigerate it for at least 4 hours, preferably overnight, to set fully and develop flavor.
- Once chilled, spread the cooled strawberry glaze evenly over the top of the cheesecake. For a glossy finish, give it a gentle swirl with a spoon. Chill again for 30 minutes to let the topping set.
- Before serving, carefully remove the sides of the springform pan. Slice with a sharp knife, wiping it clean between cuts if needed. Serve chilled, with extra fresh strawberries if desired.
- For best presentation, clean the edges of the slices with a damp towel and plate them on a cool platter. Enjoy that burst of creamy, tangy cheesecake layered with bright strawberry goodness.
Refrigerate the cake for at least 4 hours, preferably overnight, to set fully. Before serving, remove from the pan, slice with a hot, damp knife for clean cuts, and plate with extra strawberries for garnish. Serve chilled for best texture and flavor.
How to Know It’s Done
- Cheesecake edges are firm, center jiggles slightly when shaken.
- Strawberry glaze is glossy and thickens as it cools.
- Cake feels firm but tender to the touch, with no raw batter smell.
Strawberry Cheesecake Cake
Ingredients
Equipment
Method
- Preheat your oven to 175°C (350°F). Lightly grease a 9-inch springform pan and set aside.
- Combine the graham cracker crumbs, sugar, and melted butter in a bowl. Mix until the crumbs are evenly coated and resemble wet sand.
- Press the crumb mixture evenly into the bottom of the prepared pan, using the back of a spoon or your fingers to create a firm, even layer. Bake for 10 minutes until golden, then let cool slightly.
- In a large bowl, beat the softened cream cheese with an electric mixer until smooth and creamy, about 2 minutes.
- Add the sugar and continue beating until the mixture is fluffy and light, about 3 more minutes.
- One at a time, beat in the eggs, ensuring each is fully incorporated before adding the next. Mix in vanilla extract.
- Pour the cream cheese batter over the cooled crust and smooth the top with an offset spatula. Bake for 50-55 minutes until the edges are set but the center still jiggles slightly.
- While the cheesecake bakes, prepare the strawberry glaze: Combine chopped strawberries, sugar, lemon juice, and lemon zest in a saucepan. Simmer over medium heat for about 10 minutes until the berries break down and the mixture thickens, filling your kitchen with a sweet, fruity aroma.
- Remove the baked cheesecake from the oven and let it cool in the pan for about an hour. Then, refrigerate it for at least 4 hours or overnight to fully set and develop flavors.
- Spread the cooled strawberry glaze evenly over the chilled cheesecake, creating a glossy, vibrant topping. Chill for an additional 30 minutes to let the glaze set.
- Carefully release the sides of the springform pan. Slice the cake with a hot, damp knife for clean cuts, wiping the blade between slices. Serve chilled, garnished with extra strawberries if desired, and enjoy that luscious combination of creamy cheesecake and fresh fruit.
Pro tips for perfect strawberry cheesecake cake
- Bolded mini-head: Chill your cream cheese thoroughly before beating—warm cheese can make the batter lumpy.
- Bolded mini-head: Use a light hand when folding strawberries into the batter—gentle mixing keeps them intact and vibrant.
- Bolded mini-head: When baking the crust, watch for a golden hue—overbaking can make it dry and hard.
- Bolded mini-head: For a glossy strawberry glaze, simmer berries until they release their juice and thicken—avoid overcooking to prevent burning.
- Bolded mini-head: Rest the baked cheesecake in the oven with the door slightly ajar for 10 minutes—this prevents cracking caused by sudden temperature changes.
- Bolded mini-head: Use a hot, damp knife to slice—this ensures clean cuts through the creamy layers without tearing.
- Bolded mini-head: Chill the assembled cake for at least 4 hours—this helps the flavors meld and the layers set perfectly.
Common mistakes and how to fix them
- FORGOT to preheat oven → Always preheat to ensure even baking and proper crust setting.
- DUMPED cheesecake batter in pan → Pour gently to avoid air bubbles and uneven texture.
- OVER-TORCHED crust → Keep an eye on crust; bake until golden, not burnt, for perfect crunch.
- MISSED chilling time → Chill thoroughly for clean slices and full flavor development.
Quick fixes and pantry swaps
- If berries release too much juice, splash a little cornstarch to thicken the glaze quickly.
- When strawberries are tart, sprinkle with sugar and let sit 10 minutes for a sweeter burst.
- Patch cracks in the cheesecake by gently smoothing with a spatula and chilling again.
- Shield the crust edges with foil if they brown too fast during baking.
- Splash vanilla extract into the batter for a fragrant lift if flavor feels flat.
Prep, store, and reheat tips
- Prepare the strawberry glaze and refrigerate up to 24 hours; it thickens and intensifies in flavor, adding a bright, tangy note when served.
- Bake the cheesecake crust and base layers a day ahead; store wrapped tightly in plastic wrap at room temperature or in the fridge for up to 2 days.
- Assemble and top the cake with strawberries just before serving to keep the fruit fresh and vibrant, avoiding a soggy topping.
- Refrigerate the fully assembled cake for at least 4 hours, ideally overnight, to allow flavors to meld and layers to set properly.
- To reheat slices, warm gently in the microwave for 10-15 seconds until slightly warm and soft—avoid overheating to preserve creaminess.
Top questions about strawberry cheesecake cake
1. How do I choose the right strawberries?
Use ripe, fragrant strawberries for the best flavor. They should smell sweet and look vibrant red. If they’re tart, sprinkle a little sugar on them before using.
2. Should I soften the cream cheese?
Softened cream cheese blends smoothly, avoiding lumps. Beat it until silky before mixing with other ingredients, especially if it’s cold.
3. How do I know when the crust is done?
Bake the crust until it turns a light golden brown, about 10 minutes at 175°C (350°F). Keep an eye on it to avoid burning.
4. How can I tell if the cheesecake is baked properly?
The cheesecake is done when the edges are set but the center still jiggles slightly. It should smell rich and slightly tangy.
5. How long should I chill the cake?
Chill the cake for at least 4 hours or overnight. This helps the layers set and flavors develop, making it easier to slice cleanly.
6. How do I get clean slices?
Use a hot, damp knife to slice through the cake. Wipe it clean between cuts for neat slices and no tearing.
7. My glaze is too thin, what do I do?
If the strawberry glaze is too runny, simmer it longer to thicken. For a quick fix, add a pinch of cornstarch mixed with water.
8. Can I substitute the crust ingredients?
You can swap graham cracker crumbs with digestive biscuits or almond flour for a different flavor. Expect slight changes in crunch and sweetness.
9. How can I make this dairy-free?
If you want a dairy-free version, replace cream cheese with coconut cream or cashew-based cheese. The flavor will be creamier and nuttier.
10. Can I use frozen strawberries?
Use frozen strawberries if fresh aren’t available. Thaw and drain excess water for a more concentrated, bright flavor.
Making this strawberry cheesecake cake isn’t just about the end result; it’s about the little moments of tasting, adjusting, and feeling proud of a dessert that’s both nostalgic and fresh. When you finally slice into it and see those layers of bright berries and creamy cheese, it’s a reminder of why baking can be such a satisfying act.
It’s a treat that’s perfect for summer gatherings or just when you need a sweet lift. Honestly, it’s the kind of dessert that makes the effort feel worth it—simple, honest, and full of flavor. Nothing fancy, just good ingredients and a little patience.
Hi there! I’m Himani and welcome to Val’s Recipe Box. This little corner of the internet didn’t begin with me. It began with Val my neighbourhood aunt whose kitchen held more warmth than any fireplace ever could.


 This little corner of the internet didn’t begin with me.
It began with Val my neighbourhood aunt whose kitchen held more warmth than any fireplace ever could.
She was more of a friend and I’ve come to know her in the most unexpected way.
This little corner of the internet didn’t begin with me.
It began with Val my neighbourhood aunt whose kitchen held more warmth than any fireplace ever could.
She was more of a friend and I’ve come to know her in the most unexpected way.