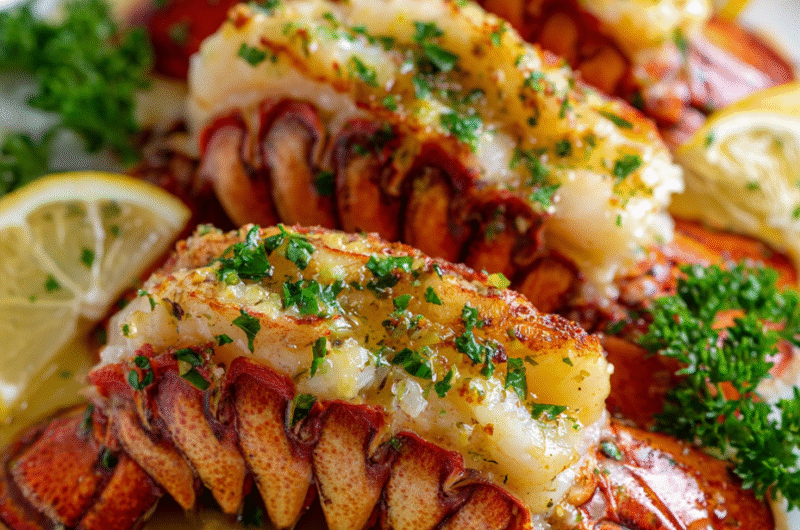
There’s something satisfying about cracking open a lobster tail, shells giving way to tender, buttery meat. It’s a messy, tactile kind of joy that turns dinner into an event, not just a meal. I love how a simple garlic butter can elevate that experience, making each bite rich with flavor and a hint of indulgence.
This recipe isn’t about fussing over complicated techniques; it’s about embracing the messy, flavorful ritual of shelling and savoring lobster. It’s perfect for a special night, but honestly, once you get the hang of it, it’s a quick, impressive way to turn seafood into a shared celebration. The smell of garlic and butter filling the kitchen makes every home feel a little more festive.
Focusing on the overlooked beauty of lobster tail shells, turning an everyday seafood dish into an interactive, shell-cracking experience that makes dinner feel like a shared event.
The story behind this recipe
I first stumbled upon lobster tails during a beachside vacation, where the simple act of cracking shells with salt-sticky fingers turned into a moment of pure joy. That messy, tactile experience stayed with me, especially the way garlic and butter mingled with the ocean breeze, making everything feel indulgent yet rooted in simplicity. Ever since, I’ve been chasing that same feeling—turning a fancy seafood into something approachable, sharing a dish that invites everyone to dig in and get a little messy. It’s honest, unpretentious, and a reminder that good food can be both luxurious and comforting.
Ingredient breakdown: key components
- Lobster tails: I look for tails that feel heavy with firm, slightly springy meat—freshness makes a noticeable difference in sweetness and texture. Swap with king crab claws if you want a different shell-on experience, but the lobster’s tender bite is unmatched.
- Garlic: I prefer finely minced garlic that sizzles immediately when it hits the butter, releasing that pungent, aromatic punch. If you only have garlic powder, use half the amount and add it later to avoid burning—it’s all about that bright, fragrant aroma.
- Butter: I use unsalted, high-quality European butter for a rich, creamy base that melts into the shell and coats the meat beautifully. Olive oil can be a lighter alternative, but it won’t deliver the same velvety richness or that satisfying crackle when sizzling.
- Parsley: Fresh parsley adds that fresh, grassy note and a pop of color—chop it fine and sprinkle just before serving. Dried parsley can work in a pinch, but it loses that vibrant, herbaceous zing.
- Lemon: I squeeze bright lemon juice over at the end—nothing beats that zingy, citrusy lift that cuts through the richness. For a more mellow tang, add lemon zest to the butter as it melts; it’s a subtle flavor boost.
- Salt & Pepper: I season generously with flaky sea salt and freshly cracked black pepper. The salt enhances the sweetness of the lobster, and the pepper adds a little smoky heat—adjust to your taste, but don’t hold back.
- Optional spice: A pinch of smoked paprika or cayenne can add a smoky or fiery kick—just a little, if you want a subtle heat that complements the buttery richness.
Spotlight on key ingredients
Garlic:
- Lobster tails: I look for tails that feel heavy with firm, slightly springy meat—freshness makes a noticeable difference in sweetness and texture. Swap with king crab claws if you want a different shell-on experience, but the lobster’s tender bite is unmatched.
- I prefer finely minced garlic that sizzles immediately when it hits the butter, releasing that pungent, aromatic punch. If you only have garlic powder, use half the amount and add it later to avoid burning—it’s all about that bright, fragrant aroma.
Parsley:
- Butter: I use unsalted, high-quality European butter for a rich, creamy base that melts into the shell and coats the meat beautifully. Olive oil can be a lighter alternative, but it won’t deliver the same velvety richness or that satisfying crackle when sizzling.
- Fresh parsley adds that fresh, grassy note and a pop of color—chop it fine and sprinkle just before serving. Dried parsley can work in a pinch, but it loses that vibrant, herbaceous zing.
Notes for ingredient swaps
- Dairy-Free: Use coconut milk or oil instead of butter for richness, but expect a slightly different flavor profile and less velvety texture.
- Low-Sodium: Opt for unsalted butter and skip added salt, then season to taste; the dish will be milder but still flavorful.
- Herb Variations: Swap parsley for chives, basil, or tarragon to change the herbal note and add different freshness layers.
- Garlic Alternatives: Use roasted garlic for a sweeter, milder garlic flavor, or garlic-infused oil for convenience and a subtler aroma.
- Acid Boost: Replace lemon juice with lime or vinegar for a different tang—try lemon first for classic brightness, but experiment as you go.
- Shellfish Swap: King crab legs can replace lobster tails for a slightly sweeter, meatier bite with a different shell experience.
- Spice Level: Add a pinch of cayenne or smoked paprika for heat and smoky depth—start small, then build to your taste.
Equipment & Tools
- Kitchen shears: To cut through the shell cleanly without damaging the meat.
- Sharp boning knife: To lift and expose the lobster meat carefully.
- Baking sheet: To hold the lobster tails for oven roasting.
- Basting brush: To apply the garlic butter evenly and prevent burning.
Step-by-step guide to garlic butter lobster
- Gather your equipment: a sharp boning knife, kitchen shears, a baking sheet, and a basting brush. Preheat oven to 200°C (390°F).
- Using kitchen shears, cut through the top shell of each lobster tail lengthwise, stopping just before the tail fin. Carefully lift the meat, keeping it attached at the fin, and lay it on top of the shell.
- Pat the lobster meat dry with paper towels to remove excess moisture—this helps the butter adhere better and promotes even cooking.
- Mix softened butter with minced garlic, a pinch of salt, pepper, and a squeeze of lemon juice. Brush generously over the lobster meat, letting some drip into the shell.
- Place lobster tails on a baking sheet, shell side down, and bake in the preheated oven for 12-15 minutes. The meat should turn opaque and slightly firm to the touch.
- Halfway through, baste the tails with more garlic butter, and check for color and aroma. If the butter starts to burn, reduce oven temperature slightly or tent loosely with foil.
- Once cooked, broil on high for 2-3 minutes to get a lightly charred, smoky top—keep a close eye to prevent burning.
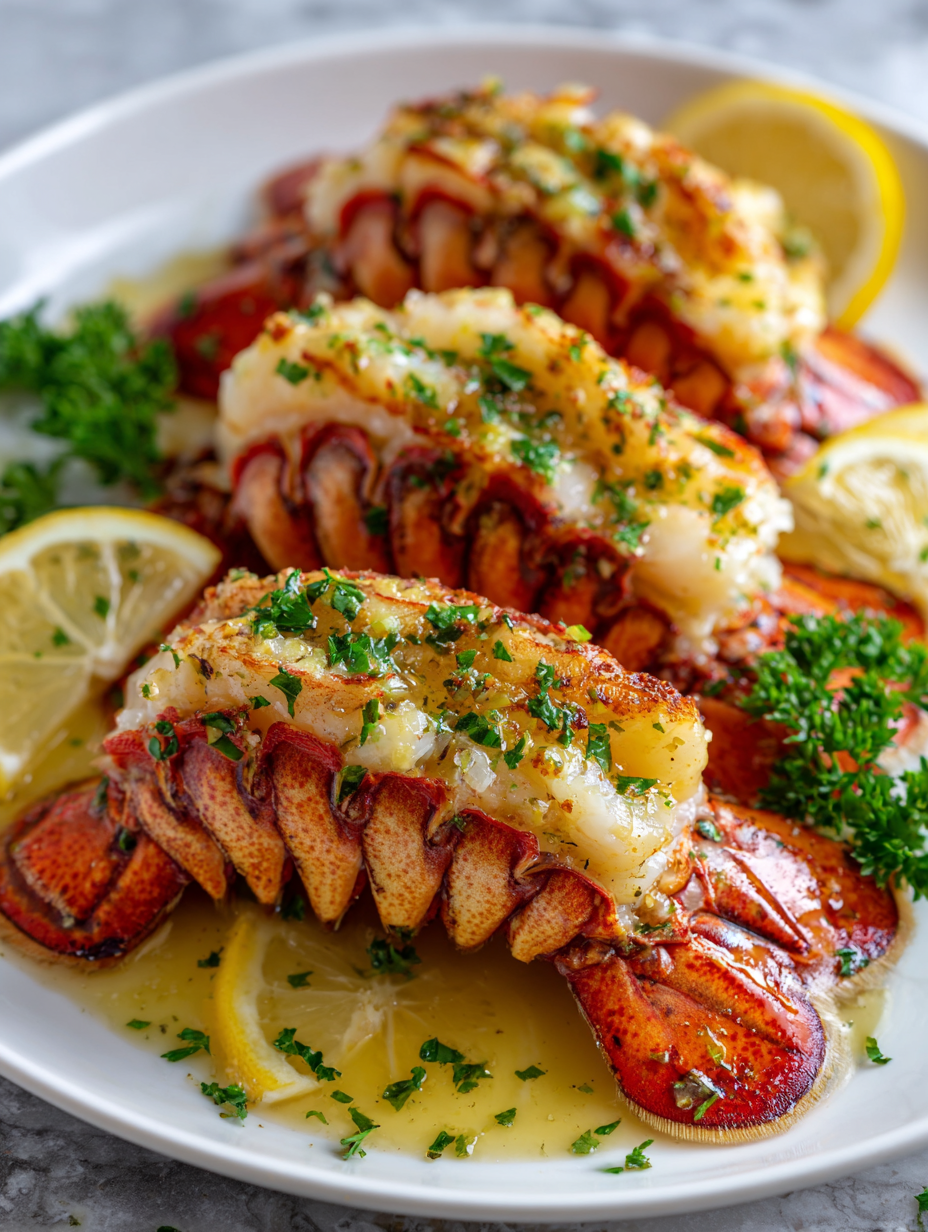
- Remove from oven, let rest for 2 minutes. Squeeze fresh lemon over the top, sprinkle with chopped parsley, and serve hot with shell crackers and extra butter on the side.
Let the lobster tails rest for 2 minutes to settle flavors. Serve directly from the shell, garnished with parsley and lemon wedges. Provide extra butter for dipping and encourage guests to shell and enjoy right away.
How to Know It’s Done
- The lobster meat is opaque and firm, not translucent or rubbery.
- Garlic butter bubbles and turns golden at the edges during baking.
- The shells turn a vibrant red with some slight charring on top after broiling.
Garlic Butter Lobster Tails
Ingredients
Equipment
Method
- Use kitchen shears to cut through the top shell of each lobster tail lengthwise, stopping just before the tail fin. Carefully lift the meat, keeping it attached at the fin, and lay it on top of the shell.
- Pat the lobster meat dry with paper towels to remove excess moisture, ensuring the butter adheres well during baking.
- Mix softened butter with finely minced garlic, lemon juice, chopped parsley, salt, and pepper until well combined, creating a fragrant garlic butter.
- Brush the garlic butter generously over the exposed lobster meat, allowing some to seep into the shell for extra flavor.
- Arrange the lobster tails on a baking sheet, shell side down, and bake in a preheated oven at 200°C (390°F) for 12-15 minutes, until the meat turns opaque and begins to slightly caramelize.
- Halfway through baking, baste the tails with more garlic butter using a basting brush, ensuring they stay moist and flavorful.
- Once cooked, switch the oven to broil on high and broil for an additional 2-3 minutes to lightly char the top, creating a smoky aroma and appealing color.
- Remove from the oven, let rest for 2 minutes, then squeeze additional lemon juice over the lobster and sprinkle with fresh parsley for a bright, fresh finish.
- Serve the lobster tails directly from the shell with extra garlic butter on the side for dipping, encouraging everyone to crack and savor each tender bite.
Pro tips for perfect lobster
- garlic: Mince garlic finely so it sizzles immediately and releases full aroma without burning.
- Hot butter: Ensure butter is melted and bubbling before adding lobster to develop a rich, crackling crust.
- Shell prep: Slightly crack shells with kitchen shears for easier cracking and better butter penetration.
- Broil watch: Keep a close eye during broiling to prevent butter from burning and shells from charring excessively.
- Baste generously: Brush lobster with garlic butter multiple times during roasting for maximum flavor and moisture.
- Rest briefly: Let cooked lobster rest for 2 minutes to let juices redistribute before serving.
- Finish with zest: Add lemon zest at the end for a bright, aromatic lift that cuts through richness.
Common mistakes and how to fix them
- FORGOT to check shell cracks → carefully inspect shells before cooking.
- DUMPED too much butter → use moderate, evenly spread butter for better flavor.
- OVER-TORCHED the lobster → keep a close eye during broiling, avoid burning the butter.
- MISSED resting time → let the lobster rest 2 minutes before serving for optimal juiciness.
Quick fixes and pantry swaps
- If shells crack during cooking → patch with kitchen glue or transfer to a fresh shell.
- When butter burns → splash in a little water or lemon juice to cool and deglaze.
- If lobster meat is rubbery → quick rescue with a brief broil, watch closely for color and aroma.
- When garlic scent fades → add a fresh squeeze of lemon or a sprinkle of herbs to revive flavor.
- Splash cold water on over-torched butter → stop the burning and preserve the rich, nutty aroma.
Prep, store, and reheat tips
- Prepping the lobster tails: You can cut and clean the shells a day ahead, keeping them covered in the fridge for up to 24 hours. The aroma of shell and saltiness will build overnight, making it easier and more flavorful to crack and serve.
- Garlic butter: Prepare the garlic butter mixture up to 2 days in advance. Keep it in an airtight container in the fridge, where the garlic’s pungency will mellow slightly, but the butter stays fragrant and ready to brush on the lobster.
- Storing cooked lobster: Once roasted, lobster tails can be kept in the fridge for up to 2 days. Wrap them tightly in foil or store in an airtight container. Expect the meat to be slightly firmer and the flavors more concentrated, so reheating gently is key.
- Reheating: Gently warm lobster in a 150°C (300°F) oven for about 10 minutes, basting with any leftover garlic butter. The meat should reheat without drying out, and the garlic aroma will re-emerge as it warms. Avoid microwave reheating which can make the meat rubbery and dull the flavor.
Top questions about garlic butter lobster
1. How do I choose good lobster tails?
Look for lobster tails that feel heavy and firm, with a slightly springy texture. Freshness makes a big difference in sweetness. Swap with king crab claws if you want a different shell-on experience, but lobster’s tender bite is unmatched.
2. Can I use garlic powder instead of fresh garlic?
Finely minced garlic sizzles immediately when it hits hot butter, releasing a pungent, aromatic punch. If you only have garlic powder, use half the amount and add it later to prevent burning—aim for that bright, fragrant aroma.
3. What kind of butter should I use?
Use high-quality unsalted butter for a rich, velvety coating that melts into the shell. Olive oil can be a lighter option, but it won’t give you that crackling, buttery richness or the same satisfying sizzle.
4. Can I skip the parsley?
Fresh parsley adds a grassy, vibrant note and a splash of color. Chop it fine and sprinkle just before serving. Dried parsley can work but loses some of that bright, herbal zing.
5. When should I add lemon to the dish?
A squeeze of lemon juice right after baking adds a zingy, citrus brightness that cuts through the richness. For a subtler flavor, add lemon zest to the butter as it melts—it’s a small but impactful touch.
6. How much salt and pepper should I use?
Season generously with flaky sea salt and freshly cracked black pepper. The salt enhances sweetness, and the pepper adds smoky heat. Adjust according to your taste, but don’t hold back on the seasoning.
7. Can I add spice to this recipe?
A pinch of smoked paprika or cayenne can add a smoky or fiery kick. Use sparingly at first, then taste and build heat gradually—these spices complement the buttery richness without overpowering.
8. How do I know when the lobster is done?
Bake lobster tails at 200°C (390°F) for 12-15 minutes until the meat turns opaque and slightly firm. Broil on high for 2-3 minutes at the end to get a lightly charred top—watch closely to prevent burning.
9. What if the shells crack during cooking?
If shells crack or split during cooking, carefully patch with kitchen glue or transfer the lobster to a new shell before serving. Keeping shells intact helps with presentation and easier cracking.
10. How do I fix burnt butter or rubbery lobster?
When butter starts to burn, splash in a little water or lemon juice to cool the pan and deglaze. If lobster meat is rubbery, a quick burst under the broiler can revive some texture—watch it closely.
There’s something about cracking open a lobster tail that makes the whole meal feel more special, more interactive. The rich garlic butter, the burst of lemon, and that satisfying crack of shell—it’s a messy, honest kind of joy that sticks with you.
In the end, this dish is about celebrating seafood in its most tactile, flavorful form. It’s simple enough for a weeknight treat but impressive enough to serve when you want to make an ordinary evening feel a little more memorable.
Hi there! I’m Himani and welcome to Val’s Recipe Box. This little corner of the internet didn’t begin with me. It began with Val my neighbourhood aunt whose kitchen held more warmth than any fireplace ever could.


 This little corner of the internet didn’t begin with me.
It began with Val my neighbourhood aunt whose kitchen held more warmth than any fireplace ever could.
She was more of a friend and I’ve come to know her in the most unexpected way.
This little corner of the internet didn’t begin with me.
It began with Val my neighbourhood aunt whose kitchen held more warmth than any fireplace ever could.
She was more of a friend and I’ve come to know her in the most unexpected way.