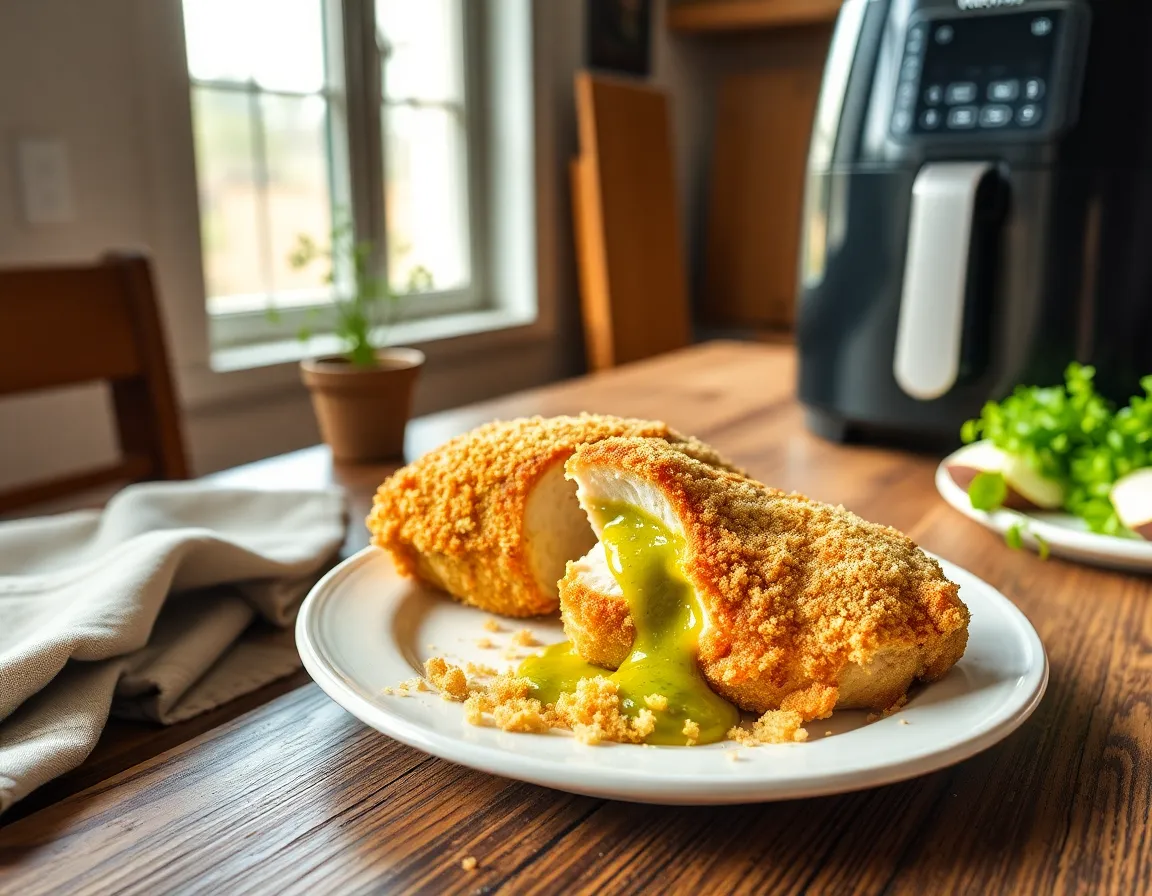
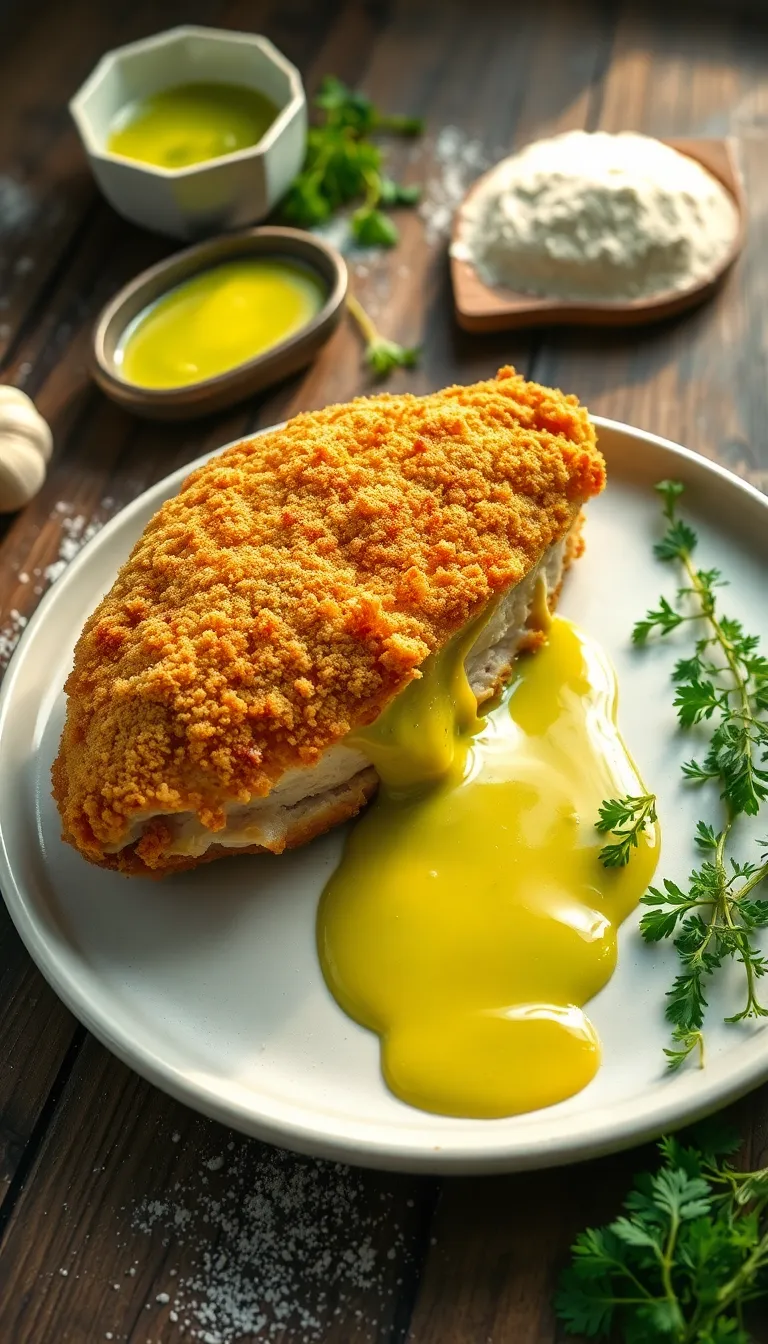
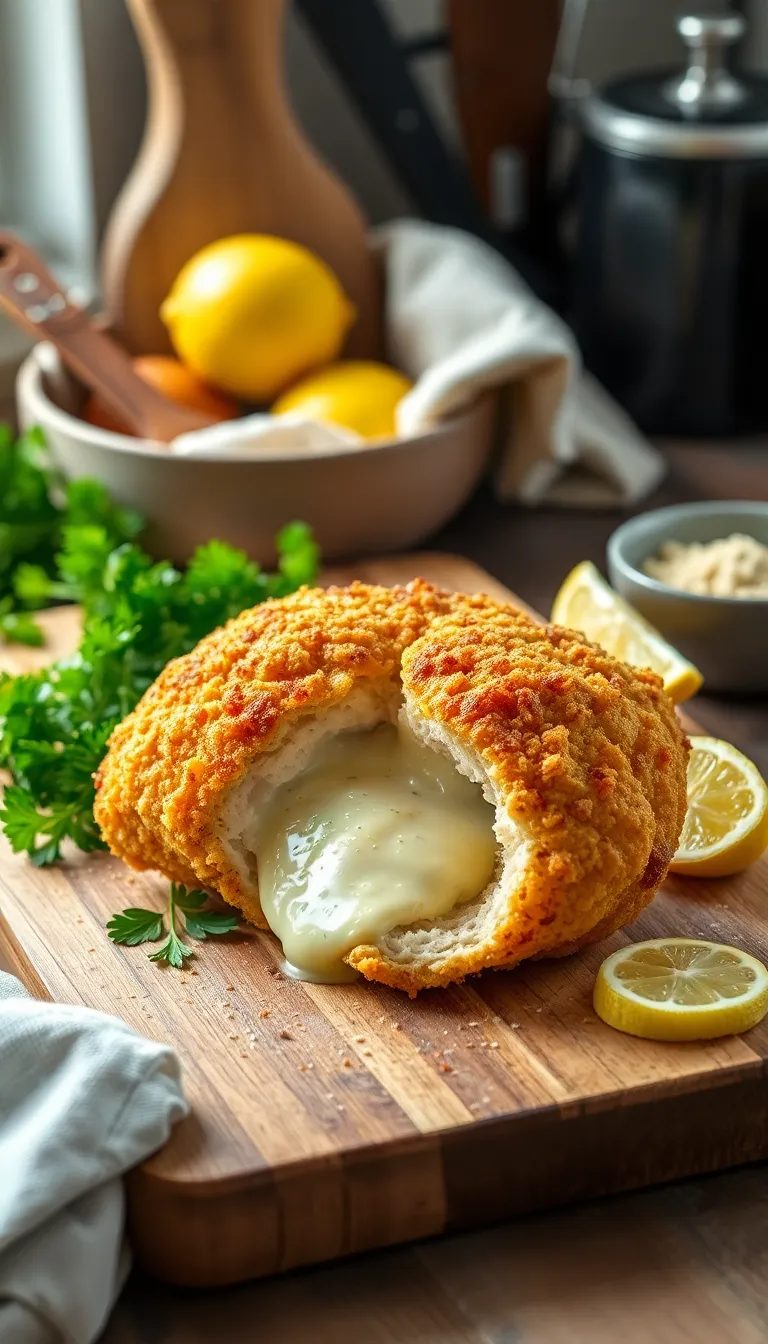
Get ready to experience the mouthwatering delight of Chicken Kiev like never before, thanks to the magic of the air fryer! Whether you’re a kitchen novice or a seasoned chef, this recipe will guide you effortlessly to a golden, crispy crust that gives way to a tender, juicy chicken breast. Inside, discover a burst of flavor as the herbed garlic butter center melts perfectly, infusing each bite with rich, aromatic goodness.
What makes this Chicken Kiev truly special is its ability to transform simple ingredients into a gourmet experience with minimal fuss. The air fryer not only speeds up the cooking process but also ensures a healthier version of this classic dish without sacrificing taste. Imagine the symphony of buttery herbs and succulent chicken dancing on your palate, and feel confident knowing you can recreate this culinary masterpiece with ease.
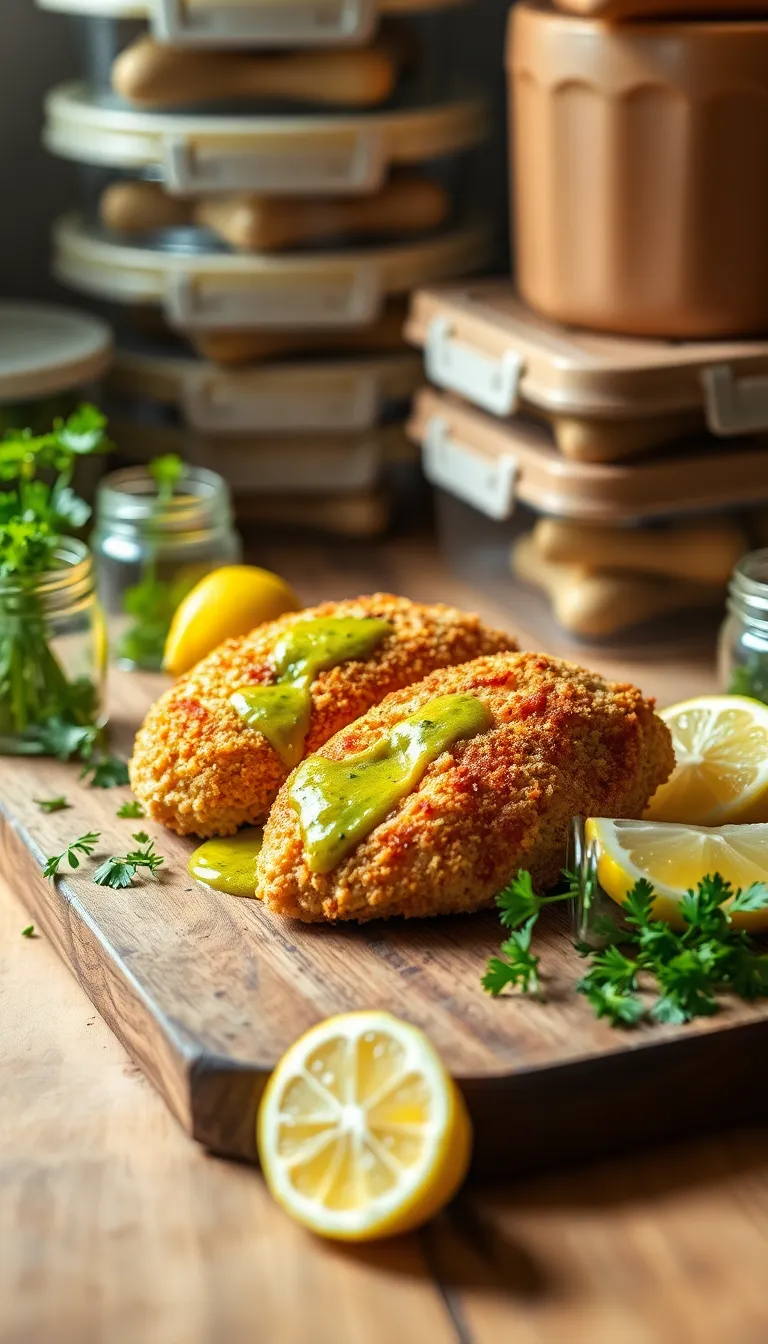
About This chicken kiev air fryer Recipe
- Quick and Easy: This chicken Kiev recipe is designed for the air fryer, cutting cooking time in half while delivering the same classic flavors.
- Healthier Option: By using an air fryer, you reduce the amount of oil needed, making this a lighter version of the traditional dish.
- Flavor-Packed: The juicy chicken breast is filled with a rich garlic butter that bursts with flavor in every bite.
- Crispy Perfection: Achieve a perfectly crispy coating without the hassle of deep frying, thanks to the air fryer’s circulating hot air.
- Impressive Yet Simple: This dish looks and tastes gourmet, but it’s surprisingly easy to prepare, making it perfect for both weeknight dinners and special occasions.
Why You’ll Love This Recipe
- Quick and Easy: This recipe takes advantage of the air fryer’s efficiency, delivering delicious Chicken Kiev in half the time of traditional methods.
- Healthier Choice: By using an air fryer, you significantly reduce the amount of oil needed, making this a lighter option without sacrificing flavor.
- Crispy Perfection: Achieve a golden, crispy coating that locks in the juicy, herb-infused butter, offering a delightful contrast in every bite.
- Flavorful and Gourmet: The combination of garlic, herbs, and butter creates a rich, savory filling that elevates this dish to gourmet levels.
- Impressive Yet Simple: This recipe is perfect for both casual weeknight dinners and special occasions, impressing guests with minimal effort.
Ingredients
- 2 large boneless, skinless chicken breasts
- 4 tablespoons unsalted butter, softened
- 2 cloves garlic, minced
- 2 tablespoons fresh parsley, chopped
- 1 tablespoon fresh dill, chopped
(or substitute with dried dill, using half the amount)
- 1 cup all-purpose flour
- 2 large eggs, beaten
- 1 cup breadcrumbs
(Panko breadcrumbs can be used for extra crunch)
- 1 teaspoon salt
- 1/2 teaspoon black pepper
- 1 teaspoon paprika
- 1 teaspoon lemon zest
(adds a fresh citrus flavor)
- 1 tablespoon olive oil
(for brushing the air fryer basket)
- 1 lemon, cut into wedges (optional)
(for serving)
- Fresh parsley, chopped (optional)
(for garnish)
Kitchen Tools You’ll Need
- Air Fryer: Essential for cooking the Chicken Kiev to crispy perfection without excess oil. If you don’t have an air fryer, a convection oven could be a suitable alternative.
- Meat Mallet: Used to pound the chicken breasts to an even thickness, ensuring they cook evenly. A rolling pin can be used if a meat mallet is unavailable.
- Mixing Bowls: Needed for preparing the herb butter mixture and for coating the chicken in flour, egg, and breadcrumbs.
- Plastic Wrap: Helpful for covering the chicken breasts while pounding them to prevent splatter and ensure cleanliness.
- Knife: Required for finely chopping herbs and trimming chicken as needed. Make sure it’s sharp for best results.
- Cutting Board: Provides a stable surface for preparing the chicken and herbs. Choose a board that is easy to clean and maintain.
- Tongs: Useful for handling the chicken pieces, especially when coating them in flour, egg, and breadcrumbs, to keep your hands clean.
Preparation Steps
- Prepare the garlic butter by mixing softened butter, minced garlic, chopped parsley, salt, and pepper in a bowl. Ensure the mixture is creamy and well-combined.
- Flatten the chicken breasts using a meat mallet to a thickness of about 1/4 inch. Be careful not to tear the meat.
- Place a spoonful of garlic butter in the center of each chicken breast, then roll them tightly, tucking in the sides as you go.
- Secure the rolled chicken with toothpicks, ensuring the butter is fully enclosed within the meat.
- Dip each chicken roll in flour, then beaten egg, and finally coat with breadcrumbs. Make sure the entire surface is evenly covered.
- Preheat the air fryer to 375°F (190°C). Arrange the chicken rolls in a single layer in the basket, ensuring they do not touch.
- Cook in the air fryer for 18-20 minutes, turning halfway through, until the coating is golden brown and the internal temperature reaches 165°F (74°C).
- Let the chicken Kiev rest for a few minutes before serving, allowing the juices to settle.
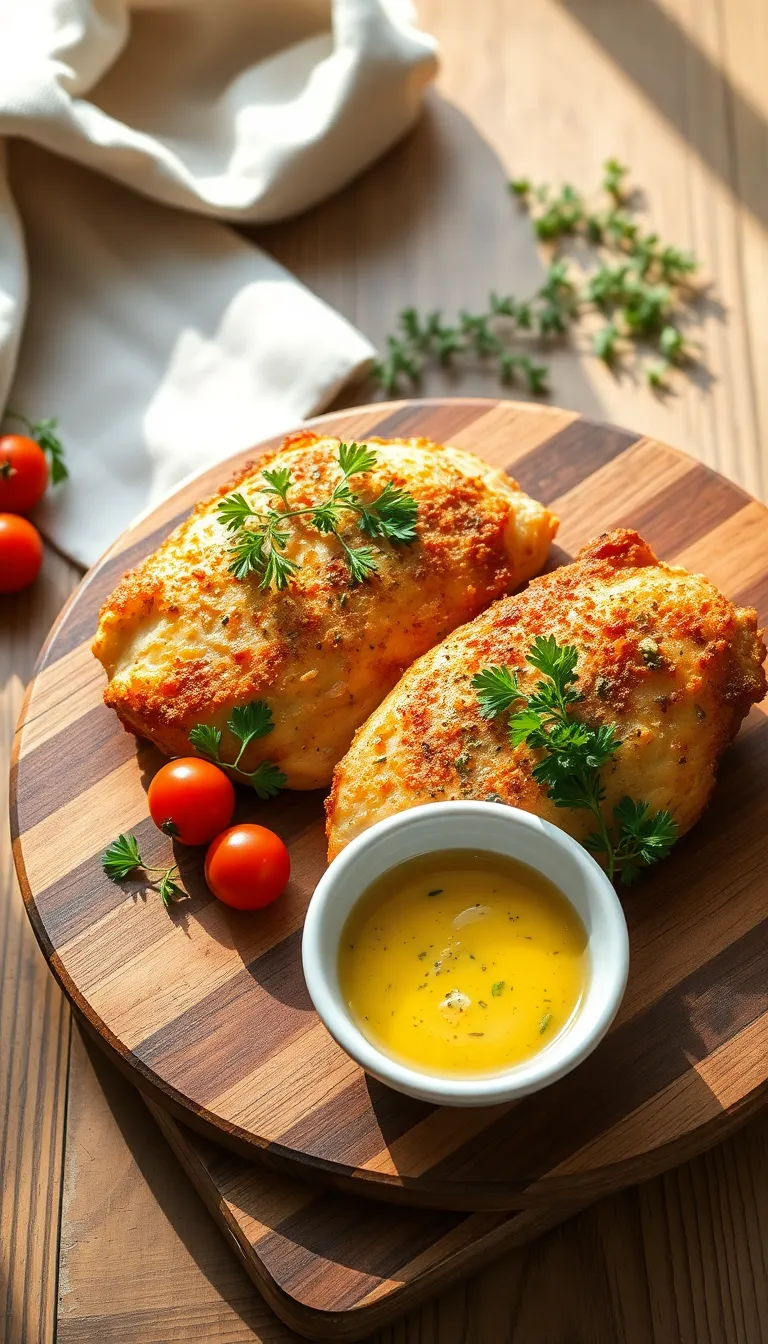
Serving Suggestions

- Classic Mashed Potatoes: Serve the chicken Kiev with a side of creamy mashed potatoes to soak up the delicious garlic butter. This pairing is a comfort food classic and provides a hearty base for the meal.
- Steamed Asparagus: Add a touch of elegance with lightly steamed asparagus spears. The fresh, slightly crisp texture complements the rich, buttery chicken Kiev perfectly.
- Fresh Garden Salad: A fresh garden salad with a tangy vinaigrette can balance the richness of the chicken Kiev. Include ingredients like cherry tomatoes, cucumber, and mixed greens for a refreshing contrast.
- Lemon Wedges for Garnish: Squeeze fresh lemon over the chicken Kiev before serving to enhance the flavors with a zesty touch. It also adds a pop of color to the plate.
- Chilled White Wine: Pair the dish with a chilled glass of Sauvignon Blanc or Chardonnay, which complements the dish’s buttery profile and adds a touch of sophistication to your dining experience.
- Herbed Rice Pilaf: Serve with a side of herbed rice pilaf, incorporating herbs like parsley and dill. The subtle herb notes in the rice pair well with the garlic and herb flavors in the chicken Kiev.
Pro Tips for Perfect Results

- Freeze Before Cooking: After assembling your chicken Kiev, freeze them for about 30 minutes. This helps the butter inside solidify and prevents it from leaking out during cooking.
- Use Panko for Extra Crunch: Swap out regular breadcrumbs for panko crumbs to achieve a crispier coating. Panko’s light and airy texture crisps up beautifully in the air fryer.
- Preheat the Air Fryer: Always preheat your air fryer for about 5 minutes before adding the chicken. This ensures even cooking and a golden, crispy exterior.
- Brush with Oil: Lightly brush the chicken with olive oil or melted butter before air frying. This promotes browning and adds a layer of flavor to the crust.
- Prepare in Advance: You can prepare the chicken Kiev up to 24 hours in advance and store them in the refrigerator. This allows the flavors to meld and makes dinner prep quick and easy.
- Rest Before Serving: Allow the chicken to rest for about 5 minutes after cooking. This helps the juices redistribute and prevents them from spilling out when you cut into the chicken.
Common Mistakes to Avoid
- Overstuffing the Chicken: One common mistake is trying to fit too much butter or filling inside the chicken breast. This can cause the chicken to burst open while cooking. To avoid this, use a moderate amount of filling and ensure you seal the chicken breast securely with toothpicks or kitchen twine.
- Using Cold Butter: If the butter is too cold, it won’t blend well with the herbs and could lead to uneven distribution during cooking. Instead, allow the butter to soften at room temperature before mixing with herbs and spices for a smooth, consistent filling.
- Skipping the Freezer Step: Not freezing the chicken before air frying can result in the filling leaking out. To ensure the filling stays intact, place the stuffed chicken in the freezer for about 15-30 minutes before cooking. This helps the butter firm up and reduces the chance of it melting too quickly.
- Incorrect Air Fryer Temperature: Cooking at the wrong temperature can lead to uneven cooking or a soggy crust. Always preheat your air fryer to the recommended temperature, usually around 360°F (182°C), to ensure even and crispy results.
- Overcrowding the Air Fryer Basket: Placing too many pieces in the basket can prevent proper air circulation, resulting in uneven cooking. Cook in batches if necessary, and ensure each piece has enough space around it to allow for optimal air flow.
By paying attention to these common mistakes and following the correct approaches, you’ll be able to create a delicious and perfectly cooked Chicken Kiev in your air fryer. Happy cooking!
Storage and Reheating Tips
- Allow the chicken Kiev to cool to room temperature before storing to prevent condensation from making the breading soggy.
- For refrigeration, place the chicken Kiev in an airtight container or wrap it tightly in aluminum foil. Make sure the container is sealed properly to maintain freshness.
- Store the chicken Kiev in the refrigerator for up to 3 days. Do not exceed this timeframe to ensure food safety.
- To freeze, wrap the cooled chicken Kiev individually in plastic wrap, then place them in a freezer-safe bag or container. Label the package with the date to keep track of freshness.
- Frozen chicken Kiev can be stored for up to 2 months. Ensure the freezer temperature is consistently below 0°F (-18°C) for optimal preservation.
- For reheating, preheat your air fryer to 350°F (175°C). Place the chicken Kiev in the air fryer basket and heat for about 5-7 minutes, or until warmed through. This method helps maintain the crispy coating.
- If using an oven, preheat to 350°F (175°C) and place the chicken Kiev on a baking sheet. Heat for 15-20 minutes, checking to ensure it is heated thoroughly.
- Avoid using a microwave for reheating as it can make the breading soggy and unevenly heat the chicken.
- Always check the internal temperature of the reheated chicken Kiev; it should reach 165°F (74°C) to ensure it is safe to eat.
Proper storage and reheating of your chicken Kiev will ensure that you can enjoy the dish with the same delicious taste and texture as when it was first prepared. By following these guidelines, you maintain not only the quality but also the safety of your meal.
Frequently Asked Questions

Frequently Asked Questions
Q: Can I use bone-in chicken for this recipe?
- Answer: It’s best to use boneless chicken breasts for even cooking and to ensure the butter filling stays intact.
Q: What can I substitute for fresh herbs in the filling?
- Answer: You can use dried herbs, but reduce the quantity by half as dried herbs are more concentrated in flavor.
Q: My chicken kiev is leaking butter during cooking. How can I prevent this?
- Answer: Ensure the chicken is tightly sealed around the butter and consider chilling it in the freezer for about 15 minutes before cooking.
Q: Can I prepare chicken kiev in advance?
- Answer: Yes, you can assemble the chicken and store it in the refrigerator for up to 24 hours before cooking.
Q: How can I make this recipe gluten-free?
- Answer: Substitute the breadcrumbs with a gluten-free variety or crushed gluten-free cornflakes.
Q: What should I do if I don’t have an air fryer?
- Answer: You can bake the chicken kiev in a conventional oven at 400°F (200°C) for about 25-30 minutes, ensuring the internal temperature reaches 165°F (74°C).
Final Thoughts

The Chicken Kiev Air Fryer recipe is a delightful twist on a classic dish, making it both easy and quick to prepare. With a crispy golden crust and a flavorful, buttery center, this recipe brings a touch of elegance to your dinner table. Experience a restaurant-quality meal right from your own kitchen with minimal effort and maximum flavor.
Feel free to add your own spin, whether it’s by experimenting with different herbs or adding a dash of your favorite spices. Cooking is all about creativity, so embrace the opportunity to make this dish uniquely yours. Your personal touch can transform a simple meal into something truly special.
We warmly invite you to try this Chicken Kiev Air Fryer recipe and discover the joy of making a beloved dish with modern convenience. Gather your ingredients, fire up the air fryer, and savor the satisfaction of a meal well made. Happy cooking!
Hi there! I’m Himani and welcome to Val’s Recipe Box. This little corner of the internet didn’t begin with me. It began with Val my neighbourhood aunt whose kitchen held more warmth than any fireplace ever could.


 This little corner of the internet didn’t begin with me.
It began with Val my neighbourhood aunt whose kitchen held more warmth than any fireplace ever could.
She was more of a friend and I’ve come to know her in the most unexpected way.
This little corner of the internet didn’t begin with me.
It began with Val my neighbourhood aunt whose kitchen held more warmth than any fireplace ever could.
She was more of a friend and I’ve come to know her in the most unexpected way.
