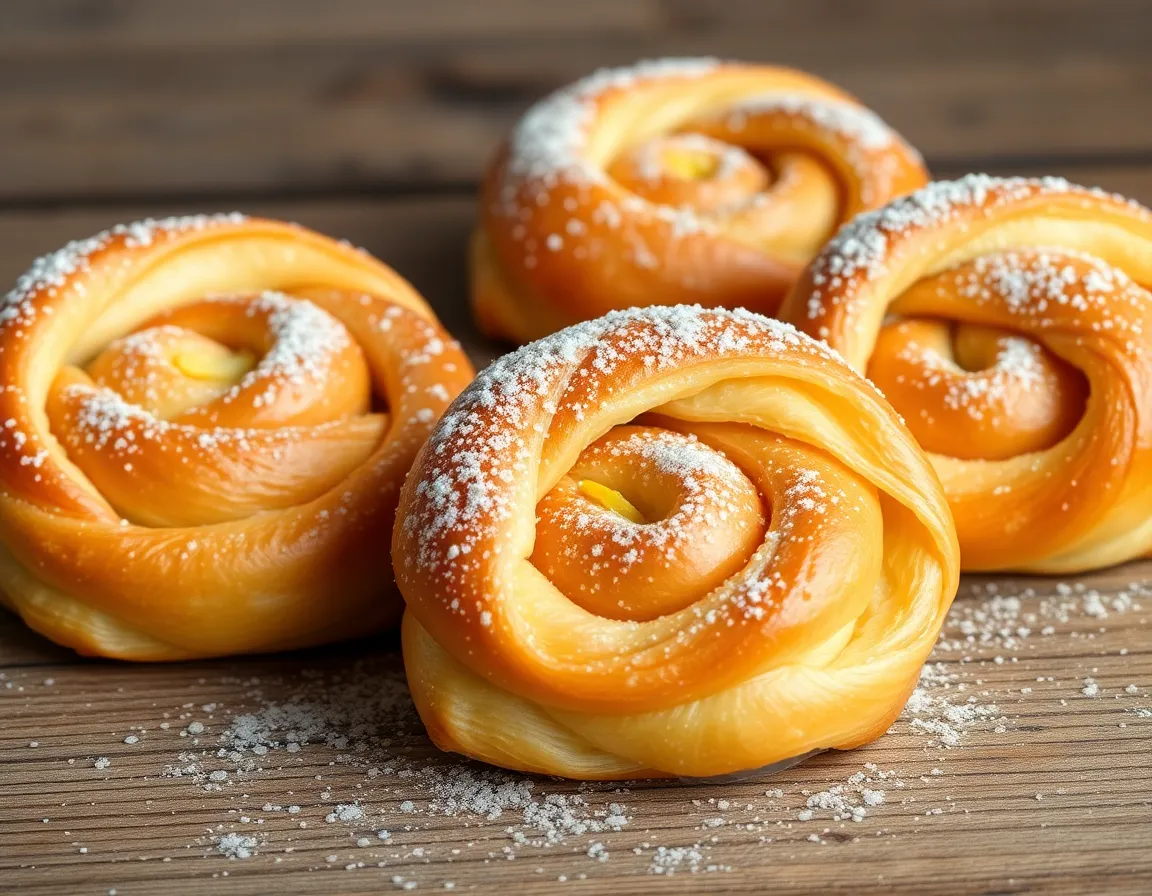
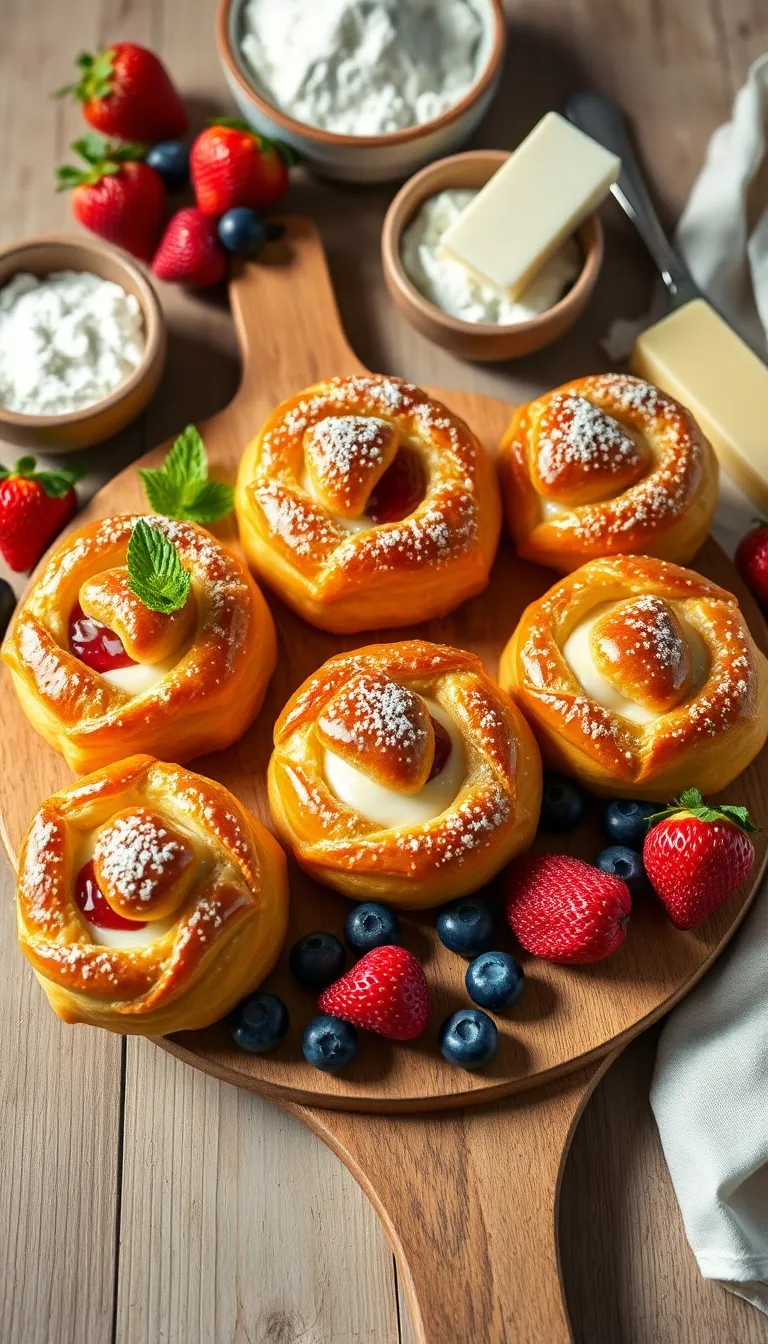
Imagine sinking your teeth into a flaky, golden pastry filled with a creamy, tangy cheese center that melts in your mouth. This cheese danish recipe is a delightful treat that combines the comforting warmth of fresh-baked dough with the irresistible richness of cream cheese. Whether you’re a novice baker or a seasoned pro, creating this delectable pastry at home is sure to be a rewarding experience.
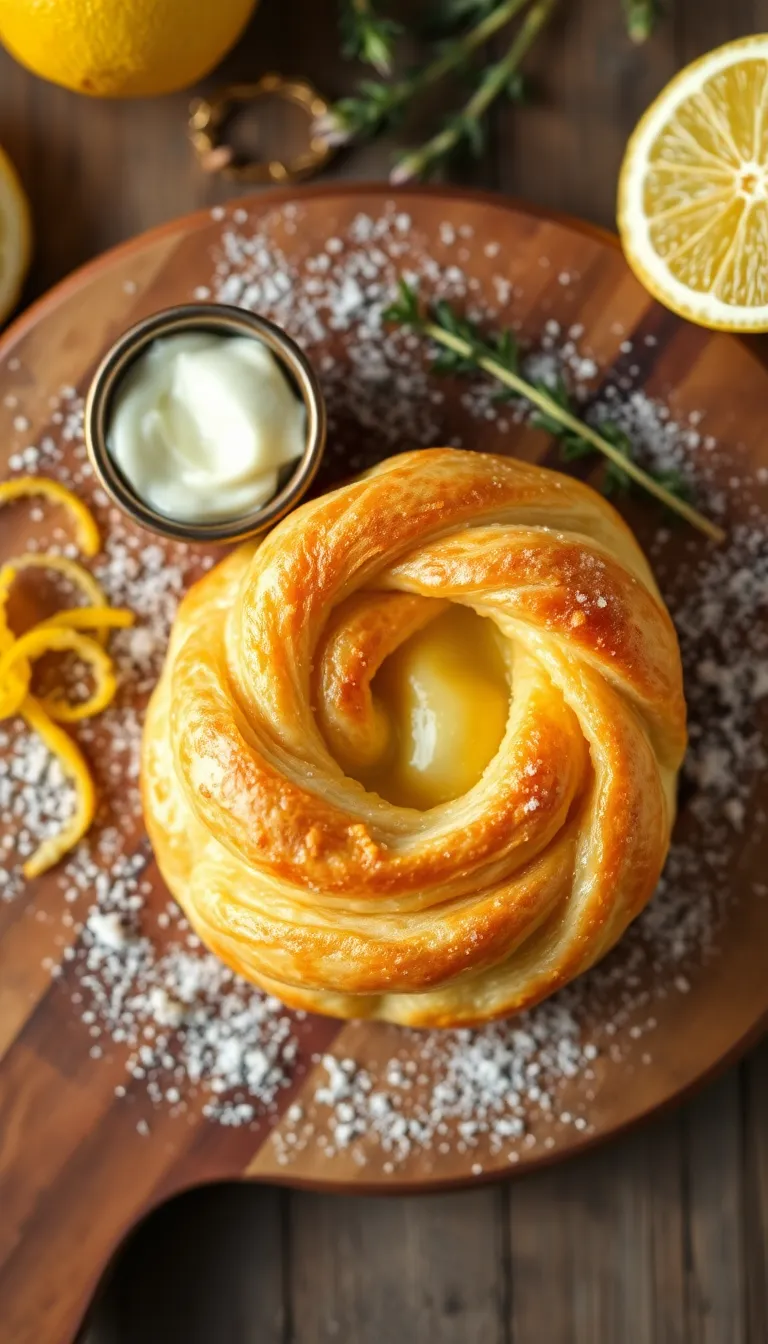
What makes this recipe truly special is the harmonious blend of buttery pastry and sweet, slightly tart filling, enhanced by a hint of vanilla and a touch of lemon zest. With each bite, you’ll enjoy a symphony of flavors and textures that is both luxurious and satisfying. Don’t worry—this recipe is crafted to be straightforward and achievable, ensuring you can enjoy these delightful pastries with confidence and ease.
About This cheese danish Recipe
- Easy and Quick: This cheese danish recipe uses store-bought puff pastry, making it a time-saving option without compromising on taste.
- Creamy and Decadent: The rich, creamy cheese filling paired with the flaky pastry creates a perfect balance of textures and flavors.
- Customizable: You can effortlessly adapt the filling with your favorite fruits or preserves, allowing for endless flavor variations.
- Perfect for Any Occasion: Whether it’s a casual brunch or a special dessert, these cheese danishes are sure to impress your guests.
- Beginner-Friendly: With simple steps and no need for special equipment, this recipe is perfect for both novice and experienced bakers.
- Make-Ahead Convenience: These danishes can be prepared ahead and stored, offering a stress-free solution for busy mornings.
Why You’ll Love This Recipe
- Quick and Easy: This cheese danish recipe comes together in under 30 minutes, making it perfect for a delicious homemade treat without the fuss.
- Irresistible Flavor: The rich, creamy cheese filling paired with a flaky, buttery pastry will satisfy your sweet and savory cravings in every bite.
- Customizable Toppings: Add your favorite fruits, nuts, or jams to personalize each danish, ensuring there’s something for everyone.
- Perfect for Any Occasion: Whether it’s a family breakfast, brunch with friends, or a special dessert, these cheese danishes are sure to impress.
- Made with Simple Ingredients: Using everyday pantry staples, this recipe is accessible and easy to make without a trip to a specialty store.
Ingredients
- 1 package puff pastry (thawed, usually comes in a pack of two sheets)
- 8 oz cream cheese (softened)
- 1/3 cup granulated sugar
- 1 tsp vanilla extract
- 1 egg yolk
- 1/2 tsp lemon zest
(for a hint of citrus flavor)
- 1 tbsp all-purpose flour
(helps thicken the cheese mixture)
- 1 egg
(beaten for egg wash)
- 1 tbsp water
(to mix with the egg for egg wash)
- 1/4 cup sliced almonds (optional)
(for a crunchy topping)
- 2 tbsp apricot jam
(optional, for glazing)
- 1 tbsp powdered sugar (optional, for dusting finished pastries)
Kitchen Tools You’ll Need
- Mixing Bowl: Essential for combining the cheese filling ingredients. A medium-sized bowl will be sufficient.
- Hand Mixer or Whisk: Used to blend the cream cheese, sugar, and other filling ingredients until smooth. A hand mixer speeds up the process, but a whisk works as well.
- Rolling Pin: Needed to roll out the puff pastry to the desired thickness. If you don’t have one, a clean bottle can be a substitute.
- Baking Sheet: Used to bake the danishes. Make sure it’s large enough to accommodate all your pastries without overcrowding.
- Parchment Paper: Helps prevent the danishes from sticking to the baking sheet and makes cleanup easier.
- Pastry Brush: Useful for applying egg wash to the pastries for a golden finish. If you don’t have one, you can use a clean paper towel or your fingers.
- Knife or Pizza Cutter: Needed to cut the puff pastry into squares or rectangles. A sharp knife will work, but a pizza cutter is very handy for this task.
- Wire Rack: Ideal for cooling the danishes once they are out of the oven to maintain their crisp texture.
Preparation Steps
- Preheat your oven to 375°F (190°C). This ensures the oven is hot enough to bake the danish evenly.
- Roll out the puff pastry on a lightly floured surface into a rectangle approximately 12×9 inches. This size provides the perfect thickness for baking.
- Prepare the cheese filling by mixing cream cheese, sugar, and vanilla extract in a bowl until smooth. The mixture should be creamy and free of lumps.
- Spread the cheese filling evenly over the center of the puff pastry, leaving an inch border on all sides. This prevents the filling from spilling out during baking.
- Fold the edges of the pastry over the filling and press gently to seal. The pastry should securely enclose the filling but not be too tight.
- Brush the top of the pastry with a beaten egg for a golden finish. The egg wash will give the danish a shiny, crisp crust.
- Bake in the preheated oven for 25-30 minutes or until the pastry is golden brown and puffed. The danish should be flaky and the filling set.
- Allow to cool on a wire rack for at least 10 minutes before serving. This helps the filling set further and makes slicing easier.
Serving Suggestions
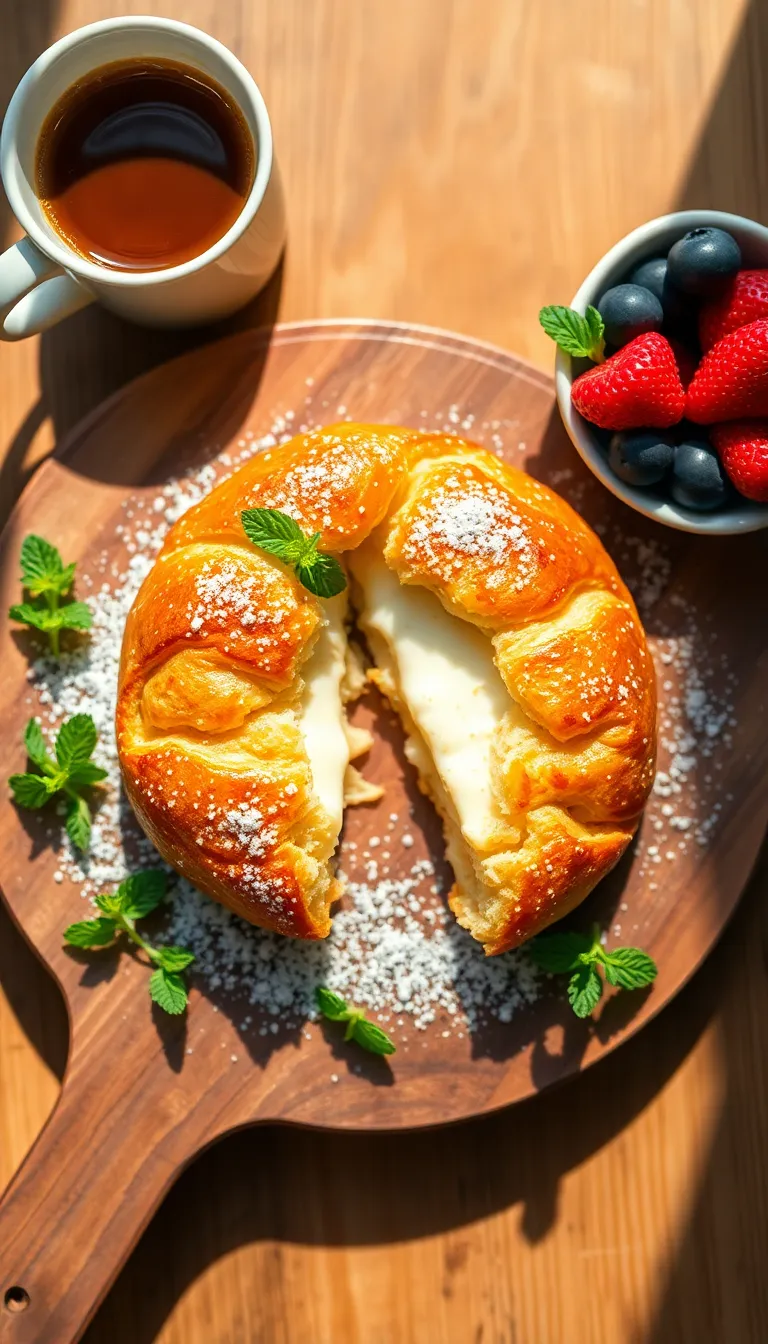
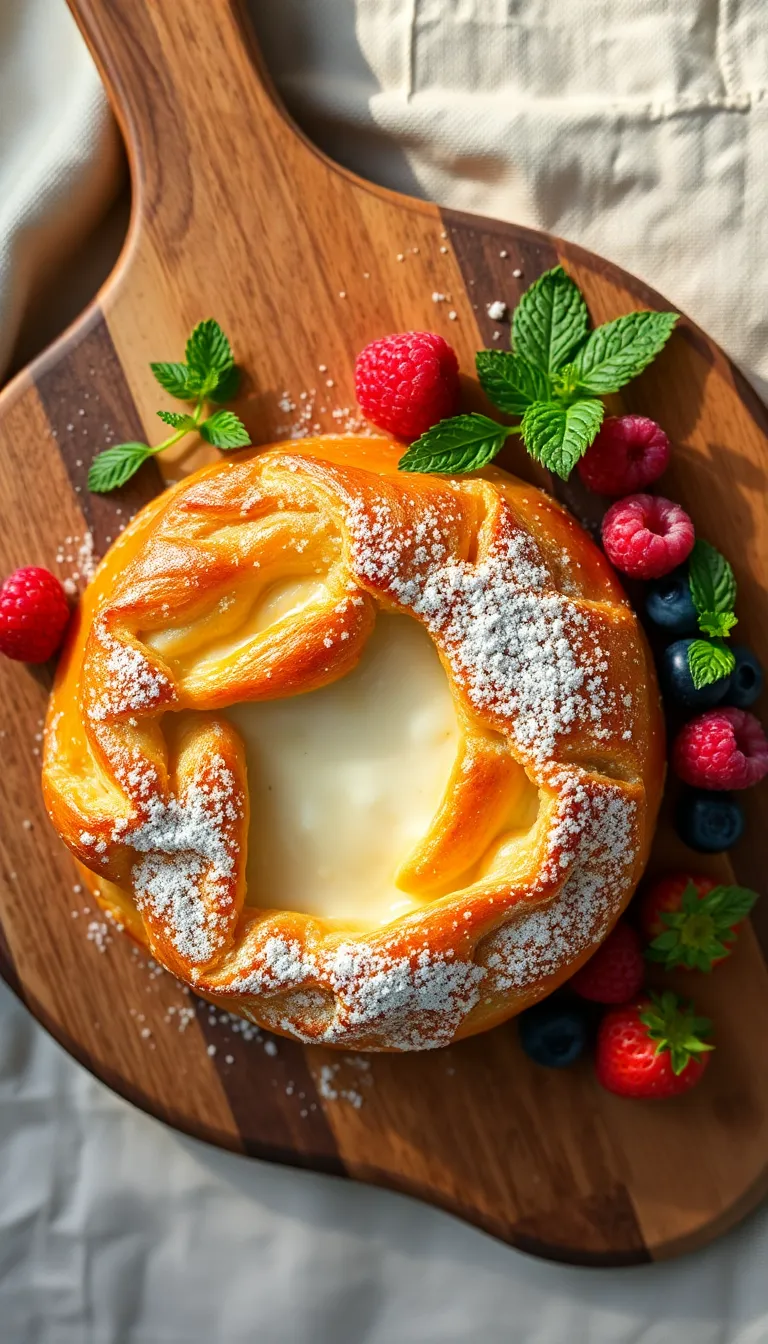
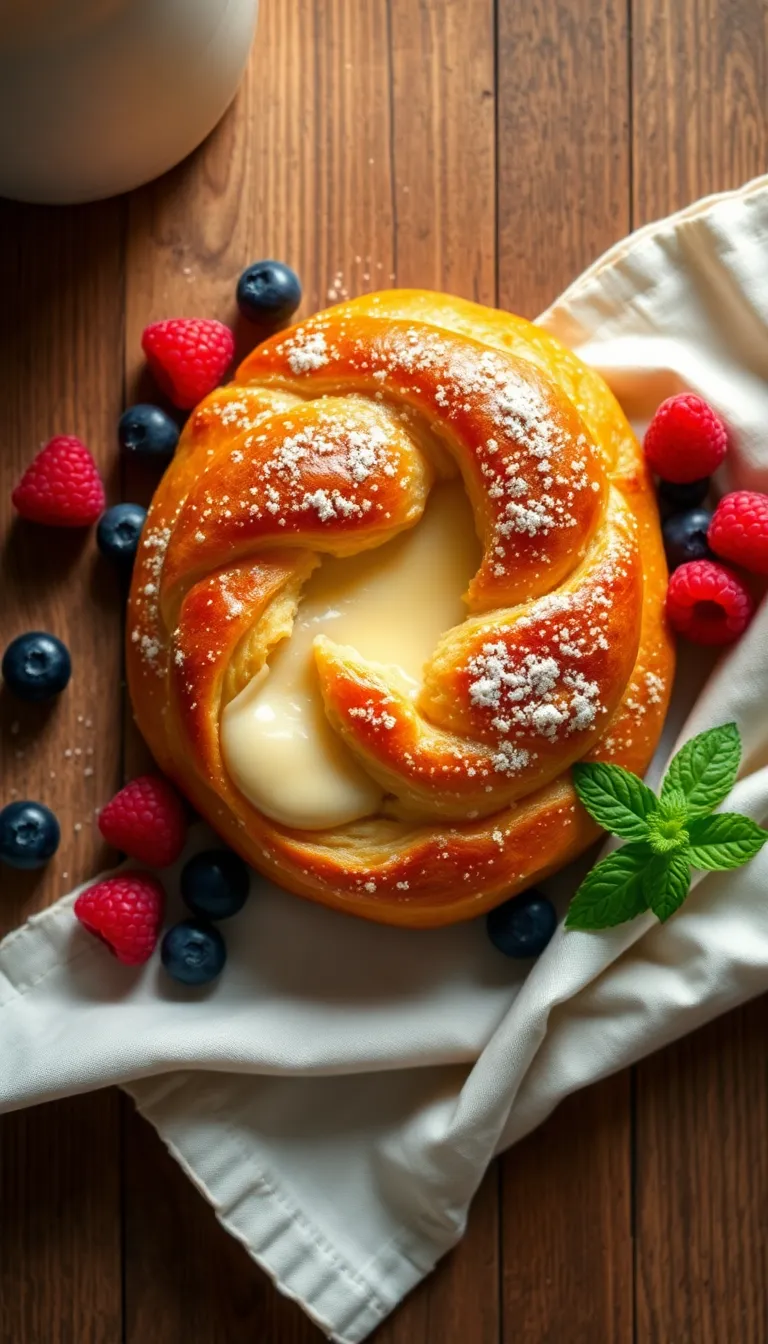
- Breakfast Spread: Serve the cheese danish alongside a selection of fresh fruits like berries or melon slices. The natural sweetness and refreshing nature of the fruit balance the richness of the cheese filling, making for a delightful morning treat.
- Brunch Buffet: Pair the cheese danish with a variety of pastries such as croissants and scones, complemented by a mimosa or freshly brewed coffee. This creates an elegant and satisfying brunch spread, ideal for gatherings.
- Afternoon Tea: Offer the cheese danish with a pot of hot tea. Choose black tea or a lightly flavored herbal tea to complement the buttery pastry without overpowering its delicate taste.
- Dessert Presentation: Drizzle honey or a fruit compote over the cheese danish before serving as dessert. This adds a touch of sweetness and visual appeal, enhancing the overall presentation.
- Garnishing with Fresh Herbs: Sprinkle a few leaves of fresh mint or basil on the danish for a burst of color and a hint of freshness that contrasts beautifully with the creamy cheese.
- Complementary Beverage: Serve with a glass of chilled white wine or sparkling cider. These beverages cleanse the palate and highlight the creamy texture and buttery flavor of the danish.
Pro Tips for Perfect Results
- Chill the Dough: After rolling out your puff pastry, chill it in the fridge for about 20 minutes before adding the filling. This helps the dough firm up slightly, making it easier to handle and less likely to lose its shape in the oven.
- Room Temperature Cream Cheese: Use cream cheese that has been softened to room temperature for a smoother, lump-free filling. This will ensure a creamy texture without over-mixing, which can lead to a dense filling.
- Brush with Egg Wash: Before baking, brush the edges of the pastry with a simple egg wash made from a beaten egg and a splash of milk. This will give your danish a beautiful golden-brown finish and an appealing sheen.
- Make-Ahead Tip: Prepare the cheese filling a day in advance and store it in an airtight container in the refrigerator. This allows the flavors to meld together and saves time on the day of baking.
- Use Lemon Zest for Brightness: Add a teaspoon of freshly grated lemon zest to the cheese filling. This subtle citrus note elevates the flavor profile and balances the richness of the cheese.
- Chef’s Secret: Freeze Before Baking: Once assembled, freeze the uncooked danishes on a baking sheet for 10 minutes. This brief chilling period helps the pastry hold its shape during baking and results in a flakier texture.
Common Mistakes to Avoid
- Using Cold Ingredients: Cold cream cheese and eggs can lead to a lumpy filling. Make sure to bring these ingredients to room temperature before mixing. This ensures a smooth and even filling, enhancing the texture and flavor of your cheese danish.
- Overworking the Dough: Handling pastry dough too much can make it tough and less flaky. To avoid this, handle the dough as little as possible and use a light touch when rolling it out. If using store-bought puff pastry, follow the package instructions for thawing and rolling.
- Not Sealing the Edges Properly: Failing to seal the edges firmly can cause the filling to leak during baking. Use a little water or egg wash to moisten the edges of the pastry before pressing them together. This will help create a better seal and keep the delicious filling intact.
- Baking at the Wrong Temperature: Baking at too high or too low a temperature can result in a soggy or overly browned danish. Preheat your oven to the temperature specified in the recipe and use an oven thermometer if available to ensure accuracy.
- Skipping the Resting Time: Allowing the pastry to rest before baking helps prevent shrinkage and enhances texture. Be sure to chill the assembled danishes in the refrigerator for at least 15 minutes before baking. This step ensures the pastry is firm and maintains its shape during baking.
By being mindful of these common pitfalls, you can avoid disappointments and create a cheese danish that is deliciously flaky with a perfectly smooth filling. Remember, attention to detail and patience are key to achieving bakery-quality results at home. Happy baking!
Storage and Reheating Tips
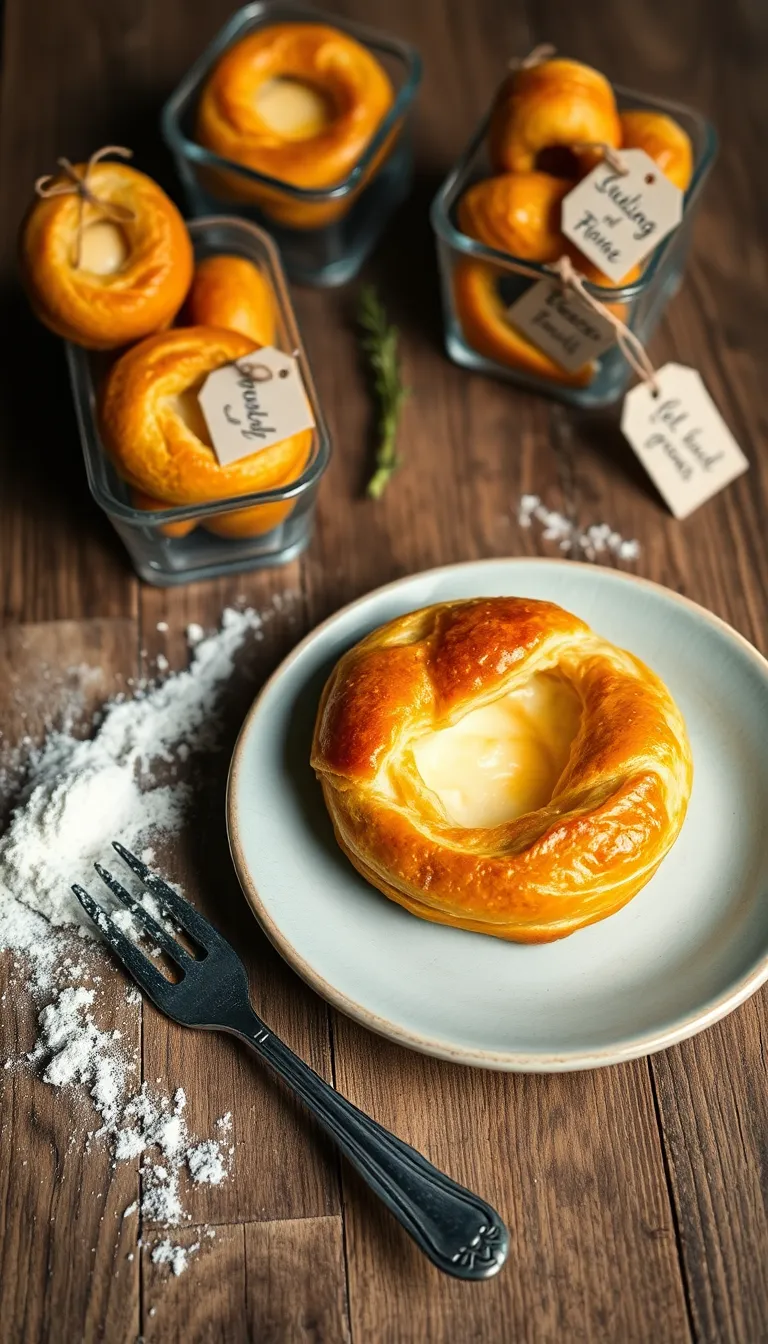
- Store leftover cheese danishes in an airtight container to maintain freshness. A sealable plastic or glass container works best.
- Refrigerate the danishes promptly after they have cooled to room temperature. They can be stored in the refrigerator for up to 3 days.
- If you wish to freeze the cheese danishes, wrap each one individually in plastic wrap or aluminum foil before placing them in a freezer-safe bag or container. They can be frozen for up to 2 months.
- Tip: Label the container with the date they were made or frozen to keep track of freshness.
- For reheating refrigerated danishes, preheat your oven to 350°F (175°C) and warm them for about 10 minutes. This keeps the pastry crisp without drying it out.
- If reheating from frozen, allow the danishes to thaw in the refrigerator overnight before following the above oven reheating instructions.
- Warning: Avoid reheating danishes in the microwave, as this can make the pastry soggy and compromise texture.
- Food Safety: Always check that the cheese filling reaches an internal temperature of 165°F (74°C) when reheating to ensure safety.
By following these storage and reheating tips, you can enjoy your cheese danishes at their best, even days after baking. Proper storage and careful reheating ensure that each bite is as delightful as the first.
Frequently Asked Questions

Frequently Asked Questions
Q: Can I use a different type of cheese for the filling?
- You can substitute cream cheese with ricotta or mascarpone for a slightly different texture and flavor.
Q: How can I prevent my danish from becoming soggy?
- Ensure the filling is not too wet and bake the pastry until it is golden brown and fully set.
Q: Is it possible to make the dough from scratch instead of using store-bought?
- Yes, you can make a traditional laminated dough at home, but it requires time for rolling and chilling.
Q: How do I know when the danish is fully baked?
- The pastry should be golden brown and the filling should be set and slightly puffed.
Q: Can I add fruit to the cheese danish?
- Adding fruits like berries or peach slices can enhance the flavor; just ensure the fruit is not too juicy.
Q: What is the best way to reheat a cheese danish?
- Reheat in an oven at 350°F (175°C) for about 10 minutes to maintain crispness, rather than using a microwave.
Final Thoughts

This cheese danish recipe is a delightful combination of flaky pastry and creamy cheese filling, making it a breakfast treat or a sweet snack that’s hard to resist. The use of simple ingredients and straightforward steps makes it approachable for bakers of all levels, while the rich taste and beautiful presentation offer a reward well worth the effort. It’s a perfect blend of ease and elegance that will impress friends and family alike.
Feel free to get creative and add your personal touch by incorporating your favorite fruits or a sprinkle of cinnamon to the cheese filling. Cooking is all about exploration, so don’t hesitate to make adjustments that suit your taste. Experimenting can lead to delightful discoveries that make this dish uniquely yours.
We warmly invite you to try this cheese danish recipe and experience the joy of baking something delicious and homemade. Whether you’re sharing it with loved ones or savoring it yourself, this recipe is sure to bring smiles and satisfaction. Happy baking!
Hi there! I’m Himani and welcome to Val’s Recipe Box. This little corner of the internet didn’t begin with me. It began with Val my neighbourhood aunt whose kitchen held more warmth than any fireplace ever could.


 This little corner of the internet didn’t begin with me.
It began with Val my neighbourhood aunt whose kitchen held more warmth than any fireplace ever could.
She was more of a friend and I’ve come to know her in the most unexpected way.
This little corner of the internet didn’t begin with me.
It began with Val my neighbourhood aunt whose kitchen held more warmth than any fireplace ever could.
She was more of a friend and I’ve come to know her in the most unexpected way.