
Baked mac and cheese is the kind of dish that feels like a warm hug on a chilly evening, but I like to think of it as more than just comfort food. This version adds a smoky, crispy topping that transforms the familiar into something a little more special, a little more grown-up. It’s the kind of dish that sparks conversations around the table, each bite carrying a hint of nostalgia mixed with a surprising depth of flavor.
I’ve made countless versions of baked mac and cheese over the years, but this one sticks with me because of that crispy topping—smoky, crunchy, and just a touch salty. It’s the kind of dish I crave after a long day, when I want something hearty but also crave that little kick of surprise. Plus, it’s surprisingly easy to throw together, even on a weeknight when time feels limited.
Focusing on the nostalgic comfort of baked mac and cheese while adding a surprising twist with a smoky, crispy topping that elevates the classic dish into something unexpectedly sophisticated and deeply satisfying.
Nostalgic Comfort with a Twist
- This dish reminds me of my grandma’s Sunday dinners, where the kitchen was always filled with cheesy, buttery goodness.
- I love how the crispy topping adds a surprising crunch that elevates the simple comfort of mac and cheese into something memorable.
- There’s a quiet pride in mastering a dish that’s so familiar yet feels like a small victory every time I pull it from the oven.
- Even on chaotic weeknights, this recipe feels like a warm, reliable friend—something I can count on to soothe and satisfy.
- Nothing beats the smell of melted cheese and toasted breadcrumbs wafting through the house—it’s pure comfort in aroma form.
The story behind this recipe
- This baked mac and cheese recipe actually started from a moment of chaos in my kitchen. I was trying to make a quick dinner, and somehow, I ended up with a pan of cheesy, gooey goodness that had a surprisingly smoky, crispy topping. It was a happy accident, and I’ve been tweaking it ever since, trying to recreate that perfect crunch paired with the creamy interior.
- What keeps me coming back to this dish is that contrast—soft, cheesy pasta with a crackly, smoky crust. It’s a reminder that sometimes the best comfort foods come from a little bit of mess and experimentation. Plus, that topping adds a layer of sophistication that elevates the whole thing from simple to special.
- heading: ‘The inspiration behind this dish’
Historical tidbits and fun facts
- The roots of baked mac and cheese trace back to 18th-century Europe, where cheese sauces were first baked with pasta in noble kitchens.
- In America, this dish became a household staple during the Great Depression, offering a hearty, affordable comfort food that could stretch ingredients.
- The crispy topping, often made with breadcrumbs or crushed crackers, was originally a way to add texture and flavor, turning a simple casserole into a celebratory dish.
- Variations with smoky or spicy toppings emerged in the mid-20th century, reflecting regional tastes and the influence of barbecue culture.
- Today, baked mac and cheese is a canvas for creativity—smoky, crunchy, cheesy—yet its heart remains rooted in cozy, nostalgic traditions.
Key ingredients and tips
- Cheddar cheese: I love how it melts into a gooey, stretchy layer—aim for a sharp variety for depth, but a milder cheese like mozzarella can soften the punch if you prefer milder flavors.
- Pasta: I usually go for elbows because they cradle the cheese, but shells or cavatappi work just as well—just keep an eye on cooking time so they stay al dente, about 8-10 minutes.
- Breadcrumb topping: I like panko toasted with a drizzle of butter until golden—if you want more crunch, sprinkle some crushed crackers or nuts on top for extra texture.
- Milk: Whole milk makes it rich and creamy, but if you’re out, half-and-half or even a splash of heavy cream can amp up the velvety feel—just watch for it to bubble gently to avoid scorching.
- Smoked paprika: Adds that smoky depth to the topping—if you’re out, a pinch of cumin or chipotle powder gives a similar smoky warmth, but use sparingly so it doesn’t overpower.
- Butter: I prefer unsalted so I can control the salt level, but salted butter works fine—just cut back a pinch on added salt in the cheese sauce if you choose salted butter.
- Mustard powder: A small pinch boosts the cheese flavor with a subtle tang—if you’re not a fan, just skip it; the dish will still be rich and cheesy.
Spotlight on key ingredients
Cheddar cheese:
- I love how it melts into a gooey, stretchy layer—aim for a sharp variety for depth, but a milder cheese like mozzarella can soften the punch if you prefer milder flavors.
- Pasta: I usually go for elbows because they cradle the cheese, but shells or cavatappi work just as well—just keep an eye on cooking time so they stay al dente, about 8-10 minutes.
Breadcrumbs & Milk:
- Breadcrumb topping: I like panko toasted with a drizzle of butter until golden—if you want more crunch, sprinkle some crushed crackers or nuts on top for extra texture.
- Milk: Whole milk makes it rich and creamy, but if you’re out, half-and-half or even a splash of heavy cream can amp up the velvety feel—just watch for it to bubble gently to avoid scorching.
Notes for ingredient swaps
- Dairy-Free: Swap cow’s milk with almond, soy, or oat milk. The dish will be slightly lighter and less rich, but still creamy.
- Cheese Variations: Use Monterey Jack, Gruyère, or mozzarella instead of cheddar for different flavor profiles and textures.
- Gluten-Free: Replace traditional pasta with gluten-free varieties like rice or chickpea pasta. Keep in mind they may cook slightly differently.
- Breadcrumb Topping: Use crushed crackers, nuts, or even fried onions for a different crunch and flavor twist.
- Add-Ins: Mix in cooked bacon, sautéed mushrooms, or caramelized onions to add depth and personal flair to the dish.
- Spice it Up: Incorporate hot sauce or a pinch of cayenne into the cheese sauce for extra heat and complexity.
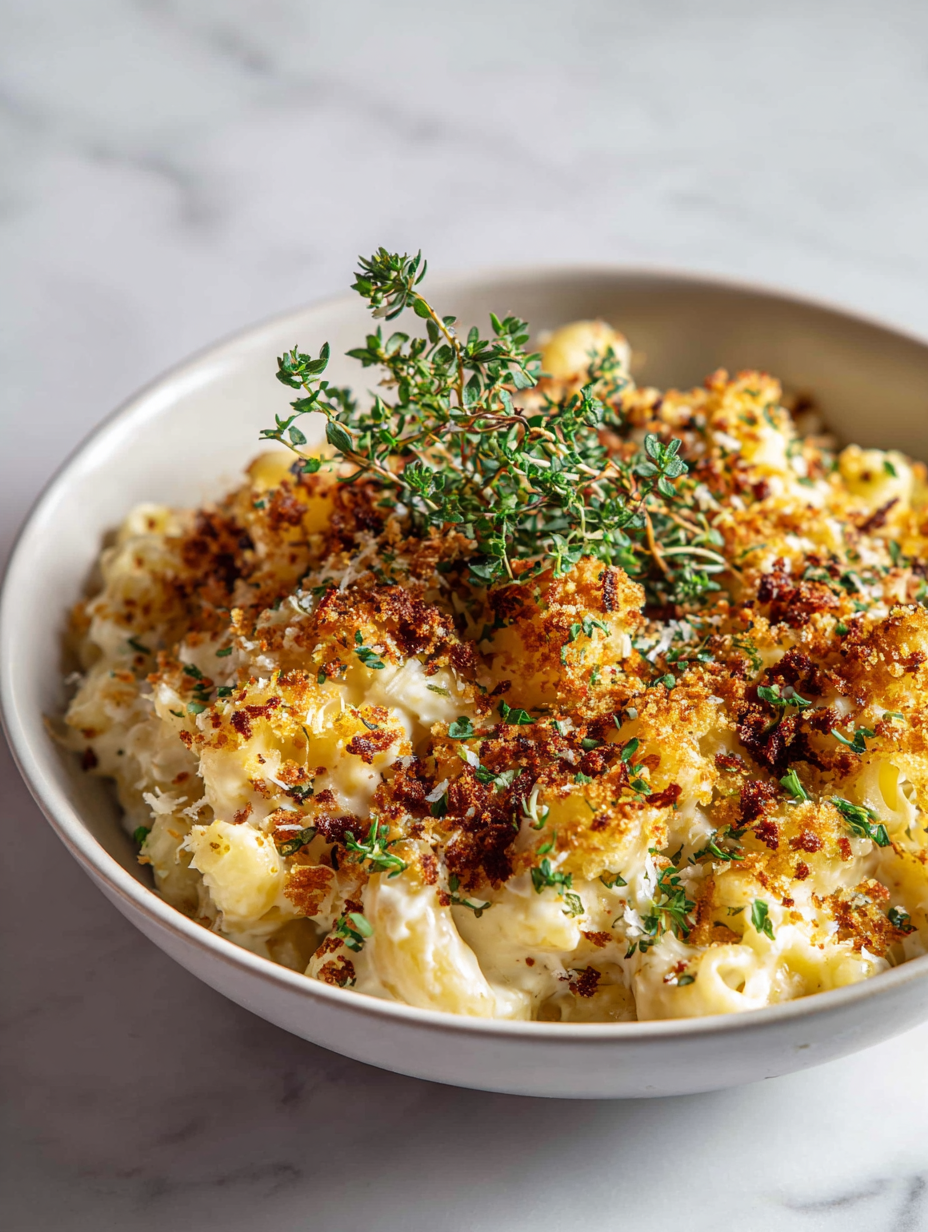
- Herbal Touch: Fresh thyme or parsley can brighten the dish—add just before serving for a fresh pop.
Equipment & Tools
- Large pot: To cook the pasta evenly.
- Saucepan: To prepare the cheese sauce.
- Baking dish: To bake and finish the dish.
- Whisk: To blend the sauce ingredients smoothly.
- Spatula: To mix and transfer components.
Step-by-step guide to baked mac and cheese
- Gather your equipment: a large pot for pasta, a saucepan for cheese sauce, a baking dish (about 20x20cm or 8×8 inches), a whisk, and a spatula. Preheat your oven to 190°C (375°F).
- Cook the pasta: Boil a generous amount of salted water, add the pasta, and cook until just al dente, about 8-10 minutes. Drain and set aside.
- Make the cheese sauce: In the saucepan, melt 2 tablespoons of butter over medium heat. Add 2 tablespoons of flour, whisking constantly for about 1 minute until light golden. Gradually pour in 2 cups of milk, whisking to avoid lumps. Bring to a gentle simmer, then stir in 1 ½ cups of shredded cheddar cheese, a teaspoon of mustard powder, salt, and pepper to taste. Cook until smooth and thickened, about 3-5 minutes.
- Combine pasta and sauce: Add the cooked pasta to the cheese sauce, stirring gently until well coated. Transfer this mixture into your prepared baking dish.
- Prepare the topping: Mix ½ cup of panko breadcrumbs with 1 tablespoon of melted butter, a pinch of smoked paprika, and a handful of grated Parmesan if desired. Spread evenly over the pasta.
- Bake the dish: Place in the preheated oven and bake for 20-25 minutes, until the topping is golden and crispy, and the cheese is bubbling around the edges.
- Check for doneness: The top should be crisp and golden, the cheese bubbling, and the pasta hot throughout. If the topping isn’t crispy enough, broil for an additional 2-3 minutes, watching carefully to prevent burning.
- Rest and serve: Let the baked mac and cheese rest for about 5 minutes after removing from the oven. Serve hot, with a sprinkle of fresh herbs if you like, and enjoy the crispy, cheesy bite.
Allow the baked mac and cheese to rest for 5 minutes before serving. This helps the sauce set slightly and makes serving easier. Finish with a sprinkle of fresh herbs or extra cheese, if desired. Serve hot, ensuring the topping is crispy and the cheese is gooey.
How to Know It’s Done
- Cheese sauce is smooth and coats the pasta evenly.
- Topping is golden and crispy, not soggy.
- Dish is bubbling around the edges, indicating it’s thoroughly heated.
Smoky Baked Mac and Cheese with Crispy Topping
Ingredients
Equipment
Method
- Bring a large pot of salted water to a boil, then add the pasta and cook until just al dente, about 8-10 minutes. Drain and set aside.
- In a saucepan, melt the butter over medium heat, then whisk in the flour and cook for about 1 minute until it turns a light golden color.
- Gradually pour in the milk, whisking constantly to prevent lumps, and bring to a gentle simmer. Let it thicken slightly, about 3-5 minutes.
- Stir in shredded cheddar cheese, mustard powder, and a pinch of salt and pepper. Continue whisking until the cheese melts and the sauce is smooth and creamy.
- Add the cooked pasta to the cheese sauce, stirring gently to coat all the pieces evenly.
- Transfer the cheesy pasta mixture into a greased baking dish, spreading it out evenly.
- In a small bowl, combine the panko breadcrumbs with melted butter, smoked paprika, and grated Parmesan. Spread this mixture evenly over the top of the pasta.
- Bake in a preheated oven at 190°C (375°F) for 20-25 minutes, until the topping is golden brown and crispy, and the cheese is bubbling around the edges.
- Once baked, remove from the oven and let it rest for about 5 minutes. This helps the cheese set slightly and makes serving easier.
- Serve hot, garnished with extra herbs or cheese if desired, and enjoy the warm, cheesy, crispy goodness.
Pro Tips for Perfect Baked Mac and Cheese
- Bolded Mini-Head: Use room temperature cheese to promote smooth melting and avoid clumps.
- Bolded Mini-Head: Toast your breadcrumbs until golden—this boosts flavor and adds a satisfying crunch.
- Bolded Mini-Head: Stir the cheese sauce constantly while adding milk—this prevents lumps and ensures a silky texture.
- Bolded Mini-Head: Broil the topping for a few seconds at the end—watch carefully for a crispy, golden crust.
- Bolded Mini-Head: Use a wide, shallow baking dish—this helps the cheese melt evenly and promotes browning.
- Bolded Mini-Head: Let the baked mac rest for 5 minutes—this allows the cheese to set, making it easier to serve.
- Bolded Mini-Head: Mix a splash of smoked paprika into the topping—this adds a smoky aroma and depth of flavor.
Common mistakes and how to fix them
- MISSED CHECK: Overcooked pasta becomes mush—test early for perfect al dente texture.
- MISSED STEP: Forget to let the dish rest—skips setting, making serving messy and cheese runny.
- MISSED FIX: Topping isn’t crispy—broil for 2-3 minutes, watch carefully to prevent burning.
- MISSED SIGN: Cheese sauce is lumpy—whisk continuously and add milk gradually to smooth out.
Quick fixes and pantry swaps
- When cheese isn’t melting smoothly, splash in a bit more milk and whisk vigorously.
- If topping isn’t crispy, broil for 2-3 minutes, keeping a close eye to prevent burning.
- DUMPED too much salt? Rinse the pasta briefly before combining to reduce saltiness.
- When sauce is lumpy, quickly whisk in warm milk gradually to smooth it out.
- Splash hot sauce or smoked paprika to add instant smoky depth if topping feels bland.
Prep, store, and reheat tips
- You can prep the cheese sauce and cook the pasta a day ahead; store separately in airtight containers in the fridge for up to 24 hours. Reheat gently, stirring until smooth and heated through, about 3-4 minutes on low heat, until it smells warm and cheesy.
- Assemble the baked mac and cheese a few hours before baking. Cover tightly and keep in the fridge. The flavors meld and deepen overnight, making it even more comforting.
- Leftovers keep well for up to 3 days in the fridge. Reheat in the oven at 180°C (350°F) uncovered for 15-20 minutes, until bubbling and crispy on top. The cheese will be gooey, and the topping should shimmer with a golden hue.
- Avoid freezing after baking, as the texture can change—cheese may become grainy and topping soggy. If you must freeze, store unbaked assembled dish for up to 2 months, then bake directly from frozen, adding an extra 10 minutes.
Top questions about baked mac and cheese
1. What cheese should I use for the best melt?
Use a sharp cheddar for a rich, tangy flavor that melts smoothly into the sauce. Mild cheeses can make it less punchy.
2. How long do I cook the pasta before baking?
Cook the pasta just until al dente, about 8-10 minutes. It will soften further during baking without turning mushy.
3. What’s the ideal baking time and temperature?
Bake at 190°C (375°F) for 20-25 minutes until the topping is golden and crispy, and the cheese is bubbling.
4. How do I get a crispy topping?
If the topping isn’t crispy enough, broil for 2-3 minutes, but watch closely to avoid burning.
5. Can I use different breadcrumbs or toppings?
Use panko breadcrumbs for a crunchier topping, toasted with butter until golden for extra flavor.
6. Can I make this dish in advance?
Yes, you can prepare the cheese sauce and cook the pasta a day ahead. Store separately in the fridge and assemble before baking.
7. How do I reheat leftovers?
Reheat in the oven at 180°C (350°F) uncovered for about 15-20 minutes until bubbling and crisp on top.
8. What if the cheese doesn’t melt smoothly?
If the cheese isn’t melting well, make sure the sauce is hot and whisk continuously while adding cheese.
9. Can I substitute the milk?
Swap the milk with half-and-half or heavy cream for a richer, silkier sauce. Non-dairy milks work too, but may alter flavor.
10. How do I prevent overcooked pasta or runny cheese?
Avoid overcooking the pasta; check early. Also, let the dish rest for 5 minutes after baking to set the cheese.
This baked mac and cheese isn’t just about the cheesy comfort; it’s about those crispy edges and smoky bites that make every forkful memorable. It’s a dish that’s rooted in nostalgia but with a twist that keeps it interesting, especially when you need something satisfying and a little special. Every time I make it, I find a new reason to love this simple, honest recipe.
In the end, it’s also about the messy, imperfect moments in the kitchen that lead to the best results. A little trial, a pinch of chaos, and a lot of tasting—this dish reminds me that good food is often about the honest process and the small surprises along the way.
Hi there! I’m Himani and welcome to Val’s Recipe Box. This little corner of the internet didn’t begin with me. It began with Val my neighbourhood aunt whose kitchen held more warmth than any fireplace ever could.


 This little corner of the internet didn’t begin with me.
It began with Val my neighbourhood aunt whose kitchen held more warmth than any fireplace ever could.
She was more of a friend and I’ve come to know her in the most unexpected way.
This little corner of the internet didn’t begin with me.
It began with Val my neighbourhood aunt whose kitchen held more warmth than any fireplace ever could.
She was more of a friend and I’ve come to know her in the most unexpected way.