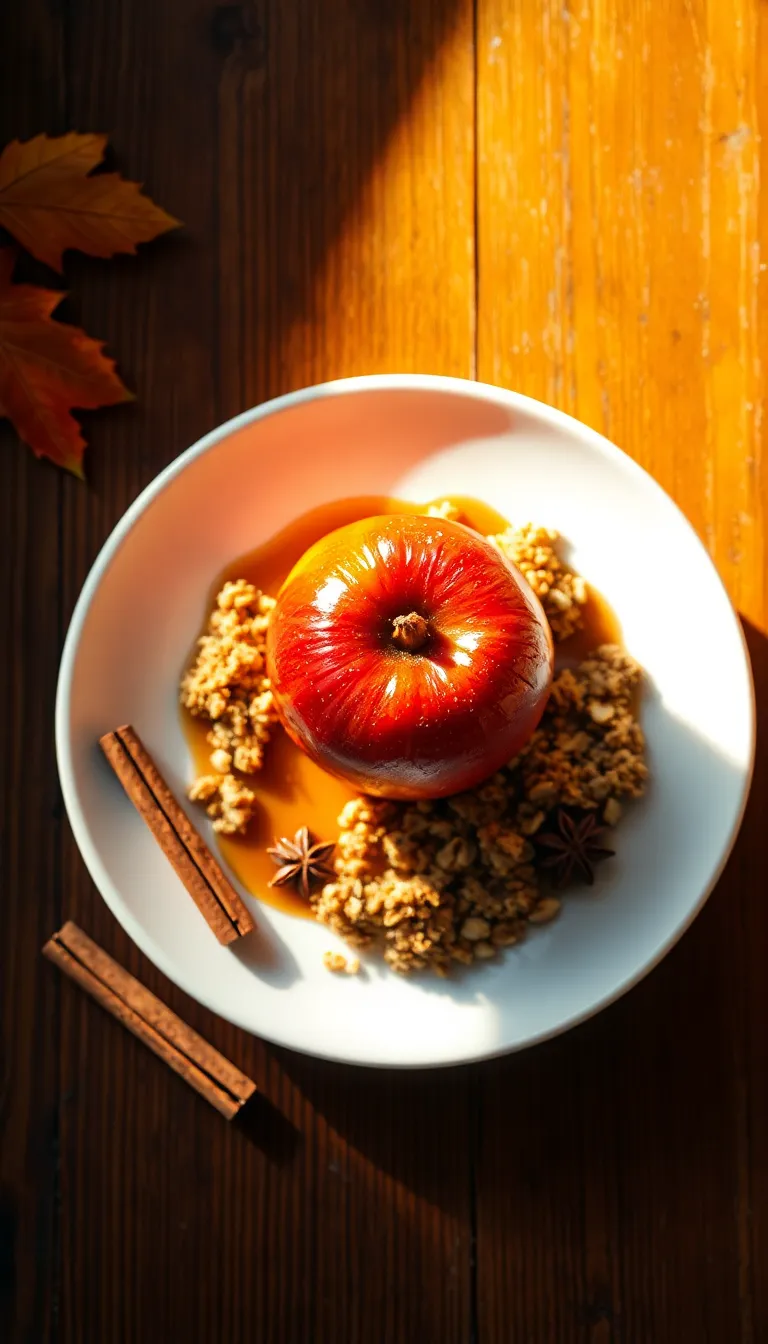
Imagine the comforting aroma of cinnamon and baked apples wafting through your kitchen, signaling the arrival of a delightful treat that’s as easy to make as it is delicious to eat. Whether you’re a novice or a seasoned pro, these baked apples with oats and brown sugar offer a simple yet indulgent way to embrace the cozy flavors of fall. The heart of this recipe lies in the harmonious blend of tender, juicy apples with a crispy oat topping that’s kissed with the rich sweetness of brown sugar.
What makes this recipe truly special is its ability to transform humble ingredients into something extraordinary. As you dive into each bite, the warmth of cinnamon and the caramel-like notes of brown sugar dance on your palate, creating a sensory experience that’s both familiar and exciting. Rest assured, this dish is not only easy to prepare but also guaranteed to impress, giving you the confidence to bring a touch of homemade magic to your table.
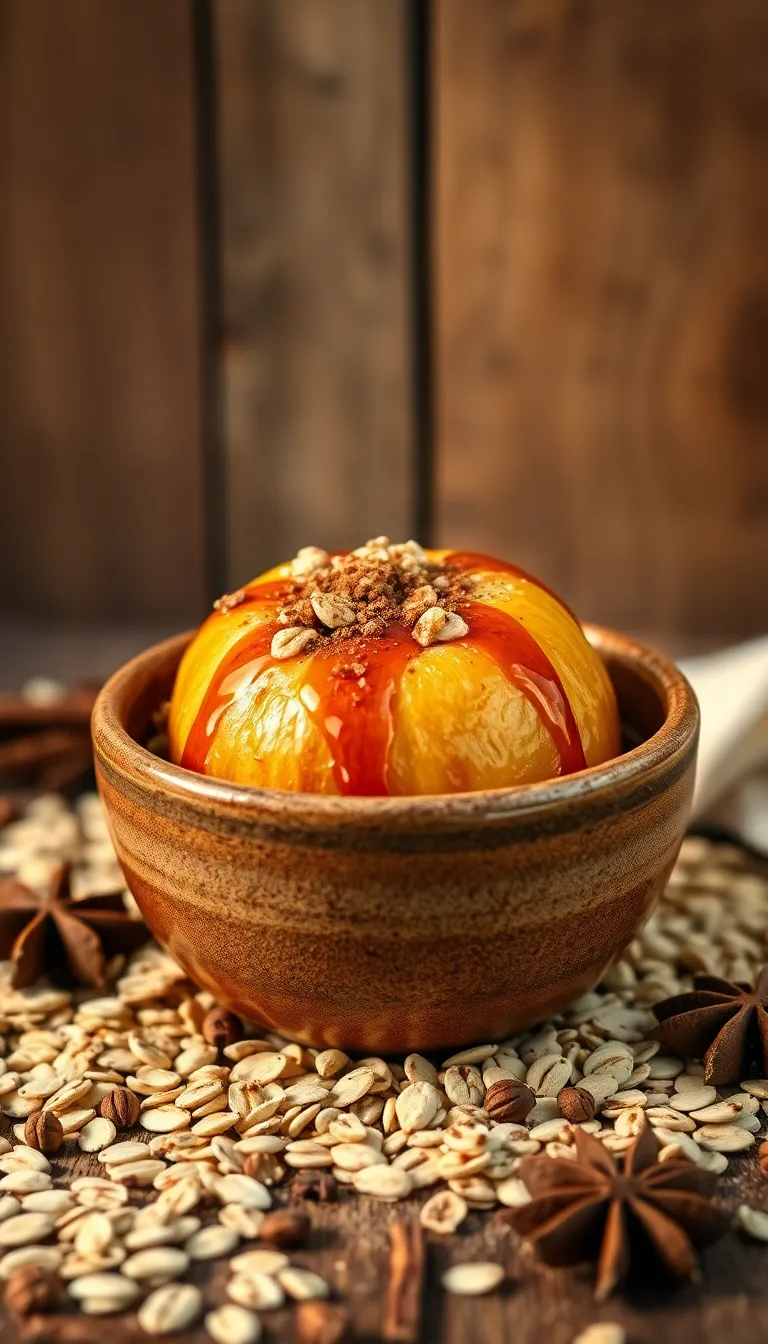
About This baked apples with oats and brown sugar Recipe
- Cozy and Comforting: This recipe brings the warmth and comfort of baked apples to your table, perfect for a chilly day or a cozy night in.
- Quick and Easy: With minimal preparation and just 30 minutes in the oven, this dish is a time-saving dessert that doesn’t compromise on flavor.
- Nutritious Delight: Packed with fiber-rich oats and nutrient-dense apples, this dessert provides a healthier alternative to satisfy your sweet tooth.
- Rich Flavor Profile: The combination of sweet, tart apples and the caramel-like flavor of brown sugar creates a deliciously balanced treat.
- Customizable: Easily adapt this recipe with your favorite nuts, spices, or dried fruits to make it uniquely yours.
- Kid-Friendly: A fun and simple recipe that even young cooks can help with, making it an excellent family activity.
Why You’ll Love This Recipe
- Quick and Easy: This recipe requires minimal prep time, making it perfect for a quick dessert or a cozy snack.
- Warm and Inviting Flavors: The combination of baked apples with oats and brown sugar creates a comforting and aromatic treat that’s perfect for any season.
- Healthier Dessert Option: Using oats and fresh apples adds fiber and nutrients, making it a more wholesome choice compared to traditional sugary desserts.
- Customizable: Easily adapt this recipe by adding your favorite nuts, dried fruits, or spices to suit your personal taste preferences.
- Simple Ingredients: Utilize pantry staples like oats and brown sugar, along with fresh apples, to create a delicious dessert without the need for a special trip to the grocery store.
- Perfect for Gatherings: Its delightful aroma and flavor make it a crowd-pleaser at family gatherings or festive occasions.
Ingredients
- 4 large apples (such as Granny Smith or Honeycrisp, cored and halved)
- 1 cup old-fashioned oats
- 1/2 cup brown sugar, packed
- 1/4 cup unsalted butter, melted
- 1 tsp ground cinnamon
- 1/2 tsp ground nutmeg
- 1/4 tsp salt
- 1/4 cup chopped walnuts or pecans (optional)
- 1/4 cup raisins or dried cranberries (optional)
- 1/2 cup apple cider or water
- 1/2 tsp vanilla extract (optional)
Chopped nuts add a crunchy texture, but can be omitted or substituted with seeds for a nut-free version.
These add sweetness and texture. Substitute with other dried fruits if preferred.
Apple cider enhances the apple flavor, but water can be used as a neutral alternative.
Vanilla adds a depth of flavor, but can be left out if not available.
Kitchen Tools You’ll Need
- Apple Corer: Use this to easily remove the cores from the apples, creating space for the oat and brown sugar filling. If you don’t have one, a small paring knife can be used carefully.
- Sharp Knife: Essential for cutting the tops off the apples and making small incisions to prevent splitting during baking.
- Mixing Bowl: Needed for combining oats, brown sugar, and other filling ingredients. A medium-sized bowl should suffice.
- Spoon: A regular spoon will help you fill the apples with the oat and brown sugar mixture.
- Baking Dish: Use a baking dish that can hold all the apples snugly. An 8×8-inch dish or similar size works well.
- Aluminum Foil: Cover the baking dish with foil to help the apples bake evenly and prevent the tops from over-browning. If unavailable, a lid or additional baking sheet can be used.
- Oven Mitts: Important for safely handling the hot baking dish when removing it from the oven.
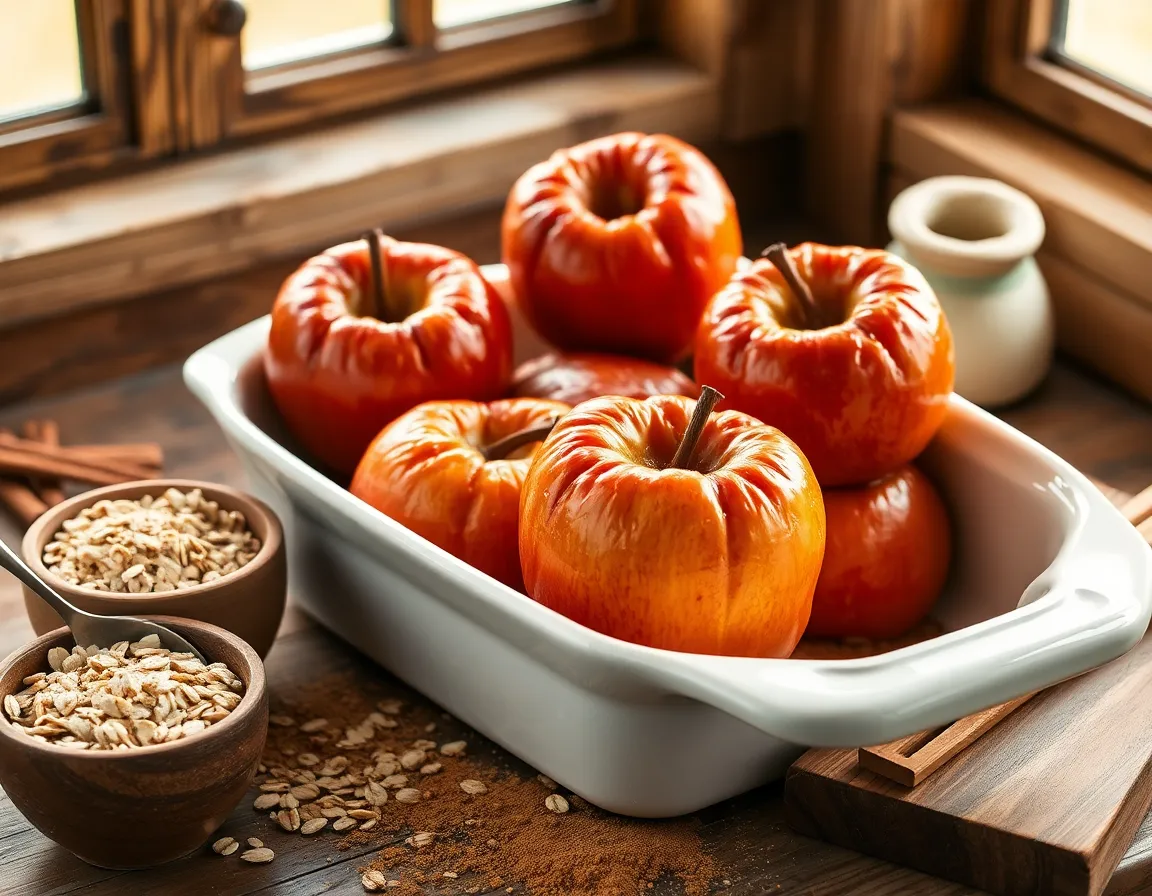
Preparation Steps
- Preheat your oven to 350°F (175°C) and position the oven rack in the middle.
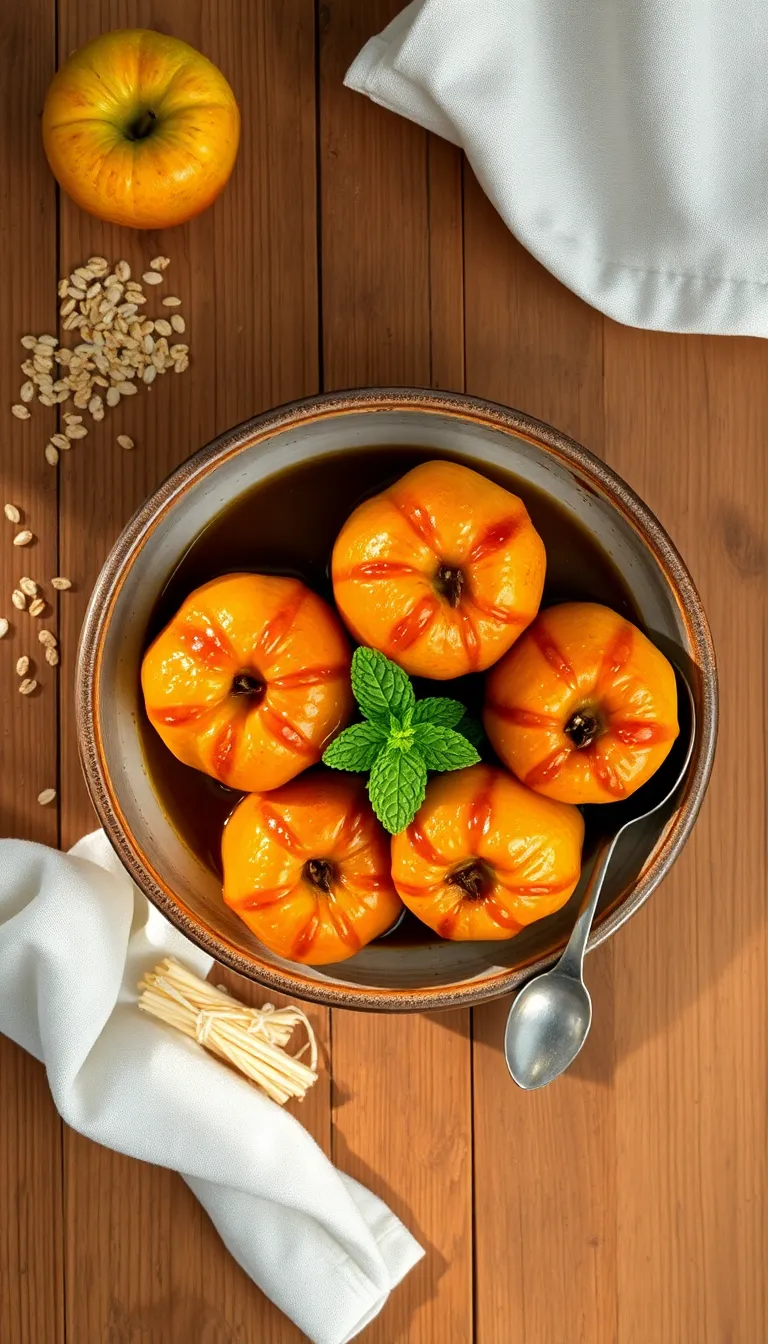
- Core the apples using an apple corer or a sharp knife, being careful to remove the seeds and tough center without cutting through the bottom.
- Mix oats, brown sugar, cinnamon, and a pinch of salt in a bowl until evenly combined.
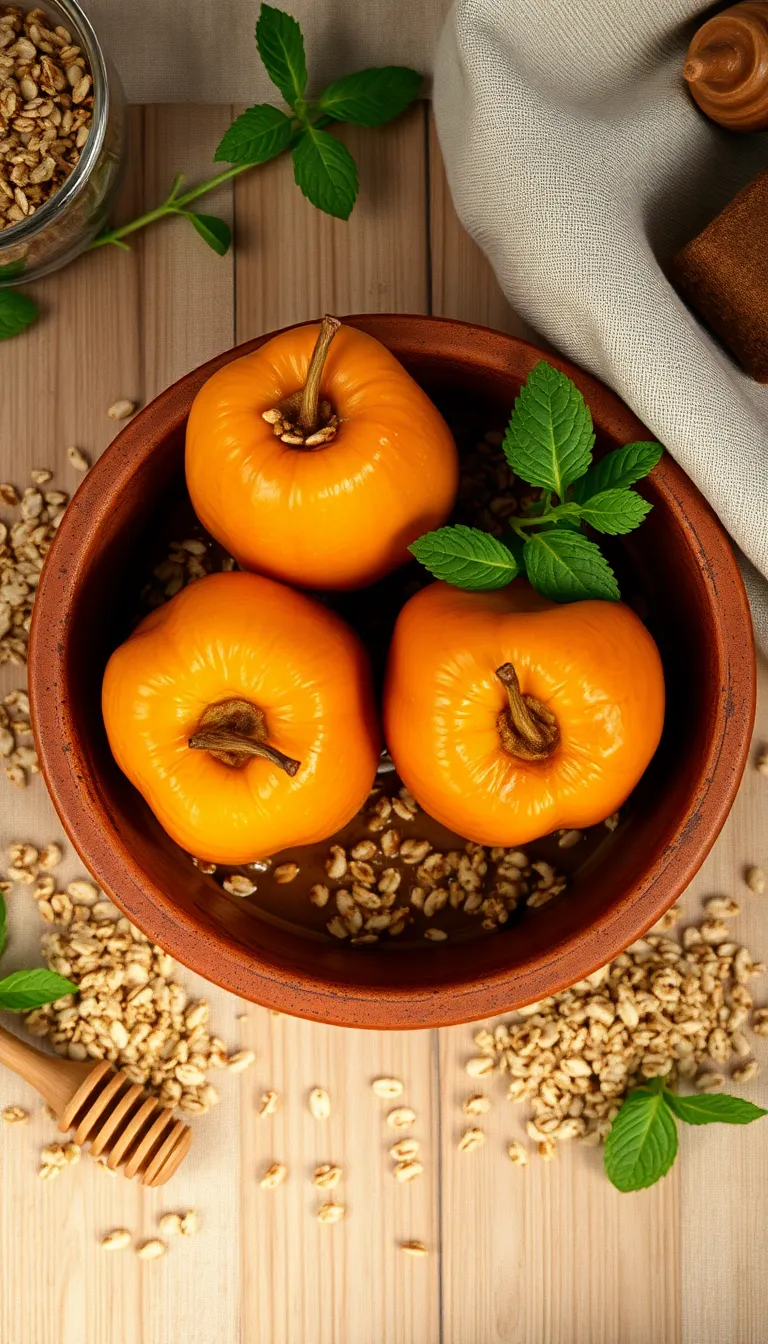
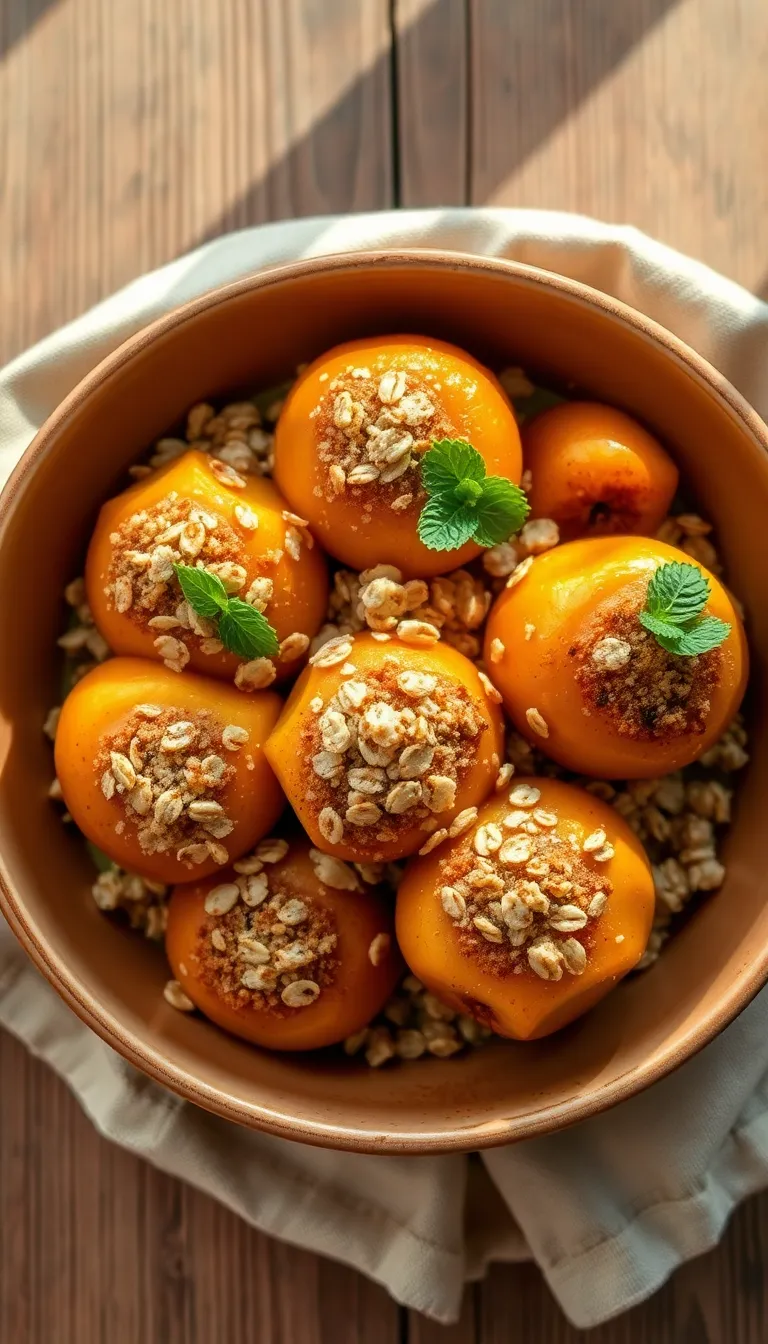
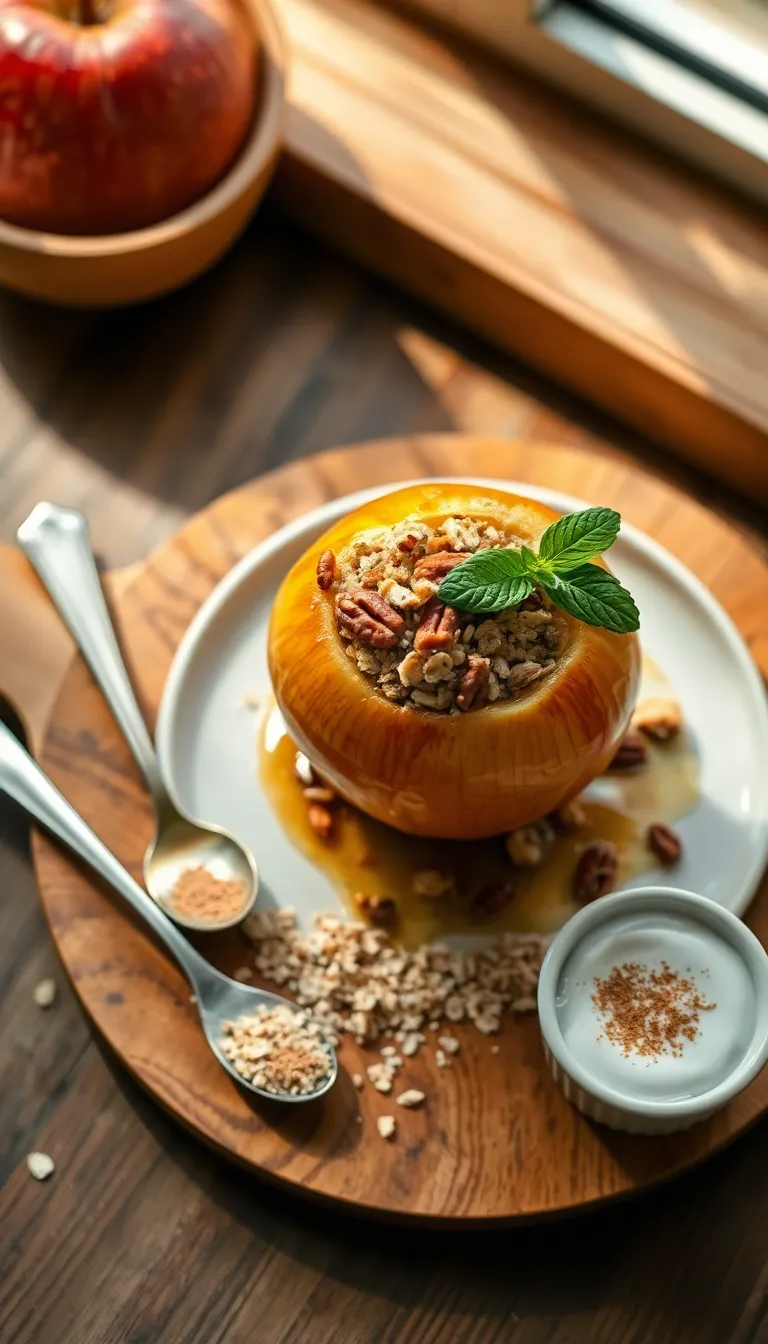
- Stuff the oat mixture into the center of each apple, pressing down slightly to compact it.
- Place the apples in a baking dish and pour about 1/4 inch of water or apple juice into the bottom of the dish to help steam the apples.
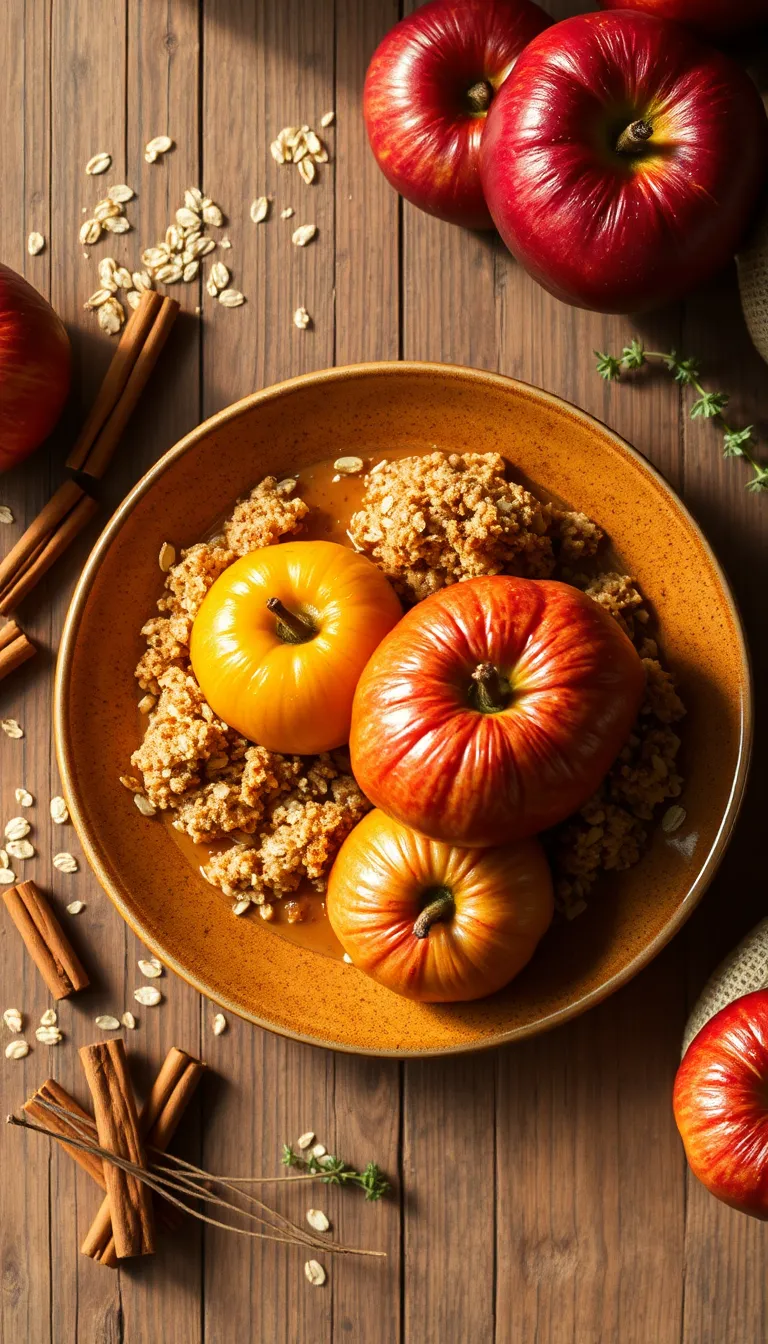
- Bake the apples for about 35-45 minutes, or until they are tender when pierced with a fork and the tops are golden brown.
- Remove the baked apples from the oven and let them cool for a few minutes before serving. Be careful, as the filling will be very hot.
Serving Suggestions
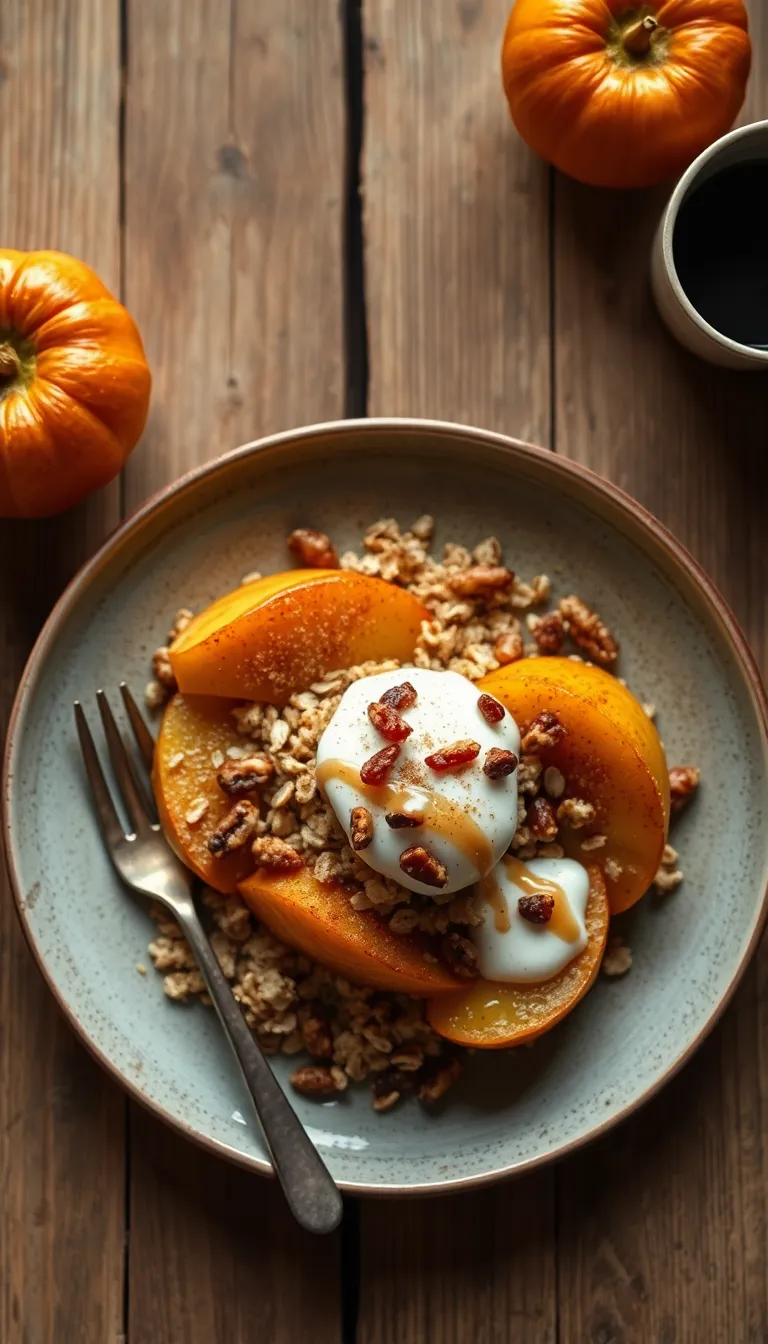
- With Vanilla Ice Cream: Serve the warm baked apples alongside a scoop of vanilla ice cream. The creaminess and slight chill of the ice cream create a delightful contrast with the warm, spiced apples, enhancing the dessert experience.
- Drizzle of Caramel Sauce: Add a drizzle of caramel sauce over the baked apples for extra sweetness and a touch of indulgence. The caramel complements the brown sugar and adds a luscious, glossy finish.
- Sprinkling of Toasted Nuts: Garnish with toasted walnuts or pecans for a satisfying crunch. The nuts provide a contrasting texture and complement the oats, adding depth to each bite.
- Paired with Herbal Tea: Serve the baked apples with a cup of chamomile or mint tea. The light, aromatic flavors of the tea balance the sweetness of the dessert, making it a perfect choice for an afternoon treat.
- Garnished with Fresh Mint Leaves: Add a few fresh mint leaves on top for a pop of color and a refreshing hint. Mint enhances the presentation and offers a subtle, fragrant contrast to the warm spices.
- Accompanied by Greek Yogurt: Serve the baked apples with a dollop of Greek yogurt for a healthier option. The yogurt adds creaminess and a slight tang that pairs well with the sweetness of the apples, making it suitable for a brunch or breakfast setting.
Pro Tips for Perfect Results
- Choose the Right Apples: Opt for firm, tart apples like Granny Smith or Honeycrisp. They hold their shape well during baking and balance the sweetness of the brown sugar.
- Enhance the Filling: Add a pinch of salt and a dash of cinnamon to the oats and brown sugar mixture. This will enhance the overall flavor complexity and depth.
- Prevent Sogginess: To avoid soggy oats, lightly toast them in a dry pan for 2-3 minutes before mixing with the other filling ingredients. This will keep them crunchy even after baking.
- Make Ahead for Convenience: Prepare the filling and core the apples up to a day in advance. Store them separately in airtight containers in the refrigerator. Assemble just before baking for fresh results.
- Chef’s Secret for Extra Flavor: Brush the inside of the cored apples with a bit of melted butter and a sprinkle of nutmeg before adding the filling. This adds a luxurious richness and warmth to each bite.
- Bake for Texture: Cover the apples with foil for the first 20 minutes of baking to steam them, then remove the foil for the last 15 minutes to brown the top of the filling, achieving the perfect texture contrast.
Common Mistakes to Avoid
- Using the Wrong Type of Apples: Some apples turn mushy when baked, which can ruin the texture of your dessert. Choose firm varieties like Granny Smith or Honeycrisp for the best results. These types maintain their shape and provide a nice contrast to the soft oat topping.
- Overfilling the Apples: It’s tempting to pack in as much filling as possible, but overfilling can cause the oats and sugar to spill out and burn in the oven. Fill the apples just to the top, allowing room for the mixture to expand slightly as it cooks.
- Skipping the Core Removal: Failing to properly core the apples can leave tough, inedible bits in your dessert. Use an apple corer or a small paring knife to carefully remove the core without cutting through the bottom of the apple, creating a perfect cavity for the filling.
- Not Preheating the Oven: Placing apples in a cold oven can lead to uneven cooking. Always preheat your oven to the specified temperature before baking. This ensures that the apples and topping cook evenly, achieving the desired texture and flavor.
- Ignoring the Topping Mixture Consistency: If the topping is too dry, it won’t stick together well; if too wet, it may become soggy. Mix the oats, brown sugar, and butter until crumbly and just moist enough to hold together when pressed. This balance creates a perfect crunchy topping.
- Forgetting to Add Liquid to the Baking Dish: A small amount of water or apple juice in the baking dish prevents the apples from drying out. Add about a half cup of liquid to the bottom of the dish before baking to keep the apples moist and flavorful.
Storage and Reheating Tips
- Allow the baked apples to cool to room temperature before storing. This prevents condensation which can make the topping soggy.
- Transfer the baked apples to an airtight container. Use glass or BPA-free plastic containers to maintain freshness and prevent any odor absorption.
- Store the container in the refrigerator for up to 4 days. Ensure the refrigerator is set to 40°F (4°C) or below to maintain safety and quality.
- If you plan to store the baked apples for longer, consider freezing them. Wrap each apple tightly in plastic wrap or foil, then place them in a freezer-safe container or bag.
- Freeze for up to 2 months. Label the container with the date to keep track of its storage time.
- To reheat from the refrigerator, preheat your oven to 350°F (175°C). Place the baked apples in an oven-safe dish and cover with foil to prevent the topping from over-browning. Heat for about 15-20 minutes or until warmed through.
- For microwave reheating, place a single serving of baked apples in a microwave-safe dish. Cover loosely with a microwave-safe lid or wax paper and heat on medium power for 1-2 minutes, checking and stirring halfway through.
- If reheating from frozen, thaw the baked apples in the refrigerator overnight before following the oven reheating instructions.
- When reheating, ensure the internal temperature of the apples reaches 165°F (74°C) for safe consumption.
- Avoid repeated reheating as this can lead to a loss of texture and flavor.
Proper storage and reheating methods ensure that your baked apples with oats and brown sugar remain delicious and safe to eat. By following these guidelines, you can enjoy your leftovers without compromising on quality or safety.
Frequently Asked Questions
Frequently Asked Questions
Q: Can I use a different type of apple for this recipe?
- Yes, you can use any apple variety you prefer. However, firmer apples like Granny Smith or Honeycrisp hold their shape better during baking.
Q: Can I substitute rolled oats with quick oats?
- Quick oats can be used, but they may result in a slightly mushier texture. Rolled oats provide a better texture for this dish.
Q: What if I don’t have brown sugar?
- You can substitute brown sugar with white sugar, but consider adding a tablespoon of molasses to mimic the flavor of brown sugar.
Q: How can I make this dish vegan?
- To make it vegan, use a non-dairy butter substitute and ensure any sugar used is vegan-friendly.
Q: What should I do if my apples are too soft after baking?
- If the apples are too soft, try reducing the baking time, or choose firmer apple varieties next time for better structure.
Q: Can I add nuts or other ingredients to the filling?
- Yes, feel free to add chopped nuts like walnuts or pecans, dried fruits, or spices like cinnamon and nutmeg to enhance the flavor.
Final Thoughts
This baked apples with oats and brown sugar recipe combines the comforting flavors of tender apples and a crunchy, sweet topping. It’s a delightful mix of textures and flavors that makes it a standout dessert or a cozy breakfast option. The simplicity and wholesome ingredients make it a must-try for anyone looking for a quick yet satisfying treat.
Feel free to add your own twist by incorporating your favorite spices or nuts. Whether you choose to add a scoop of vanilla ice cream or a dollop of whipped cream, this recipe is versatile and welcoming of creativity. Let your imagination guide you and make this dish uniquely yours.
We warmly invite you to try this recipe and experience the joy of a home-cooked dessert that feels like a hug in a bowl. Happy baking!
Hi there! I’m Himani and welcome to Val’s Recipe Box. This little corner of the internet didn’t begin with me. It began with Val my neighbourhood aunt whose kitchen held more warmth than any fireplace ever could.


 This little corner of the internet didn’t begin with me.
It began with Val my neighbourhood aunt whose kitchen held more warmth than any fireplace ever could.
She was more of a friend and I’ve come to know her in the most unexpected way.
This little corner of the internet didn’t begin with me.
It began with Val my neighbourhood aunt whose kitchen held more warmth than any fireplace ever could.
She was more of a friend and I’ve come to know her in the most unexpected way.
