Setting up for beer can chicken means balancing a whole bird on an open can, often messy and splattery. You’ll hear the crack of the can opening and the sizzle as the skin hits the hot grill grate.
Prepping involves seasoning the bird thoroughly—rubbing it with salt, pepper, and herbs—then carefully positioning it over the can to keep it upright during roasting or grilling.
The crack of the can opening, the hiss of steam escaping as the lid is lifted, and the sizzling sound of the skin crisping over the hot grill—those are the sounds that mark this dish’s journey from raw bird to crispy masterpiece.
Essential ingredients and swaps
- Whole chicken: I like a good-sized bird, about 4-5 pounds, for juicy meat and crispy skin. Swap in a smaller bird if you’re short on grill space or want quicker cooking.
- Beer: A standard can of lager or pale ale works great—brings smoky depth and crispness. You could try cider or soda for a sweet twist, but don’t skip the fizz for steaming.
- Salt and pepper: Basic but essential—season generously inside and out. Use smoked salt or a spicy rub if you want extra flavor layers.
- Herbs and spices: I use paprika, garlic powder, and thyme—adds warmth and aroma. Feel free to mix in cumin, chili powder, or a squeeze of lemon zest for brightness.
- Oil or butter: Brushed on skin for extra crispness. Olive oil is my go-to, but melted butter gives a richer, more golden finish. Skip if you’re watching calories.
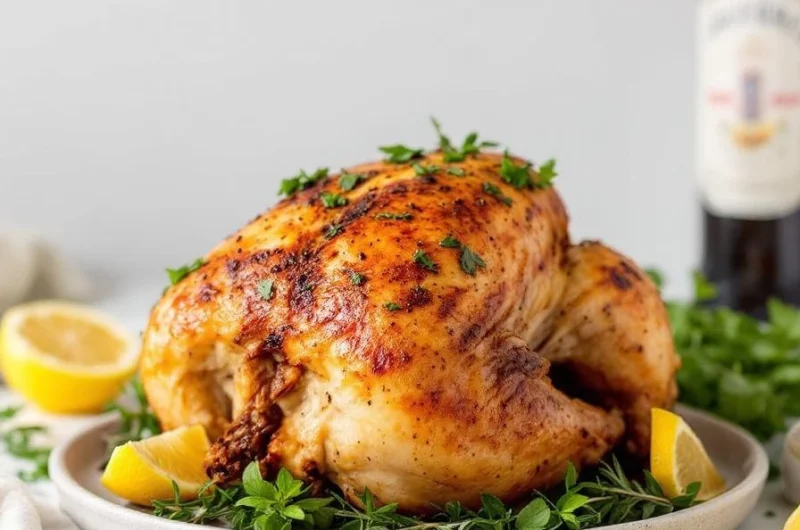
- Additional aromatics: Lemon slices, garlic cloves, or onion wedges go in the cavity or on the grill grate—boosts aroma and flavor. Skip if you want a purer chicken taste.

Beer Can Chicken
Ingredients
Equipment
Method
- Pat the chicken dry thoroughly with paper towels or a clean cloth, especially the skin, to ensure crispiness. Rub salt, pepper, paprika, garlic powder, and thyme all over the bird, inside and out, then let it sit while you prepare the grill.
- Open the beer can and pour out or drink about half to make room for the aromatics if desired. Insert lemon slices, garlic cloves, or onion wedges into the can for extra flavor, then place the can on a stable surface.
- Hold the chicken upright, then carefully lower it onto the beer can, positioning the cavity over the can and balancing the bird on its legs. Tuck the wing tips under the body to prevent burning.
- Preheat your grill to medium-high heat, aiming for about 375-400°F. Brush the chicken skin with oil or melted butter for extra crispness and color.
- Place the chicken standing upright on the grill grates, ensuring stability. Close the lid and cook for about 60 minutes, or until the skin is golden and crispy, and a meat thermometer inserted into the thickest part of the thigh reads 165°F.
- During cooking, check periodically to ensure the chicken isn’t burning; adjust placement or heat if necessary. The skin should crackle and turn deep golden brown.
- Once cooked, carefully transfer the chicken to a cutting board or platter and let it rest for 10 minutes. This helps retain juices and makes carving easier.
- Remove the beer can carefully, then carve the chicken, revealing juicy meat with crispy skin. Serve hot, garnished with your favorite sides.
Notes
Common mistakes and how to fix them
- FORGOT to dry the chicken skin thoroughly before roasting—results in less crispiness. Pat dry with paper towels.
- DUMPED marinade directly into the cavity—can water down seasoning and cause flare-ups. Keep marinade outside the bird.
- OVER-TORCHED the skin early in cooking—leads to burnt spots. Keep an eye and move bird if needed.
- MISSED resting time after cooking—causes juices to escape. Let the chicken rest for 10 minutes before carving.
Make-Ahead and Storage Tips
- You can season the chicken a day in advance—keeps the skin flavorful and helps the salt penetrate overnight.
- Wrap the seasoned bird tightly in plastic wrap and store in the fridge for up to 24 hours—avoid drying out the skin.
- The marinade or rub flavors deepen overnight, making the skin more savory and well-seasoned after cooking.
- Refrigerate the beer can and any aromatics separately if prepping far ahead—combine just before grilling.
- Cooked chicken is best enjoyed within 2 hours at room temperature or within 4 hours if kept warm, but refrigerate leftovers promptly.
- To reheat, carve and warm in a low oven or covered microwave until the skin crisps up again—listen for the crackle and smell for doneness.
FAQs
1. What does the cooking process sound like?
You’ll smell the crack of the can opening, followed by the sizzling sound of skin crisping over the grill, and the smoky aroma of the seasonings. It’s a tactile experience from start to finish.
2. How does the chicken feel when done?
The skin crackles and pops as it hits the hot grill, releasing a burst of smoky, roasted aroma. When you carve, expect a juicy, tender meat with a slight smoky char on the skin.
3. What should I look for in the finished chicken?
The skin should be golden-brown and crispy under your fingertips, with a juicy, tender meat that gives slightly when pressed. The aroma is rich, smoky, with hints of herbs and garlic.
4. How do I fix overcooked or undercooked chicken?
If the skin is burnt or blackened, reduce the heat or move the chicken to a cooler part of the grill. If the meat feels tough, it might need more time or a lower temperature.
5. How should I reheat leftovers for best texture?
Reheat the carved chicken in a low oven until the skin crisps again and the meat is warmed through. Listen for the crackle and smell for that fresh, roasted aroma before serving.
Hi there! I’m Himani and welcome to Val’s Recipe Box. This little corner of the internet didn’t begin with me. It began with Val my neighbourhood aunt whose kitchen held more warmth than any fireplace ever could.


 This little corner of the internet didn’t begin with me.
It began with Val my neighbourhood aunt whose kitchen held more warmth than any fireplace ever could.
She was more of a friend and I’ve come to know her in the most unexpected way.
This little corner of the internet didn’t begin with me.
It began with Val my neighbourhood aunt whose kitchen held more warmth than any fireplace ever could.
She was more of a friend and I’ve come to know her in the most unexpected way.