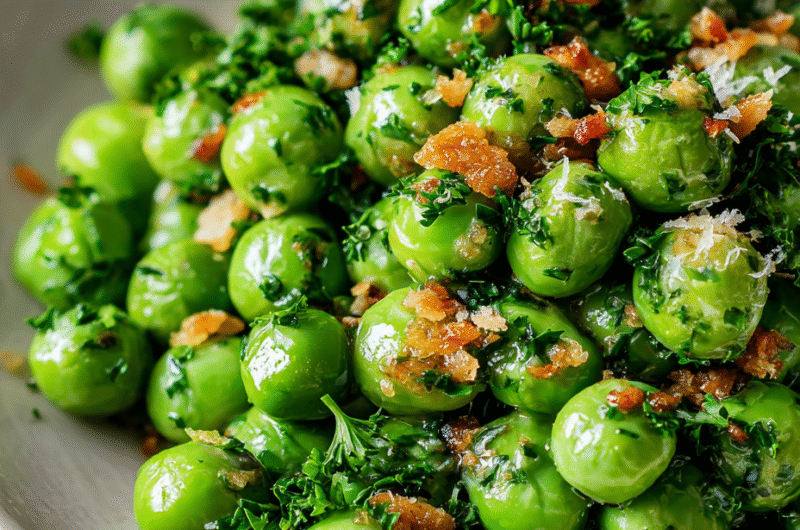
Sometimes, the simplest ingredients come together in the most unexpectedly satisfying ways. This butter garlic peas recipe is one of those little wins you stumble upon when you’re craving something quick, honest, and a little indulgent. It’s not flashy, but it’s got a quiet charm that makes it hard to resist spooning more onto your plate.
What makes this dish special isn’t just the flavor—it’s how it transforms humble peas into a buttery, garlicky treat that feels like a cozy secret. I love tossing it together on busy weeknights when I want comfort without fuss, and it always reminds me that sometimes, fewer ingredients mean more room for flavor to shine.
There’s a nostalgic quality to this dish, like a quick side from childhood, but with just enough tweak to keep it interesting. It’s a small reminder that you don’t need fancy stuff to make food feel special. Just butter, garlic, and peas—simple, honest, and a little bit magic in every bite.
Focusing on the overlooked magic of simple butter garlic peas, highlighting their nostalgic comfort and how a few tweaks can elevate everyday greens into a savory side that feels indulgent yet effortless.
The story behind this recipe
- I first made this dish late one winter evening, looking for something warm and familiar after a long day. The scent of melting butter and garlic filling the kitchen made me pause—this simple combo has roots in my childhood, but I kept tweaking it over the years until it felt just right. Now, it’s my go-to when I want a quick veggie that feels indulgent without fuss.
- There’s a quiet satisfaction in turning humble peas into something so flavorful—like catching a little secret in your own kitchen. It’s a reminder that simple ingredients, treated well, can surprise you. I often serve it with just a slice of crusty bread, letting the garlic butter pool around each bite.
- heading: The story behind this recipe
Key ingredients at a glance
- Frozen peas: I love that bright, sweet pop they have, even when slightly thawed. If fresh isn’t available, frozen works every time, just rinse and drain well.
- Butter: I use unsalted butter for control, but salted can add a nice depth. Watch your heat—too hot, and it’ll brown too quickly, risking a burnt flavor.
- Garlic: Fresh is best for that pungent, aromatic punch. If you’re out, garlic powder can work—just adjust the quantity to avoid overpowering.
- Olive oil: A splash helps prevent butter from burning and adds a fruity note. Skip it if you want a richer, butter-forward taste.
- Lemon juice: Just a squeeze to brighten everything up—think zesty, almost citrusy aroma. Lime can be a fun swap for a different twist.
- Salt & pepper: Essential for balancing the sweetness and adding depth. Don’t be shy—peas love a good seasoning to bring out their best.
- Red pepper flakes: Optional, but a pinch adds a gentle heat and a little bit of chaos—perfect for balancing richness.
Spotlight on key ingredients
Butter garlic peas:
- Frozen peas: I love that bright, sweet pop they have, even when slightly thawed. If fresh isn’t available, frozen works every time, just rinse and drain well.
- Butter: I use unsalted butter for control, but salted can add a nice depth. Watch your heat—too hot, and it’ll brown too quickly, risking a burnt flavor.
- Garlic: Fresh is best for that pungent, aromatic punch. If you’re out, garlic powder can work—just adjust the quantity to avoid overpowering.
Notes for ingredient swaps
- Dairy-Free: Swap butter for coconut oil or a neutral plant-based butter. Expect a slightly different richness and aroma, but still deliciously satisfying.
- Vegan: Use olive oil or a vegan butter substitute. It won’t melt quite the same as butter but will still carry garlic flavor well.
- Herb Variations: Fresh thyme or parsley can replace garlic for a different herbal note. These add freshness but lack the pungency of garlic.
- Sweet Peas: Fresh peas can be used instead of frozen. They’ll be crisper and require slightly less cooking time, about 2-3 minutes.
- Garlic Alternatives: Garlic powder or garlic granules work in a pinch—use about half the amount to avoid overpowering the dish.
- Oil Choices: Avocado oil can handle higher heat and adds a mild, buttery flavor. Use in place of butter for a lighter, less rich dish.
- Lemon Substitute: Lime juice offers a slightly different brightness, and vinegar (like apple cider) can add acidity if you want a tangy kick.
Equipment & Tools
- 12-inch skillet: Provides even heat for sautéing and cooking peas evenly.
- Slotted spoon: Helps stir and serve peas without excess butter or garlic.
- Sharp knife: Minces garlic finely for even flavor release.
Step-by-step guide to butter garlic peas
- Equipment & Tools: Gather a 12-inch skillet (for even heat), a slotted spoon (for peas), and a sharp knife (for garlic).
- Heat the skillet over medium-low (about 150°C / 300°F). Add 2 tbsp unsalted butter, let it melt gently, bubble, and smell warm and nutty.
- Add 3 minced garlic cloves (about 1 tbsp). Sauté until fragrant, about 30 seconds, stirring constantly to prevent burning. You want a fragrant, slightly golden aroma.
- Toss in 1 cup frozen peas (no need to thaw). Increase heat to medium (about 180°C / 350°F). Stir to coat peas with butter and garlic. Cook for 3-4 minutes, peas should be plump, bright green, and slightly tender.
- Check for doneness: peas should be heated through, butter bubbling softly, garlic fragrant without burnt smell. If they stick or brown too quickly, lower heat and add a splash of water or more butter.
- Finish with a squeeze of lemon juice (about 1 tsp) and season with salt and freshly ground pepper to taste. Stir well and cook for another 30 seconds. Peas should glisten and smell zesty.
- Remove from heat. Rest for 1 minute to let flavors meld. Plate immediately, spooning peas into a serving dish. Garnish with a tiny sprinkle of red pepper flakes if desired.
Once plated, serve immediately while warm. A quick sprinkle of flaky sea salt or additional lemon zest can brighten the dish. Enjoy the buttery, garlicky aroma as you dig in.
How to Know It’s Done
- Butter should be bubbling gently, not browning or burning.
- Garlic is fragrant but not burnt—avoid bitter taste.
- Peas are bright green, heated through, and slightly tender.
Butter Garlic Peas
Ingredients
Equipment
Method
- Gather your skillet, slotted spoon, and sharp knife to prepare for cooking.
- Place the skillet over medium-low heat and add the butter, letting it melt gently until it bubbles softly and smells warm and nutty.
- Add the finely minced garlic to the skillet and sauté for about 30 seconds, stirring constantly. You’ll notice a fragrant aroma and the garlic will turn slightly golden without browning.
- Pour in the rinsed and drained frozen peas, raising the heat to medium and stirring to coat them evenly in the garlic butter mixture. Cook for 3-4 minutes, until the peas are bright green, plump, and heated through.
- Once the peas are tender and glistening, squeeze in the lemon juice and season with salt, pepper, and red pepper flakes if using. Stir well and cook for another 30 seconds, allowing the flavors to meld.
- Remove the skillet from heat. Use a slotted spoon to transfer the peas to a serving dish, making sure they are evenly coated with butter and garlic. Serve immediately for the best flavor and texture.
Notes
Pro tips for perfect butter garlic peas
- Bolded mini-head: Use medium-low heat to melt butter slowly; prevents burning and keeps garlic fragrant.
- Bolded mini-head: Sauté garlic until fragrant, about 30 seconds—avoid browning to prevent bitterness.
- Bolded mini-head: Toss peas in and cook just until heated through—bright green and slightly tender, about 3-4 minutes.
- Bolded mini-head: Add a splash of lemon juice at the end to brighten flavors and enhance freshness.
- Bolded mini-head: Stir frequently to evenly coat peas and prevent garlic from sticking or burning.
- Bolded mini-head: For even cooking, use a wide skillet—pears should cook uniformly without overcrowding.
- Bolded mini-head: Adjust seasoning last; taste and season with salt, pepper, and optional red pepper flakes for balance.
Common mistakes and how to fix them
- FORGOT to watch heat; butter can burn quickly. Use medium-low and stir constantly.
- DUMPED peas in still frozen; thaw slightly or cook longer to prevent mushiness.
- OVER-TORCHED garlic; sauté for just 30 seconds until fragrant, not browned.
- MISSED the lemon; add a squeeze at the end for brightness and balance.
Quick fixes and pantry swaps
- When butter smokes, splash in a little water to cool and quiet the crackle.
- If peas turn mushy, quickly drain and rinse under cold water to halt cooking.
- Splash a bit of lemon juice if garlic turns bitter from overcooking.
- Patch burnt garlic with fresh minced garlic added at the end for aroma.
- Shield overcooked peas with a lid; add a splash of broth to rehydrate and shimmer.
Prep, store, and reheat tips
- You can prep the peas and garlic up to a day in advance; keep separately in airtight containers in the fridge. Peas stay bright and fresh, while garlic retains its pungency.
- Store cooked peas in the fridge for up to 2 days. Reheat gently in a skillet over low heat, smelling the butter and garlic revive into a fragrant, inviting aroma.
- For longer storage, freeze the cooked peas in a sealed container for up to 1 month. Expect slight loss of brightness; reheat with a splash of water to bring back moisture.
- Reheating: Warm gently on the stove, stirring often. The peas should shimmer with butter, and the garlic aroma will intensify, signaling they’re ready to serve again.
FAQs about butter garlic peas
1. Can I use garlic powder instead of fresh garlic?
Use fresh garlic for the most pungent, aromatic flavor. If you only have garlic powder, use about half the amount and add it earlier in the cooking process to prevent bitterness.
2. Can I substitute frozen peas with fresh peas?
Frozen peas work perfectly; just rinse and drain well before cooking. Fresh peas can be used, but they may need slightly less cooking time and should be blanched first.
3. Can I make this vegan or dairy-free?
Yes, you can replace butter with olive oil or a neutral plant-based oil. Expect a lighter, less rich flavor, but it still coats the peas nicely.
4. Is lemon juice necessary in this recipe?
Adding a squeeze of lemon juice at the end brightens the dish and balances the richness of the butter. Lime can be a good alternative for a different citrus note.
5. How do I know when the peas are done?
Cook the peas until they are bright green, heated through, and slightly tender, about 3-4 minutes on medium heat. The butter should be bubbling gently, and garlic fragrant but not browned.
6. What equipment do I need for this recipe?
Use a 12-inch skillet for even cooking, a sharp knife for mincing garlic, and a slotted spoon to serve the peas without excess butter.
7. How do I prevent garlic from burning?
Add the garlic last, stirring constantly until fragrant, about 30 seconds. Avoid burning it by keeping the heat medium-low and removing from heat if it starts to brown.
8. Can I make this dish in advance?
You can prepare the peas and garlic up to a day ahead. Store separately in airtight containers in the fridge, then reheat gently on the stove until shimmering and fragrant.
9. What if I burn the garlic or butter?
If the butter starts to smoke, splash in a little water or broth to cool and quiet the crackling. If peas turn mushy, rinse under cold water to stop cooking.
10. Any tips for perfect results?
Stir frequently during cooking for even coating. Use medium-low heat to prevent burning, and taste before serving to adjust salt and pepper as needed.
This simple butter garlic peas dish is a reminder that comfort food doesn’t need complexity. Its warm, buttery aroma and tender peas make it a little moment of satisfaction that’s easy to whip up any night.
In a world full of flashy recipes, sometimes the quiet, honest flavors are what stick with you. It’s a humble side that feels like a small, good secret—just waiting to be enjoyed.
Hi there! I’m Himani and welcome to Val’s Recipe Box. This little corner of the internet didn’t begin with me. It began with Val my neighbourhood aunt whose kitchen held more warmth than any fireplace ever could.


 This little corner of the internet didn’t begin with me.
It began with Val my neighbourhood aunt whose kitchen held more warmth than any fireplace ever could.
She was more of a friend and I’ve come to know her in the most unexpected way.
This little corner of the internet didn’t begin with me.
It began with Val my neighbourhood aunt whose kitchen held more warmth than any fireplace ever could.
She was more of a friend and I’ve come to know her in the most unexpected way.