What draws me to BBQ ham sliders isn’t just the tender, sweet ham layered with smoky, caramelized edges. It’s how those crispy, charred bits add a surprising depth, almost like a tiny burnt-sugar kiss in each bite. Those bits turn simple ham into something more complex, more satisfying, even with just a few ingredients.
I’ve made these sliders for family picnics and lazy weekend snacks, and every time, I’m reminded how a little bit of char can elevate comfort food into a celebration. There’s a messy, joyful charm in pulling apart that toasted bun to reveal the gooey, smoky ham inside. It’s honest, straightforward, and just a touch indulgent—perfect for when you want something hearty but not fussy.
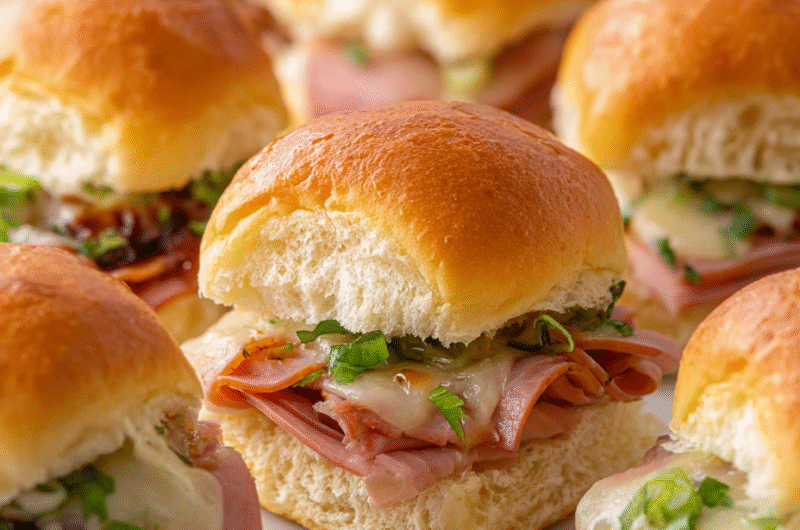
Focusing on how the smoky, caramelized edges of BBQ ham add unexpected depth and texture to the sliders, making each bite feel like a small celebration of charred goodness.
The spark behind this dish
- This recipe came about after a dinner I had at a roadside barbecue joint. The smoky, slightly crispy ham slices left an impression—something about that charred edge combined with the sweet glaze made me think of how simple ingredients can turn into something memorable with just a little heat and patience.
- I started playing with the idea of replicating that smoky crunch at home, especially for sliders where every bite should have a bit of that irresistible caramelized edge. It’s funny how a small tweak—like letting the ham sit on a hot skillet—can transform ordinary sliced ham into a star ingredient, giving each slider a punch of flavor that feels almost nostalgic.
- heading: The spark behind this dish
Ingredient breakdown: key components
- Ham: I prefer thick-cut slices with a good marbling, they get juicy and develop that smoky edge. Swap for turkey if you want leaner, but it won’t have the same richness.
- BBQ Sauce: I love a tangy, slightly sweet sauce that clings to the ham, giving each bite a smoky, sticky punch. Feel free to use a homemade or store-bought one, but steer clear of overly sweet varieties if you want balance.
- Slider Buns: Soft, brioche-style buns are my go-to—they soak up the juices without falling apart. If you want a crustier bite, try potato rolls, but avoid overly dense bread that can drown the flavors.
- Cheese: Sharp cheddar melts beautifully over the warm ham, adding a touch of saltiness. For a milder turn, try Swiss, but skip processed cheeses for a more authentic feel.
- Onions: Thinly sliced red onions add a crisp, spicy contrast that brightens the richness. Caramelized onions work too, but they change the texture—use sparingly if you prefer bite.
- Butter: A little melted butter brushed on the buns before toasting creates a golden, crispy edge. Use clarified butter for a cleaner flavor or regular butter for that familiar richness.
- Optional Extras: Pickles or a dash of hot sauce can add a nice tang or heat. Keep it simple, but don’t be afraid to tweak for your preferred spice level.
Spotlight on key ingredients
Ham:
- I prefer thick-cut slices with a good marbling, they get juicy and develop that smoky edge. Swap for turkey if you want leaner, but it won’t have the same richness.
- BBQ Sauce: I love a tangy, slightly sweet sauce that clings to the ham, giving each bite a smoky, sticky punch. Feel free to use a homemade or store-bought one, but steer clear of overly sweet varieties if you want balance.
- Slider Buns: Soft, brioche-style buns are my go-to—they soak up the juices without falling apart. If you want a crustier bite, try potato rolls, but avoid overly dense bread that can drown the flavors.
Cheese & Onions:
- Cheese: Sharp cheddar melts beautifully over the warm ham, adding a touch of saltiness. For a milder turn, try Swiss, but skip processed cheeses for a more authentic feel.
- Onions: Thinly sliced red onions add a crisp, spicy contrast that brightens the richness. Caramelized onions work too, but they change the texture—use sparingly if you prefer bite.
Notes for ingredient swaps
- Dairy-Free: Use dairy-free cheese or omit cheese altogether for a lactose-intolerant friendly slider. Expect a less creamy, slightly sharper bite.
- Gluten-Free: Swap buns for gluten-free rolls or lettuce wraps. The texture will be a bit different, more tender and less fluffy.
- Sweet BBQ Sauce: Choose a tangier or spicier BBQ sauce if you prefer less sweetness, which enhances the smoky ham flavor.
- Ham Alternatives: Turkey or roasted chicken slices work well if you want leaner options. They won’t develop the same caramelized edges, though.
- Cheese Variations: Gouda or pepper jack can add a different flavor punch. Just keep in mind melting qualities differ.
- Onion Options: Use caramelized onions for sweetness or omit for a sharper contrast. Thin red onions keep crunch and spice.
- Butter Choices: Clarified butter or olive oil can be used for brushing buns, altering richness slightly but maintaining crispness.
Equipment & Tools
- Baking sheet: To bake and keep sliders warm.
- Skillet: To cook and caramelize the ham.
- Basting brush: To apply melted butter and BBQ sauce.
- Knife: To slice buns and cut ingredients.
- Cutting board: To prep ingredients.
- Tongs: To flip and handle hot slices of ham.
Step-by-step guide to BBQ Ham Sliders
- Gather all equipment: baking sheet, skillet, basting brush, knife, cutting board, and tongs.
- Preheat oven to 180°C (350°F). Line a baking sheet with parchment for easy cleanup.
- Slice buns in half horizontally. Brush cut sides lightly with melted butter. Set aside.
- Heat skillet over medium-high heat, about 4 minutes. Add sliced ham in a single layer.
- Cook ham for 2-3 minutes per side, until edges get crispy and caramelized. Use tongs to flip.
- While ham cooks, warm BBQ sauce in a small bowl. Once ham is ready, brush generously with sauce.
- Toast buns cut side down on the skillet for 1-2 minutes until golden and slightly crispy.
- Layer ham on the bottom bun, then top with cheese slices. Cover with the top bun.
- Place assembled sliders on prepared baking sheet. Cover loosely with foil.
- Bake for 8-10 minutes, until cheese is melted and buns are warm. Check for bubbling edges.
- Remove from oven, let rest for 2 minutes. Optionally, garnish with sliced green onions or pickles.
- Serve warm, with extra BBQ sauce on the side for dipping or drizzling.
Let the sliders rest for 2 minutes after baking to allow the cheese to settle. Serve immediately with additional BBQ sauce if desired.
How to Know It’s Done
- Ham edges are crispy and caramelized, with a smoky aroma.
- Cheese melts into the ham and slightly oozes when pressed.
- Buns are toasted golden and hold shape without sogginess.

BBQ Ham Sliders
Ingredients
Equipment
Method
- Set a skillet over medium-high heat and let it warm for about 2 minutes until it’s hot and begins to shimmer slightly.
- Place the slices of ham in the skillet in a single layer, pressing down slightly to ensure contact with the hot surface.
- Cook the ham for 2-3 minutes on each side, until the edges turn golden brown and crispy, and you hear a gentle sizzling sound.
- Brush the caramelized ham slices generously with BBQ sauce, coating all sides for a smoky, sticky glaze.
- While the ham cooks, slice the buns in half horizontally and brush the cut sides with melted butter using a basting brush.
- Once the ham is glazed and crispy, remove it from the skillet and set aside briefly.
- Place the buttered buns cut side down on the hot skillet and toast for 1-2 minutes until they’re golden and slightly crispy.
- Layer the crispy ham slices onto the bottom halves of the toasted buns, then top each with a slice of cheese and a few rings of red onion.
- Cover each slider with the top bun, pressing down gently to help everything meld together.
- Arrange the assembled sliders on a baking sheet and bake in a preheated oven at 180°C (350°F) for 8-10 minutes, until the cheese is melted and the buns are warm and toasted.
- Remove from the oven, let rest for 2 minutes, then serve warm, optionally garnished with extra onions or BBQ sauce on the side.
Pro tips for perfect sliders
- Caramelize first: Let the ham slices sit on the hot skillet until edges turn deep amber and crispy for that smoky crunch.
- Apply sauce last: Brush BBQ sauce onto the ham after caramelizing to avoid burning the sugars and losing smoky depth.
- Toast buns properly: Press buns cut side down on the skillet until golden and slightly crunchy—this prevents sogginess and adds texture.
- Use tongs for flipping: Keep your fingers away from hot ham edges and ensure even caramelization without tearing slices.
- Butter generously: Brushing melted butter on buns before toasting creates a rich, crispy crust that holds up to juicy fillings.
- Watch the oven: Bake sliders just until cheese melts and buns are warm—about 8-10 minutes at 180°C (350°F)—to avoid drying out.
- Rest before serving: Let sliders sit for 2 minutes after baking; this helps the cheese set and flavors meld.
Common mistakes and how to fix them
- FORGOT to check ham’s crispy edges, fix by adjusting heat and cooking time.
- DUMPED sauce directly on ham without spreading, spread evenly for better flavor.
- OVER-TORCHED buns, cover with foil early to prevent burning.
- MISSED resting time, let sliders sit for 2 minutes for better cheese melting and assembly.
Quick fixes and pantry swaps
- When sauce is too thick, splash in a bit of water to loosen it up.
- If ham sticks to the pan, patch with a quick drizzle of oil and flip gently.
- Splash a little apple cider vinegar if BBQ sauce turns too sweet or dull.
- Patch burnt buns with a slice of fresh bread or foil — avoid bitter flavors.
- Shield hot sliders with foil if cheese starts to over-tan in the oven.
Prep, store, and reheat tips
- Assemble the sliders up to a day in advance; keep the assembled but unbaked sliders covered tightly in the fridge. The flavors meld better overnight, and the bread stays fresh.
- Bake and reheat the sliders within 24 hours for optimal freshness. Reheat in a 180°C (350°F) oven for about 10 minutes until warmed through and the cheese is melty.
- Store leftover sliders in an airtight container in the fridge for up to 2 days. The bread may soften slightly, but the smoky ham and cheese remain flavorful.
- To reheat, cover with foil to prevent drying out, and check that the cheese is gooey and the buns are heated evenly. The aroma of smoky ham should re-emerge as they warm.
- For best texture, reheat sliders directly from the fridge rather than at room temperature. Expect a slightly softer bun, but still delicious with that smoky, caramelized edge intact.
Top questions about BBQ Ham Sliders
1. What kind of ham works best?
Use thick-cut, marbled ham slices for juicy, smoky bites. Thin slices dry out faster, so adjust cooking time accordingly.
2. When should I add the BBQ sauce?
Brush the ham with BBQ sauce after caramelizing to prevent burning the sugars and preserve smoky flavor.
3. How do I toast the buns properly?
Toast buns cut side down until golden and slightly crispy—about 1-2 minutes—so they don’t turn soggy once assembled.
4. What’s the ideal oven temperature and time?
Bake sliders at 180°C (350°F) for 8-10 minutes or until cheese is melted and buns are warm, keeping an eye so they don’t dry out.
5. Should I rest the sliders after baking?
Let sliders rest for 2 minutes after baking to allow the cheese to set and flavors to meld without losing their gooey texture.
6. Can I use other meats instead of ham?
Substitute with turkey or chicken slices for leaner options, but expect less smoky, caramelized edges and different richness.
7. What are good dairy-free options?
Use dairy-free cheese or omit cheese altogether for dairy allergies or preferences, but expect a less creamy, sharper bite.
8. Can I make these sliders in advance?
Prepare assembled sliders up to 24 hours ahead, keep refrigerated, and bake just before serving for freshest flavor and texture.
9. How do I reheat leftovers without drying them out?
Reheat leftovers in a 180°C (350°F) oven for about 10 minutes, covering with foil to keep them moist and warm.
10. What if my BBQ sauce is too thick?
When sauce is too thick, splash in a little water or broth to loosen it up before brushing onto the ham.
These sliders are more than just a quick snack; they feel like a small, smoky celebration in every bite. The crispy edges and gooey cheese make them hard to resist, especially when shared with good company. They’re perfect for when you want something familiar but with that unexpected charred depth that keeps everyone coming back for more.
In a way, they remind me that simple ingredients, treated with patience and care, can turn into something memorable. Whether for a casual weekend or a spontaneous gathering, these sliders bring a little smoky joy to the table—no fuss, just honest, flavorful comfort.
Hi there! I’m Himani and welcome to Val’s Recipe Box. This little corner of the internet didn’t begin with me. It began with Val my neighbourhood aunt whose kitchen held more warmth than any fireplace ever could.


 This little corner of the internet didn’t begin with me.
It began with Val my neighbourhood aunt whose kitchen held more warmth than any fireplace ever could.
She was more of a friend and I’ve come to know her in the most unexpected way.
This little corner of the internet didn’t begin with me.
It began with Val my neighbourhood aunt whose kitchen held more warmth than any fireplace ever could.
She was more of a friend and I’ve come to know her in the most unexpected way.