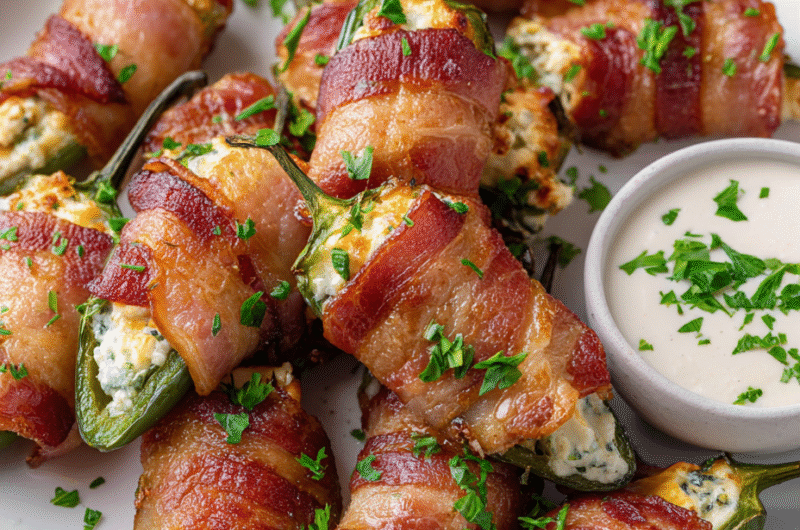
Bacon wrapped jalapeño poppers are one of those recipes that seem simple but carry a lot of nostalgic weight. The smoky aroma of bacon sizzling against the fiery kick of jalapeños instantly takes me back to backyard cookouts and lazy weekends with friends. It’s a messy, chaotic dish in the best way—melted cheese oozing out, crispy edges, and that perfect balance of heat and savory crunch.
I’ve tinkered with this recipe over the years, trying to make it just right without losing its carefree charm. It’s not about perfection, really, but about capturing that moment when everything hits just right—the crackle of bacon, the spice of the peppers, and a little gooey cheese pulling away as you bite in. It’s a dish that invites messy hands and loud laughs, no matter how many times you’ve made it.
In a way, these poppers are more than an appetizer. They’re a reminder that sometimes, the simplest ingredients—bacon, jalapeños, cheese—can come together to create something memorable. They’re perfect for casual gatherings or when you want a snack that’s both fiery and indulgent, with a smoky depth that lingers long after the last bite.
Focusing on how the smoky bacon and spicy jalapeños create a perfect harmony of heat and savoriness, transforming a simple appetizer into a nostalgic bite that brings back backyard cookouts and lazy weekends, all while balancing the chaos of melting cheese and crispy edges.
The story behind this recipe
- This recipe was born out of a lazy summer evening when I was craving something spicy, smoky, and totally satisfying. I remember the first time I wrapped jalapeños in bacon, the way the aroma filled the kitchen—crispy bacon, fiery peppers, and melted cheese mingling in a messy, irresistible way. It’s a dish that’s stuck with me, a perfect blend of chaos and comfort, like backyard weekends with friends.
- Over the years, I’ve tinkered with different cheeses and spice levels, but the core remains the same—simple ingredients, big flavor. It’s one of those recipes that feels like a small rebellion, a little bit messy but totally worth it. Whenever I make these, I think about how food can turn an ordinary moment into a tiny celebration, even if it’s just for myself.
- heading: The story behind this recipe
Key Ingredient Insights
- Bacon: I prefer thick-cut for that smoky, meaty crunch. When frying, watch for crispy edges that shouldn’t burn—aim for a deep amber. Swap with turkey bacon if you want less fat, but it loses some of that smoky richness.
- Jalapeños: I choose firm, bright green peppers with tight skins. If they’re soft or dull, skip them—they won’t hold up in the oven. For less heat, remove seeds and membranes; for more, leave them in. The spicy kick is what makes these poppers sing.
- Cream cheese: I like full-fat, silky cream cheese. It melts smoothly and balances the heat perfectly. Use Greek yogurt for a tangier, lighter filling, but reduce the amount slightly to keep it creamy.
- Cheddar cheese: Sharp, aged cheddar adds a punch of flavor and melts into gooey goodness. Sub mozzarella if you want a milder, stretchier result, but it won’t have the same depth. Grate it fresh for the best melt.
- Spices & extras: I often toss in a pinch of smoked paprika or garlic powder for extra depth. If you’re feeling adventurous, sprinkle a tiny bit of cayenne—just enough to tantalize without overwhelming. Fresh herbs like cilantro can brighten it up after baking.
Spotlight on key ingredients
Bacon:
- I prefer thick-cut for that smoky, meaty crunch. When frying, watch for crispy edges that shouldn’t burn—aim for a deep amber. Swap with turkey bacon if you want less fat, but it loses some of that smoky richness.
- ingredient”:
Jalapeños:
- I choose firm, bright green peppers with tight skins. If they’re soft or dull, skip them—they won’t hold up in the oven. For less heat, remove seeds and membranes; for more, leave them in. The spicy kick is what makes these poppers sing.
- ingredient”:
Notes for ingredient swaps
- Dairy-Free: Swap cream cheese for a cashew-based spread or mashed avocado. It won’t be as creamy, but adds a nice richness.
- Vegetarian: Use plant-based bacon or tempeh strips wrapped around the peppers. Expect a different smoky punch, but still delicious.
- Spicy Peppers: Replace jalapeños with banana peppers or poblanos for milder heat with a smoky note.
- Cheese: Substitute sharp cheddar with Monterey Jack or pepper jack for a milder or more spicy flavor profile.
- Bacon: Try pancetta or prosciutto if you want a different kind of smoky, salty bite. They cook faster, so watch carefully.
- Herbs & Spices: Add chopped chives or a dash of hot sauce to the cheese mix for extra flavor. Adjust heat to taste.
- Additional Fillings: Mix in cooked chorizo or sausage crumbles if you want extra smoky, meaty bites.
Equipment & Tools
- Paring knife: To carefully cut and deseed the jalapeños.
- Baking sheet with rack: To ensure even crisping of bacon and drainage of excess fat.
- Toothpicks: To secure the bacon wraps in place during baking.
- Mixing bowl: To blend the cheese filling smoothly.
Step-by-step guide to bacon-wrapped poppers
- Equipment ready: a sharp paring knife, a baking sheet with a rack, and toothpicks for securing. Preheat oven to 200°C (400°F).
- Cut the jalapeños in half lengthwise. Use the paring knife to carefully remove seeds and membranes—less heat, more crunch. Wear gloves if you’re sensitive to spice.
- Combine cream cheese with a pinch of salt, garlic powder, and a dash of smoked paprika. Mix until smooth and slightly fluffy—this helps it spread evenly.
- Stuff each jalapeño half with a spoonful of the cheese mixture. Be generous but avoid overstuffing to prevent spillage during baking.
- Wrap each stuffed pepper with a slice of bacon, securing with a toothpick. Make sure the bacon overlaps slightly for a snug fit. Place on the rack for even cooking.
- Bake in the preheated oven for 20-25 minutes. The bacon should be crispy, and the cheese bubbling—start checking at 20 minutes. The aroma will be smoky and spicy.
- If bacon isn’t crispy enough, broil on high for an additional 2-3 minutes, watching closely to prevent burning. The bacon edges should be deep amber and crackling.
- Remove from oven and let rest for 5 minutes. This allows the cheese to set slightly and avoids burns. Remove toothpicks carefully and transfer to a platter.
- Plate with a drizzle of fresh lime juice or a sprinkle of chopped cilantro for brightness. Serve warm, with a side of napkins—these can get messy!
Let the poppers rest for 5 minutes after baking to allow the cheese to set. Serve warm, garnished with fresh herbs or a squeeze of lime for added brightness.
How to Know It’s Done
- Bacon is crispy and golden around the edges.
- Cheese is melted and bubbling inside the peppers.
- Jalapeños are tender but not mushy; a slight jiggle indicates readiness.
Bacon Wrapped Jalapeño Poppers
Ingredients
Equipment
Method
- Preheat your oven to 200°C (400°F) and set a baking rack over a baking sheet. Prepare all your ingredients and tools for an easy assembly.
- Using a paring knife, carefully cut each jalapeño in half lengthwise. Gently scoop out the seeds and membranes with the knife or a small spoon, keeping the peppers intact and firm.
- In a mixing bowl, combine the softened cream cheese, grated cheddar, garlic powder, smoked paprika, salt, and black pepper. Mix until smooth and creamy, with no lumps remaining.
- Using a small spoon, generously stuff each jalapeño half with the cheese mixture, filling it close to the top without overflowing.
- Wrap each stuffed jalapeño with a slice of bacon, overlapping slightly to secure the filling. Use a toothpick to pin the bacon in place if needed.
- Place the bacon-wrapped peppers on the prepared rack over the baking sheet, arranging them in a single layer for even cooking.
- Bake in the preheated oven for 20 to 25 minutes, until the bacon is crispy and golden brown, and the cheese is bubbling inside the peppers. Check at 20 minutes and extend time if needed.
- If the bacon isn’t quite crispy enough, turn on the broiler for 2-3 minutes, watching carefully to prevent burning. The bacon should crackle and turn deep amber.
- Remove the poppers from the oven and let them rest for 5 minutes, allowing the cheese to set. Carefully remove toothpicks and transfer to a serving platter.
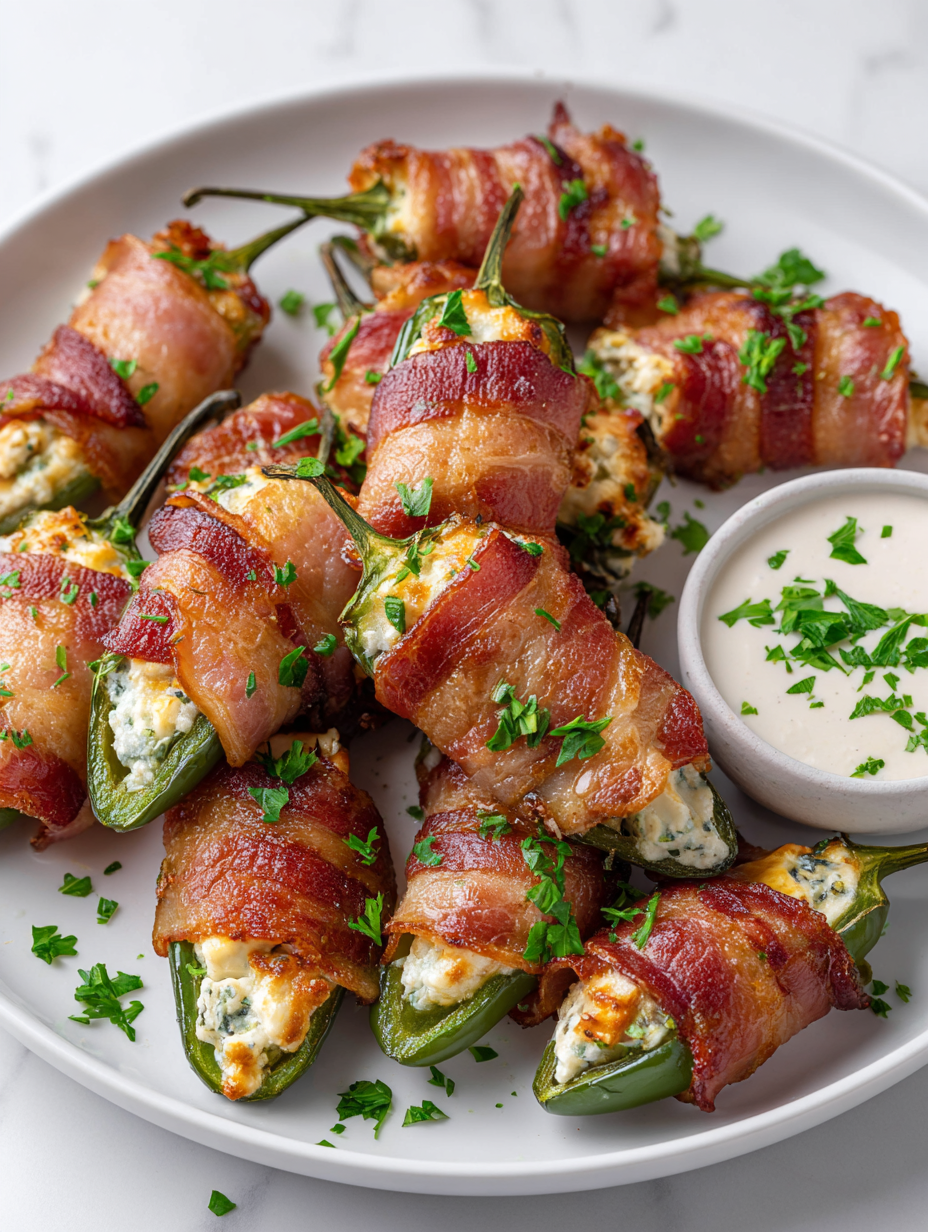
- Serve warm, garnished with chopped cilantro or a squeeze of lime if desired. Enjoy the perfect balance of smoky, spicy, and cheesy goodness—messy but irresistible!
Pro tips for perfect poppers
- Bacon placement: Start with a snug wrap to prevent unraveling—secure with a toothpick for a tight, even cook.
- Pre-cooking bacon: Par-cook bacon for 2-3 minutes before wrapping—this speeds up crisping and prevents excess shrinkage.
- Cheese stuffing: Use a small spoon to evenly fill peppers, avoiding overstuffing to prevent messy drips during baking.
- Baking rack use: Place poppers on a wire rack set over a baking sheet—drains excess fat and crisps the bacon all around.
- Broiling for crispness: Finish under the broiler for 2-3 minutes if bacon isn’t crispy enough—stay close and watch carefully.
- Cooling time: Rest baked poppers for at least 5 minutes—this helps the cheese set and reduces burns on the first bite.
- Serving tip: Serve immediately while hot and melty—pair with a squeeze of lime or a dollop of sour cream for contrast.
Common mistakes and how to fix them
- FORGOT to pat the bacon dry before wrapping—causes excess grease and soggy bacon.
- DUMPED the cheese filling too quickly—spread it evenly for uniform melting and flavor.
- OVER-TORCHED the bacon—set a timer and watch closely during broiling to prevent burning.
- MISSED the resting step—rest poppers for 5 minutes to allow cheese to set before serving.
Quick fixes and pantry swaps
- When bacon isn’t crispy enough, broil on high for 2-3 minutes to shimmer and crackle.
- Splash a little lime juice if the filling feels too heavy or bland, brightening the flavor.
- Patch a burnt bacon edge with a fresh strip if it turns too dark early in baking.
- Shield the cheese from over-melting by tenting with foil if it starts to crackle excessively.
- DUMPED too much cheese? Use a small spoon to redistribute and prevent overflow during baking.
Prep, store, and reheat tips
- Prep the jalapeños by halving and deseeding up to 24 hours in advance; keep refrigerated to prevent spoilage, and the peppers will stay firm and bright.
- Assemble the bacon-wrapped poppers fully—stuffed and wrapped—then refrigerate on a tray covered with plastic wrap for up to 24 hours. The flavors meld and the bacon stays fresh enough for a quick bake.
- Reheat leftovers in a 180°C (350°F) oven for about 10 minutes; the bacon will crisp up again, and the cheese will warm without drying out. Keep an eye on the edges for that perfect crackle.
- Shelf life for assembled, refrigerated poppers is 1-2 days. After that, the bacon may lose some crispness and the peppers soften, so best enjoyed soon after prepping.
Top questions about bacon wrapped jalapeño poppers
1. How do I control the spice level?
Use gloves to handle jalapeños if you want to avoid spicy fingertips. Removing seeds and membranes reduces heat, but leaves some spice for that fiery kick.
2. When are the poppers done?
Bake until bacon is crispy and cheese is bubbling—usually 20-25 minutes at 200°C (400°F). The peppers should be tender but not mushy.
3. How do I crisp the bacon perfectly?
If bacon isn’t crispy enough, broil for 2-3 minutes, keeping a close eye so they don’t burn and turn bitter.
4. Can I use a different rack or pan?
Use a wire rack on a baking sheet to allow fat to drain and crisp evenly. It makes a big difference in texture.
5. Can I substitute the cheese filling?
Stuff with full-fat cream cheese for smooth, melty filling. Greek yogurt can work if you want a tangier, lighter version.
6. How do I keep the bacon from unraveling?
Wrap each jalapeño half snugly with bacon and secure with a toothpick for even cooking and to prevent unraveling.
7. How long can I store leftovers?
Make ahead by assembling and refrigerating up to 24 hours. Reheat in a 180°C (350°F) oven for about 10 minutes.
8. What peppers work best for stuffing?
Choose firm, bright green jalapeños with tight skins. Softer peppers won’t hold up well and may turn too soft during baking.
9. Can I use turkey bacon instead?
Use thick-cut bacon for better smoky flavor and crunch. Turkey bacon is leaner but less smoky and crisp.
10. What if the cheese spills out during baking?
If cheese leaks out, reduce stuffing amount or chill the stuffed peppers briefly before baking to firm up the filling.
These bacon wrapped jalapeño poppers are more than just a snack; they’re a celebration of smoky spice and messy fun. Making them brings back memories of summer cookouts and carefree gatherings, even on the busiest nights.
They’re imperfect, flavorful, and perfect for sharing—or not. While they might look simple, each bite offers a complex mix of heat, crunch, and melty cheese that’s worth every messy moment.
Hi there! I’m Himani and welcome to Val’s Recipe Box. This little corner of the internet didn’t begin with me. It began with Val my neighbourhood aunt whose kitchen held more warmth than any fireplace ever could.


 This little corner of the internet didn’t begin with me.
It began with Val my neighbourhood aunt whose kitchen held more warmth than any fireplace ever could.
She was more of a friend and I’ve come to know her in the most unexpected way.
This little corner of the internet didn’t begin with me.
It began with Val my neighbourhood aunt whose kitchen held more warmth than any fireplace ever could.
She was more of a friend and I’ve come to know her in the most unexpected way.