
There’s something about spreading a thick layer of frosting on a simple sugar cookie that instantly transports me back to childhood kitchens. It’s that buttery-sweet aroma, the glossy sheen, the way it melts just a little when you bite in. Making frosting from scratch feels like a small act of nostalgia, a way to reclaim those carefree baking afternoons with no rush or pressure.
I’ve found that the magic lies in its simplicity — just butter, powdered sugar, a splash of vanilla, and a tiny pinch of salt. No fancy ingredients or colorings needed. It’s the kind of frosting that’s forgiving, easily adaptable, and above all, deeply satisfying to make and taste. Sometimes, after a long week, just whipping up a batch feels like a tiny rebellion against the chaos.
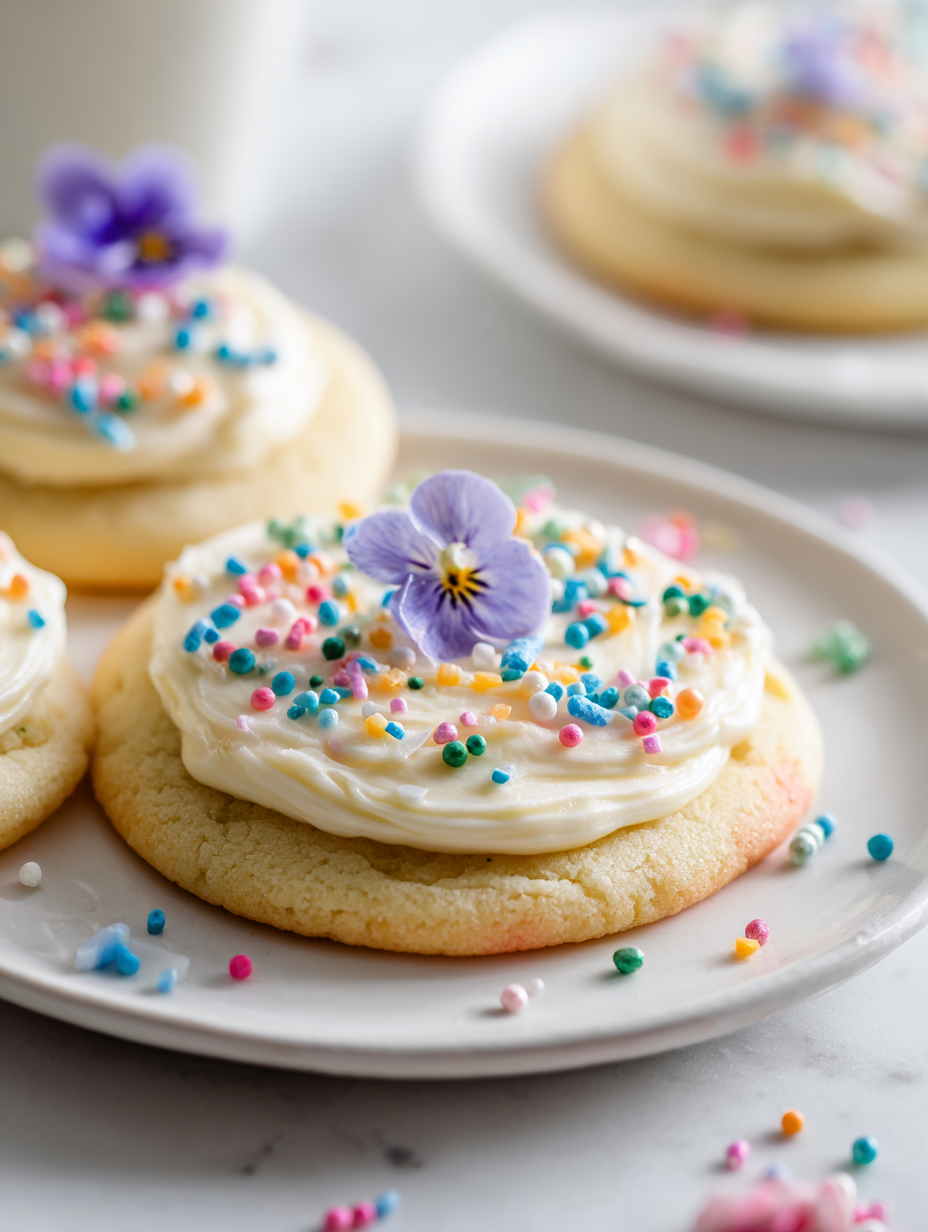
Focusing on the nostalgic power of homemade sugar cookie frosting, emphasizing how its simple, buttery sweetness can transform even the plainest cookies into memorable treats that evoke childhood memories and festive cheer.
The story behind this recipe
- One rainy afternoon, I was trying to recreate the frosting I remember from my grandmother’s kitchen. It was simple, buttery, and just a little sticky, perfect for spreading on soft sugar cookies that crumbled at the edges. That moment made me realize how much these basic ingredients could evoke such warmth and nostalgia.
- Every time I whip up this frosting, it takes me back to childhood baking sessions — the messy countertops, the faint smell of vanilla, and the satisfying shimmer of freshly frosted cookies. It’s more than just a topping; it’s a bridge to those carefree, sweet afternoons.
- Over the years, I’ve tweaked the recipe, adding a splash more vanilla or a pinch of salt, to keep that nostalgic feel while making it forgiving enough for hurried mornings or last-minute treats.
Ingredients at a Glance
- Powdered sugar: I like using superfine powdered sugar—it’s silky and dissolves smoothly into the butter, giving the frosting that velvety texture you want. If yours feels grainy, try sifting it first.
- Butter: I prefer unsalted, and I keep it at room temp—soft enough to whip easily but not melted. If it’s too soft, your frosting might be runny; if too cold, it won’t mix well.
- Vanilla extract: I always add a splash of pure vanilla—it adds warmth and depth. For a twist, try almond extract, but go easy, it’s potent.
- Salt: Just a pinch enhances sweetness and balances the richness. If your frosting tastes a bit flat, a tiny pinch more salt might do the trick.
- Milk or cream: I sometimes add a teaspoon for a silkier finish. If your frosting gets too thin, stop adding liquid and whip in more powdered sugar to tighten it up.
- Food coloring (optional): I love using natural colors—think beet juice or turmeric—just a few drops for a playful touch. If you want vibrant hues, gel colors are your best bet—they don’t thin out the frosting.
- Lemon juice (optional): A tiny squeeze brightens up the sweetness, especially if you’re aiming for a fresh, citrusy note. Use sparingly; too much can thin out the frosting.
Spotlight on key ingredients
Powdered Sugar:
- I prefer superfine for that silky, melt-in-your-mouth feel. If yours feels gritty, try sifting it first.
- Butter: Unsalted, at room temp, soft enough to whip easily. Too soft? Frosting gets runny. Too cold? It won’t blend smoothly.
Vanilla & Salt:
- Vanilla extract: A splash of pure vanilla adds warmth and depth. For a twist, try almond, but use sparingly—it’s potent.
- Salt: Just a pinch enhances sweetness and balances the richness. If your frosting tastes flat, add a tiny pinch more salt.
Notes for ingredient swaps
- Dairy-Free: Swap butter for coconut oil or vegan butter. Expect a slightly different richness and a subtle coconut aroma.
- Powdered Sugar: Use finely ground organic or homemade powdered sugar. Graininess might affect the frosting’s smoothness.
- Vanilla Extract: Replace with vanilla bean paste or almond extract for a different aromatic punch—less vanilla, more complexity.
- Milk or Cream: Substitute with almond milk or oat milk. Be aware these may alter the creaminess and slightly thin the frosting.
- Food Coloring: Use natural colorings like beet juice or turmeric. They may produce softer hues and can slightly tint the frosting.
- Salt: In a pinch, omit or reduce salt if you prefer a less salty flavor. It mainly balances sweetness, so adjust to taste.
- Lemon Juice: Replace with orange or lime juice for a different citrus brightness—use sparingly to avoid thinning the frosting.
Equipment & Tools
- Large mixing bowl: To combine and whip the frosting ingredients.
- Spatula or whisk: For mixing and aerating the frosting.
- Rubber scraper: To scrape down sides and incorporate ingredients evenly.
- Small bowl: For mixing in coloring or flavoring.
Step-by-step guide to frosting
- Gather your equipment: a large mixing bowl, a spatula or whisk, a rubber scraper, and a small bowl for mixing in coloring or flavoring. Prepping your tools ensures a smooth process.
- In the large bowl, beat 1 cup (226g) of softened unsalted butter on medium speed until creamy and pale, about 1-2 minutes. Smell that rich, buttery aroma—it’s your frosting’s base.
- Gradually add 3-4 cups (360-480g) of powdered sugar, one cup at a time. Mix on low to prevent a cloud of sugar dust, then increase to medium-high once incorporated. You want a fluffy, spreadable consistency.
- Add 1-2 teaspoons of vanilla extract and a pinch of salt. Mix in thoroughly. If you’re adding color or flavor, do so now. For vibrant hues, use gel food coloring—just a few drops.
- If the frosting feels too thick, add a teaspoon of milk or cream, one at a time, until it’s smooth and spreadable. If it’s too runny, sprinkle in a bit more powdered sugar. It should hold soft peaks but not be stiff.
- Once the texture is right, give it a final stir—scraping down the sides of the bowl to ensure everything’s evenly mixed. Smell again—rich vanilla, buttery, sweet—perfect.
- Spread the frosting onto cooled sugar cookies with a spatula or piping bag. For a glossy finish, let the frosting sit at room temperature for 10-15 minutes after spreading to settle.
- Rest the frosted cookies for at least 30 minutes to let the flavors meld and the frosting set. This prevents smudging and gives that beautiful sheen.
- Check for doneness: the frosting should hold a slight jiggle, not be sticky, and have a shiny, smooth appearance. The edges should be firm but not brittle.
Allow the frosted cookies to rest at room temperature for at least 30 minutes to set the frosting. For a glossy finish, avoid stacking until fully hardened. Decorate further if desired, then serve or store.
How to Know It’s Done
- Frosting holds soft peaks and feels silky to touch.
- Color is evenly distributed without streaks.
- Frosted cookies are set and shiny after resting.
Homemade Sugar Cookie Frosting
Ingredients
Equipment
Method
- Begin by placing your softened butter in a large mixing bowl. Using a spatula or whisk, beat it on medium speed until it becomes creamy and pale, filling your kitchen with a rich, buttery aroma.
- Gradually add sifted powdered sugar, one cup at a time, mixing on low speed to prevent dust clouds. Once incorporated, increase the speed to medium-high and beat until the mixture is fluffy and smooth, about 1-2 minutes.
- Pour in a teaspoon or two of vanilla extract and add a tiny pinch of salt. Mix thoroughly until all ingredients are evenly blended, and the frosting takes on a glossy sheen. If you'd like a softer, silkier texture, add a teaspoon of milk or cream and beat until smooth.
- Check the consistency—if it’s too thick, stir in a little more milk; if too runny, sprinkle in a bit more powdered sugar and beat again until you reach a spreadable, velvety texture.
- Use a spatula to scrape down the sides of the bowl, then give the frosting a final mix. It should be silky, shiny, and ready to spread or pipe onto cooled sugar cookies.
- Spread the frosting onto your cooled cookies with a spatula or pipe it decoratively for a festive look. Let the frosted cookies sit at room temperature for about 30 minutes to allow the frosting to set and develop its glossy finish.
Notes
Pro tips for perfect frosting
- Bolded mini-head: Sift powdered sugar to avoid grainy frosting and achieve silky smoothness.
- Bolded mini-head: Use softened butter, not melted, to keep the frosting fluffy and prevent separation.
- Bolded mini-head: Add vanilla and salt gradually, then taste to balance sweetness and depth.
- Bolded mini-head: Incorporate a splash of milk or cream slowly for a creamy, spreadable texture.
- Bolded mini-head: For vibrant colors, opt for gel food coloring—just a few drops for intense hue without thinning.
- Bolded mini-head: Rest frosted cookies at room temp for 30 minutes to help frosting set and shine.
- Bolded mini-head: If frosting feels too stiff, gently warm the mixing bowl briefly to loosen it up.
Common mistakes and how to fix them
- FORGOT to sift powdered sugar → Sift to avoid grainy frosting.
- DUMPED in all ingredients at once → Add ingredients gradually for smooth texture.
- OVER-TORCHED the butter → Use softened, not melted, butter to prevent separation.
- MISSED adjusting consistency → Add liquid or sugar as needed, watch for shiny finish.
Quick fixes and pantry swaps
- When frosting feels grainy, splash in a tiny bit of milk and beat for 5 seconds.
- If frosting is too runny, dump in more powdered sugar and whip until thickened.
- Splash a pinch of vanilla or lemon juice to mask any dull flavor—smell for brightness.
- Patch dry frosting with a few drops of cream and a quick stir to restore creaminess.
- Shield frosting from heat by refrigerating briefly if it starts to soften during application.
Prep, store, and reheat tips
- You can prep the frosting a day in advance; store covered in the fridge to keep it fresh and prevent drying out. The flavors deepen overnight, becoming subtly richer and more harmonious.
- Keep the frosting tightly covered in an airtight container in the fridge for up to 5 days. Before using, give it a good stir—sometimes it firms up or develops a slight skin that can be gently scraped away.
- For longer storage, freeze the frosting in an airtight container or zip-top bag for up to 1 month. Let it thaw in the fridge overnight, then stir to restore its creamy texture and taste the vanilla’s warm, inviting aroma.
- Reheat gently if needed—place the frosting in a microwave-safe bowl and warm in short bursts at 20-second intervals until just soft enough to spread. Watch for any separation or graininess; if that happens, beat it briefly with a whisk to smooth it out.
- Sensory note: When warmed, the frosting should smell buttery and vanilla-sweet, with a silky, spreadable consistency. It shouldn’t feel oily or look curdled. Adjust by stirring in a tiny splash of milk if it’s too thick after refrigeration.
Top questions about sugar cookie frosting
1. Can I use regular sugar instead of powdered?
Use powdered sugar, not granulated, for a smooth, melt-in-your-mouth frosting. It dissolves better and gives that classic silky texture.
2. Can I skip sifting the powdered sugar?
Yes, but it might be grainy or gritty. Sift the powdered sugar well to keep the frosting smooth and creamy.
3. How do I fix frosting that’s too thick?
Adding a splash of milk or cream helps make the frosting softer and easier to spread. Adjust until it’s creamy but not runny.
4. Can I omit vanilla or use different flavorings?
A little vanilla extract adds warmth and depth. For a citrus twist, try lemon or orange extract—but don’t overdo it.
5. What if my frosting is too watery?
If your frosting is too runny, sprinkle in a bit more powdered sugar and whip again until it thickens up.
6. How do I achieve bright colors without watering down the frosting?
Color the frosting with gel food coloring for vibrant hues without thinning it out. Use sparingly for pastel shades.
7. How long can I keep frosting in the fridge?
Store leftover frosting in an airtight container in the fridge for up to 5 days. Bring back to room temp and stir before using.
8. Can I freeze sugar cookie frosting?
For longer storage, freeze the frosting in a sealed container for up to a month. Thaw in the fridge and stir well before decorating.
9. How do I soften frosting that’s been refrigerated?
To reheat, warm gently in short bursts in the microwave until soft enough to spread. Watch for separation or graininess.
10. What if my frosting develops lumps or cracks?
If frosting cracks or becomes grainy, add a tiny splash of milk and whip briefly to smooth it out.
Frosting might seem like just a finishing touch, but it’s really the heart of those nostalgic sugar cookies. When it’s smooth, buttery, and just a little sweet, it transforms each bite into a moment of childhood cheer. Sometimes, it’s the simplest things that stick with us the longest.
Sharing this frosting with friends or family brings a quiet joy—watching their faces light up at that glossy sheen and rich vanilla aroma. It’s a small act, but one that keeps those sweet memories alive, especially during the holidays or a lazy weekend baking session.
Hi there! I’m Himani and welcome to Val’s Recipe Box. This little corner of the internet didn’t begin with me. It began with Val my neighbourhood aunt whose kitchen held more warmth than any fireplace ever could.


 This little corner of the internet didn’t begin with me.
It began with Val my neighbourhood aunt whose kitchen held more warmth than any fireplace ever could.
She was more of a friend and I’ve come to know her in the most unexpected way.
This little corner of the internet didn’t begin with me.
It began with Val my neighbourhood aunt whose kitchen held more warmth than any fireplace ever could.
She was more of a friend and I’ve come to know her in the most unexpected way.
